To clean mold from a dehumidifier safely, unplug the unit and remove the tank, filter, and detachable parts. Wash the tank with warm water and mild detergent, then rinse the filter and replace it if it’s damaged. Wipe coils and interior surfaces with a soft brush, vinegar for light buildup, or a diluted bleach solution for heavy mold. Dry every part completely before reassembly, and keep up weekly cleaning to stop mold from returning and learn the best maintenance habits.
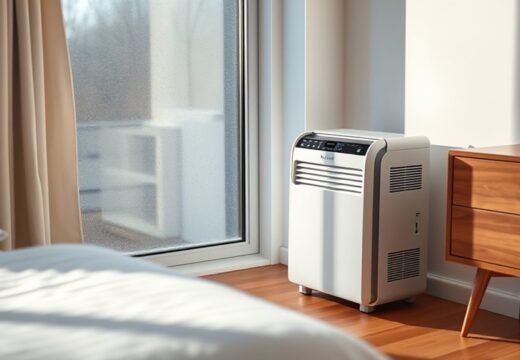
Why Mold Grows in a Dehumidifier
Mold grows in a dehumidifier because the unit constantly holds moisture, which creates the damp, cool conditions mold needs to multiply. You’re dealing with a system that pulls moisture from the air, then traps that water inside, so the interior rarely dries fully. In that environment, mold spores settle easily and colonize stagnant surfaces. Dust and other organic particles can build up and give spores a food source, accelerating growth. If you let humid air sit inside the tank, coils, or vents, you make the problem worse. Regular maintenance matters because it breaks this cycle: when you clean and dry the unit consistently, you remove the conditions mold depends on. That’s practical freedom—you keep control over the machine instead of letting hidden contamination spread. When you understand the cause, you can act early and prevent recurrence without wasted effort.
What You Need to Clean It Safely
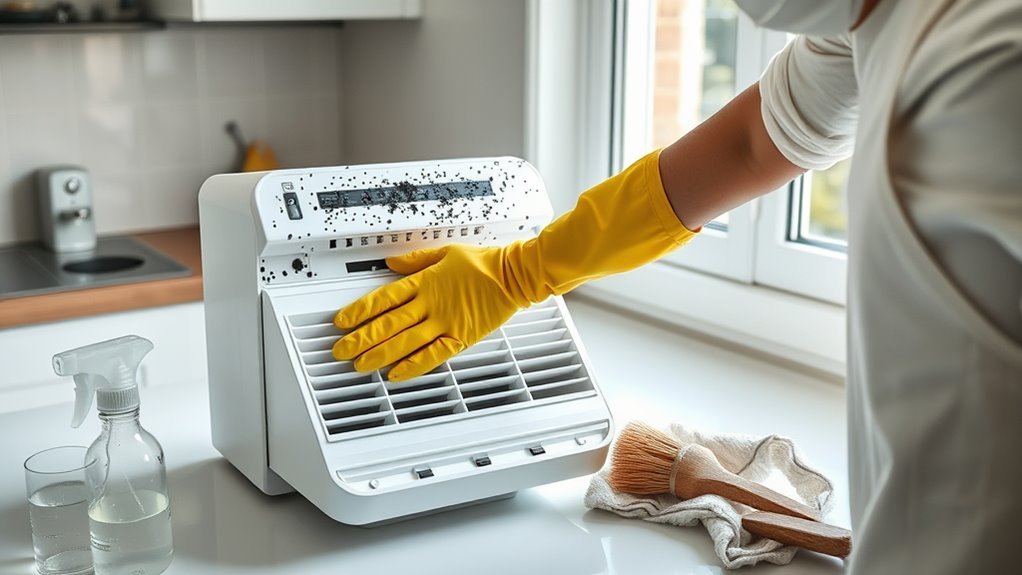
Before you start cleaning, unplug the dehumidifier and gather the right supplies: mild detergent, white vinegar, a soft cloth, and a soft-bristle brush for removing mold and grime without damaging surfaces. You’ll use these tools to clean dehumidifier parts with control, not force. Mix a cleaning solution from mild detergent and water for routine washing, or use white vinegar on light buildup. For mold-heavy areas, prepare a bleach solution of 1 cup bleach per gallon of water, then let it sit for 4-5 minutes before scrubbing. Protect your freedom from hidden contamination by keeping supplies separate for each task. After cleaning, rinse every component thoroughly so no residue remains to feed new growth. Focus regular cleaning on the water tank and filters, since they trap moisture and spores. With the right materials, you can maintain safe airflow, reduce odor, and keep your unit working cleanly and efficiently.
How to Unplug and Prep the Unit
Unplug the dehumidifier from the outlet first, and wait a few minutes for any residual charge to dissipate before you handle it. Remove the water tank, filter, and any other detachable parts according to the manufacturer’s instructions. Then clear your workspace by placing a towel or mat underneath and keeping your cleaning supplies within reach.
Power Off First
Start with a fully powered-down dehumidifier: turn it off, unplug it from the outlet, and disconnect any drainage hose or tank system to prevent shocks and spills. When you power off first, you create a safe base to clean your dehumidifier without fighting live current or leaks.
- Unplug the cord before you touch any interior parts.
- Detach the tank or hose so trapped water can’t escape.
- Move the unit where you can work cleanly and dry it fully.
Before you begin, gather mild detergent and white vinegar so you’re ready to work efficiently. Then follow the manufacturers’ instructions for any model-specific shutdown or prep steps. This precise prep helps you clean mold safely, reduces risk, and keeps the process controlled.
Clear The Workspace
Clear the area around the dehumidifier and make it ready for cleaning: unplug it from the electrical outlet, lay down a towel or plastic sheet to catch drips, and keep the space well ventilated to reduce odor and fumes. This step helps you clear the workspace and work without hazard. Place your detergent, vinegar, soft brush, and cloth within reach before you begin cleaning, so you don’t interrupt the task. Check the manufacturer’s disassembly instructions first; they show which panels or parts you can remove safely. A stable setup supports thorough cleaning and protects your flooring from spills. Keep cords, tools, and loose items away from the unit. With the machine isolated and the area prepared, you can clean efficiently, safely, and on your own terms.
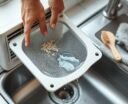
Clean the Tank, Filter, and Coils
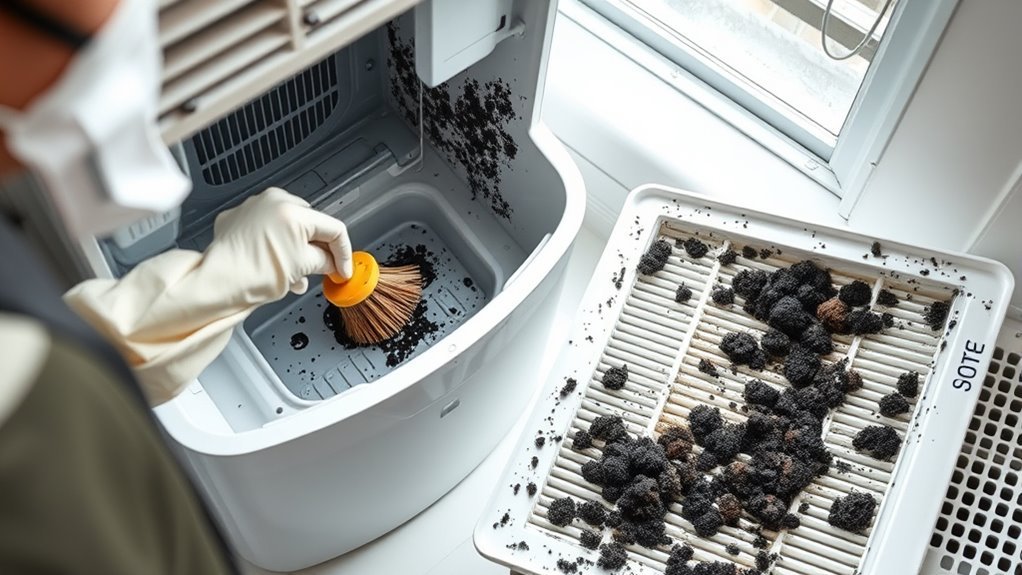
Remove the water tank, filter, and access panels so you can clean the parts that most often trap moisture and mold. To clean the tank, wash it with mild soap and warm water, scrub visible mold spots, and let it dry fully before reinstalling it. For filter maintenance, remove the filter and rinse it under running water if the manufacturer allows; replace it if it looks worn or damaged. Gently brush the coils with a soft-bristle brush or wipe them with a cloth to clear dust and mold and mildew without bending fins.
- Inspect these parts every few weeks.
- Check more often during high humidity seasons.
- Keep each component dry before reassembly.
If you want deeper cleaning, use a vinegar solution or a diluted bleach mix on the tank and coils, then rinse thoroughly so no residue remains.
Remove Mold and Odors
To eliminate mold and lingering odors, unplug the dehumidifier, empty the tank, and scrub all detachable parts with a solution of one cup of bleach per gallon of water, then rinse them thoroughly to remove any residue. Use a soft-bristle brush on vents, seams, and corners; let the solution contact surfaces for 4-5 minutes. | Task | Action | Benefit |
| — | — | — |
|---|---|---|
| Tank | Wash weekly | Limits mold growth |
| Filter | Clean weekly | Reduces odor sources |
| Coils | Brush gently | Clears hidden debris |
| Surfaces | Wipe with vinegar | Neutralizes musty smell |
| Tank | Add oil drops | Freshens after cleaning |
After you finish, wipe the dehumidifier cabinet with vinegar on a cloth for odor control. Keep your routine strict: stagnant water and organic residue fuel mold growth, so weekly cleaning preserves airflow and performance. If odor persists, repeat the bleach treatment and inspect hidden crevices. Don’t reassemble until every component is dry.
Dry Every Part Before Reassembly
Dry the tank completely before you reassemble the dehumidifier, since any residual moisture can support mold regrowth. Air-dry the filter and all removable parts in a well-ventilated area or under a fan until they’re fully dry. Check corners, seams, and other hidden crevices for trapped moisture, and wipe them with a dry cloth if needed.
Dry Tank Fully
Let every cleaned part dry completely before you put the dehumidifier back together. Keep the clean water tank open in a well-ventilated area, and wipe internal surfaces with a soft cloth to remove lingering moisture. If you need faster results, point a fan at the parts, but don’t trap humidity inside.
- Inspect seams, corners, and latch points for hidden drops.
- Check any area where water collects during use.
- Confirm each component is fully dry before reassembly.
This step protects performance and breaks the cycle that lets mold return. You’re not just drying equipment; you’re reclaiming clean air and dependable operation. When every part feels fully dry, you can rebuild the unit with confidence and keep moisture from undoing your work.
Air-Dry Filters And Parts
Once the tank and internal surfaces are dry, move every cleaned filter and detachable part into a well-ventilated area so they can air-dry completely. Keep the air intake unobstructed, and use a fan if you want faster evaporation while you dehumidifier clean. Don’t rush reassembly; trapped moisture invites mold regrowth and weakens performance.
| Part | Drying Guidance |
|---|---|
| Filters | air-dry filters until no dampness remains |
| Tank | Place upright in moving air |
| Coils | Let air circulate around all surfaces |
| Detachable parts | Dry for several hours, longer in humidity |
Check each component before reassembly. If any surface feels cool or damp, wait longer. Full drying protects your machine and keeps you free from recurring mold issues.
Check Hidden Moisture
Before you reassemble the unit, inspect every detachable part for hidden moisture, especially the water tank, filter, and any corners or crevices in the basin. Use a soft cloth to wipe internal surfaces, then let each piece air-dry fully in a well-ventilated space. Any trapped hidden moisture can let mold spores rebound fast in your dehumidifier, so don’t rush.
- Check seams, latches, and drain channels.
- Dry the basin corners and filter frame.
- Verify all parts feel cool, dry, and residue-free.
After reassembly, run the dehumidifier and monitor humidity levels; low readings confirm control. This disciplined step keeps your space clear, your machine clean, and your environment free from mold spores.
Keep Mold From Coming Back
To keep mold from coming back, empty the dehumidifier’s tank daily so water doesn’t sit and stagnate, and wipe the interior with a vinegar solution once a week to inhibit new growth. After each cleaning, dry the bucket completely before you reinstall it; leftover moisture gives spores a foothold. Place the unit in a well-ventilated spot so air can move freely and humidity drops faster. Inspect and clean, or replace, the filters on schedule so dust can’t block airflow or feed contamination. If you use an air purifier nearby, keep it running to reduce airborne particles that can settle inside the unit. These habits help you clean mold less often and maintain reliable performance. By controlling moisture, airflow, and debris, you keep the dehumidifier working as a tool of liberation, not a source of recurring growth. Stay disciplined, and you’ll deny mold the conditions it needs to return.
When to Avoid Vinegar and Bleach
Avoid vinegar on a dehumidifier’s metal parts, including screws and coils, because its acidity can corrode them over time. You should also treat bleach as a limited option, since it can weaken plastic housings and leave residues if you don’t rinse thoroughly. Use these cleaning agents only when the manufacturer allows them.
- Skip vinegar on exposed metal, especially coils and fasteners.
- Avoid bleach if the unit has fragile plastic or poor rinse access.
- Stop and reassess if ventilation is weak or odors persist.
Both vinegar and bleach can release strong fumes that may irritate your lungs in tight spaces. If you’re dealing with stubborn mold, vinegar may not fully remove spores, including black mold, so choose a stronger, approved solution. Read the manual first; some models explicitly prohibit these cleaning agents. That keeps you in control and protects the machine.
Maintain Your Dehumidifier Year-Round
Once you’ve chosen a safe cleaner and ruled out harsh chemicals, keep the dehumidifier on a regular maintenance schedule so mold doesn’t return. Empty and wash the water tank at least once a week, then dry it fully before reinstalling it. Wipe the interior with a vinegar solution weekly to suppress mold and remove odor-causing residue. Every few weeks, inspect the air filter; clean it, and replace it if it’s damaged or clogged. Set the dehumidifier away from walls and furniture so air can move freely and stagnant moisture can’t build up. Once each season, perform a deeper service: clean the coils, tank, and filter housing, then confirm every part is dry and seated correctly. This routine protects indoor air quality, improves moisture removal, and extends the unit’s lifespan. When you maintain the dehumidifier year-round, you keep mold from gaining a foothold and preserve cleaner air with less effort.
Frequently Asked Questions
What Kills Mold in a Dehumidifier?
You can kill mold with safe cleaning solutions like equal parts vinegar and water, 3% hydrogen peroxide, or diluted bleach. For dehumidifier maintenance, follow mold prevention tips: empty, dry, and clean regularly.
Why Do Dehumidifiers Get Moldy?
You get mold because dehumidifiers trap moisture, dust, and organic debris, creating ideal mold growth conditions. If you skip moisture control and appliance maintenance, stagnant water and hidden parts let spores settle, spread, and thrive.
Are Dehumidifiers Good for People With COPD?
Yes—think steam engine to airways: you can use a dehumidifier for COPD management. It’ll improve air quality, reduce irritants, and support dehumidifier benefits when you keep humidity near 30–50% and maintain ventilation.
Can I Put Vinegar in a Dehumidifier?
Yes, you can, but use a diluted cleaning solution—about 1:4 vinegar to water—only for brief cleaning. Rinse thoroughly, ventilate well, and follow maintenance tips. Vinegar benefits include mold control, but avoid prolonged exposure.
Conclusion
So, does a damp dehumidifier really need more than a quick rinse? Yes. If you leave moisture, mold returns fast. You should unplug the unit, clean the tank, filter, and coils, then dry every part completely before reassembly. Use vinegar only on safe surfaces, and skip bleach unless the manufacturer allows it. With routine emptying, filter care, and full drying, you’ll keep your dehumidifier sanitary and working efficiently year-round.