Unplug the dehumidifier, then open the cabinet according to the manufacturer’s instructions. Use a soft-bristle brush and a vacuum with a brush attachment to remove dust from the coils. For stubborn grime, apply a diluted vinegar solution only to the coil surfaces, then wipe and rinse with cool water. Avoid harsh chemicals and electrical parts. Let the coils dry completely before reassembling, and you’ll improve airflow, efficiency, and moisture control with a few simple checks.
Why Clean Dehumidifier Coils Matters
Because dirty coils can cut airflow and reduce a dehumidifier’s efficiency by up to 30%, cleaning them is essential for keeping the unit working properly. When you clean dehumidifier coils, you restore airflow, help the unit hold target humidity levels, and lower strain on the compressor. Dust and trapped moisture can also support mold and bacteria growth, which may release spores into your indoor air and weaken health protections in the spaces you control. Regular cleaning supports a clean dehumidifier that uses less power; neglected coils can drive energy use up by 20%. You also gain longer service life, since well-maintained units often run several years beyond poorly maintained ones. Use gentle cleaning methods so you don’t bend delicate fins or reduce heat transfer. This simple maintenance keeps performance stable, protects indoor air quality, and lets you keep moisture under your control without waste or dependency.
What You Need to Clean Dehumidifier Coils
To clean dehumidifier coils safely and effectively, gather a soft-bristle brush, a vacuum with a brush attachment, mild detergent, warm water, and, if needed, a vinegar solution for stubborn buildup. These tools let you remove dust and grime without warping the fins or restricting airflow. Use a vacuum with a brush attachment first to lift loose debris, then apply cleaning solutions made from warm water and mild detergent for controlled scrubbing. Keep the soft-bristle brush gentle so you clean the coil surface without bending the delicate metal. For heavier deposits, use a vinegar solution sparingly; it can dissolve mineral buildup without harsh chemicals. Before you begin, unplug your dehumidifier so you work safely and maintain full control. Check the manufacturer’s guidelines to confirm the right supplies and avoid unnecessary parts damage. With the proper kit, you can clean efficiently, preserve performance, and keep your unit working on your terms.
Unplug and Open the Dehumidifier
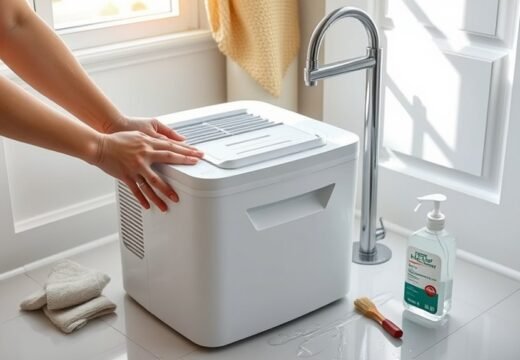
Start by unplugging the dehumidifier so you eliminate any electrical hazard before opening it. Then check the manufacturers instructions before you remove the outer casing; each model can use different clips, screws, or panels. Work on a stable surface with clear access, and keep fasteners organized so you can reassemble it without frustration.
| Step | Action |
|---|---|
| 1 | unplug the unit |
| 2 | review manufacturers instructions |
| 3 | remove the casing carefully |
When you open the housing, use controlled pressure and avoid forcing parts. You want direct access to the coils without stressing wiring or breaking tabs. Once exposed, inspect the area for dust, mold, or buildup so you can plan the next clean stage efficiently. If you see resistance during disassembly, stop and verify the sequence rather than improvising. That approach protects the machine and supports your freedom to maintain it on your terms.

Remove Dust From Dehumidifier Coils
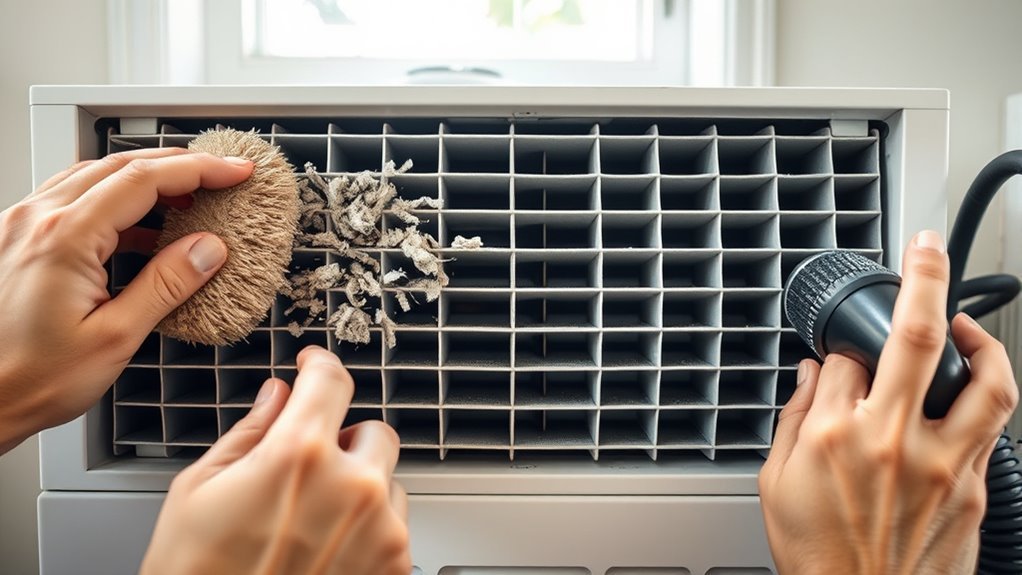
Use a soft-bristle brush to loosen dust from the coils, working gently along the fins so you don’t bend or damage them. Move in short strokes to remove dust and debris from every channel, keeping control so you preserve airflow and efficiency. If you want a faster pass, use a vacuum cleaner with a brush attachment to lift loose particles from the coils and nearby housing. Hold the nozzle close, but don’t press it against the fins. Repeat this cleaning every 1 to 3 months, especially when humidity stays high, so your unit stays free and effective. If you see light buildup, a soft brushes pass is usually enough to clean your dehumidifier without extra steps. For spots that still cling, use a cleaning solution only on the coil surface, never on electrical parts, and wipe sparingly. Afterward, let everything dry fully before reassembly.
Remove Stubborn Grime With Vinegar
Unplug the dehumidifier, then apply a 1:1 vinegar-and-water solution to the coils so it can soak for 10 to 15 minutes and break down stubborn grime and mold. After the soak, use a soft-bristle brush to scrub the coils gently and lift any remaining buildup. Rinse the coils with warm water to remove residue and reduce the risk of corrosion.
Vinegar Soak Method
For stubborn grime or mold on dehumidifier coils, mix equal parts white vinegar and water in a container and soak the coils for about 30 minutes so the solution can break down buildup. This vinegar solution streamlines your cleaning process and helps free the fins from trapped residue. After soaking, use a soft-bristle brush to lift any loosened film without bending the metal. Rinse the coils thoroughly with clean water to remove every trace of vinegar and prevent lingering odors. Then let them dry completely before reassembling the unit; trapped moisture can invite mold growth. Add this coil cleaning step to your regular cleaning routine every 3 to 4 weeks to maintain efficiency, reduce strain, and keep your dehumidifier operating with greater freedom and reliability.
Scrubbing Stubborn Grime
If grime or mold is clinging to the coils, apply a 1:1 mixture of white vinegar and water directly to the affected areas and let it sit for 10 to 15 minutes so it can break down the buildup. Then, when you Clean A Dehumidifier, use a soft-bristle brush for scrubbing stubborn grime without bending fins.
- Work along each coil row
- Lift residue from tight gaps
- Wipe loosened debris with a soft cloth
- Use soapy water only if needed
- Rinse with clean water, then dry fully
This method targets mold and mildew efficiently, restoring airflow and performance. Don’t rush reassembly; moisture left behind can reignite growth. You’re not trapped by buildup—careful cleaning gives you control and keeps the unit running cleanly.
Clean Dehumidifier Coils Safely
You need clean coils to preserve airflow, prevent mold buildup, and keep the dehumidifier running efficiently. Use only safe supplies like a soft-bristle brush, a damp cloth, and a dilute white-vinegar solution for stuck-on grime. Brush the fins gently, avoid submerging the coil assembly, and rinse away any residue when you’re done.
Why Coil Cleaning Matters
Clean coils are the difference between a dehumidifier that quietly does its job and one that struggles to keep up. When you keep them cleaned regularly, you prevent mold and bacteria from taking hold in damp fins, and you keep air quality steadier. Dust and dirt block airflow, so the unit works harder, can use up to 20% more energy, and loses control. This cleaning guide shows why maintenance is essential to keep performance high and moisture low.
- Lower strain on the compressor
- Restore steady moisture removal
- Reduce airborne contamination
- Preserve fin efficiency
- Support longer service life
Use a soft-bristle brush or vacuum attachment to lift debris, then dry the coils fully after cleaning.
Safe Cleaning Supplies
Once you know coil cleaning protects performance, the next step is choosing supplies that won’t damage the fins or internal parts. For your dehumidifier, use safe cleaning supplies: warm water and soap, or a diluted vinegar mix, plus a soft-bristle brush. Avoid contact with harsh chemicals, abrasive pads, and metal tools.
| Supply | Use |
|---|---|
| Warm water and soap | Loosen grime |
| Vinegar mix | Cut residue |
| Soft-bristle brush | Lift dust |
| Clean water | Rinse coils |
| Dry cloth | Finish drying |
Unplug the unit first, then inspect the coils for mold or buildup. After the coils are cleaned, rinse them well so no solution remains. Let everything dry completely before reassembly. Seasonal cleaning keeps your dehumidifier working with less resistance and more freedom.
Gentle Coil Cleaning Steps
Start by unplugging the dehumidifier so there’s no risk of electrical shock while you work. Keep your dehumidifier clean by opening the housing carefully and inspecting the coils. When cleaning your dehumidifier, use a vacuum with a brush attachment to lift loose dust, or a soft brush for tight fins.
- unplug first
- remove surface debris
- treat grime with vinegar-water
- rinse with cool water
- dry before reassembly
For stubborn mold, apply equal parts vinegar and water, wait a few minutes, then scrub lightly. Rinse with cool water, and avoid using harsh chemicals or excess liquid near electrical parts. Follow the manufacturers instructions for your model, because coil layouts vary. Seasonal cleaning keeps airflow open, preserves efficiency, and limits mold, giving you cleaner air and more control over your space.
Dry Dehumidifier Coils Before Reassembling
After cleaning, make sure the dehumidifier coils are completely dry before you reassemble the unit. Any trapped moisture can accumulate, invite mold growth, and reduce system performance. Use a soft cloth or towel to gently wipe each coil surface until it feels dry to the touch. Check crevices and edges where liquid can linger. If you still see damp spots, let the unit air dry for several hours in a well-ventilated space. Don’t rush this step; full drying helps you clean responsibly and keep the machine efficient. Also confirm that no cleaning solution remains on the coils, because residue can affect airflow, air quality, and electrical reliability. Before reinstalling the air filter and closing the housing, inspect the coils one more time. When you dry the coils thoroughly, you protect the unit, preserve performance, and extend lifespan.
How Often to Clean Dehumidifier Coils?
You should clean dehumidifier coils at least once per season to keep dust and mold from building up and reducing performance. That baseline answers how often to clean: match the schedule to use, location, and your manufacturers’ guidance. If you run the unit daily or in a basement, clean the coils every 3-4 weeks, or every 1-2 months in heavy moisture areas. For sporadic use, every 2-3 months usually works.
- Check coils during each filter service.
- Clean more often in humid, dusty rooms.
- Follow the manufacturer’s interval first.
- Inspect for grime, lint, or residue.
- Increase frequency if moisture from the air is high.
Regular maintenance keeps airflow open, supports efficient moisture removal, and helps the unit work with less strain. When you keep to a disciplined schedule, you protect performance and extend service life without unnecessary labor.
Signs Your Dehumidifier Coils Need Cleaning
Dirty coils show up quickly in dehumidifier performance: airflow drops, humidity removal slows, and the unit may run longer without meaningfully drying the room. When you see this, inspect the coils.
| Sign | Meaning |
|---|---|
| visible dust or dirt | Coil surfaces are restricted |
| Musty odor | mold spores may be active |
| Short cycling | Performance is being interrupted |
If airflow feels weak, or the tank fills slowly, the coil assembly likely needs to be cleaned. You may also notice the unit still can’t lower humidity after hours of operation. That’s a practical warning, not a minor glitch.
Check for buildup before you blame the electrical components. Dirty coils make the system work harder, waste energy, and reduce its ability to clean the air. Once you confirm debris, clean the coils promptly. If you smell mildew or spot discoloration, treat it as immediate maintenance. Fast action restores efficiency and protects the unit.
Frequently Asked Questions
How to Deep Clean Dehumidifier Coils?
You deep clean dehumidifier coils by unplugging it, brushing dust off gently, washing with mild detergent and warm water, rinsing, then air-drying. Follow coil maintenance tips, a cleaning frequency guide, safe cleaning solutions, effective cleaning techniques, preventive care measures.
Can a Dehumidifier Cause a Sore Throat?
Like dry desert wind, yes, your dehumidifier can irritate your throat. You’ll protect respiratory health with dehumidifier maintenance, moisture control, and appliance care, because better indoor air quality reduces dust, mold, and dryness.
Can I Run Vinegar Water Through My Humidifier to Clean It?
Yes, you can run a vinegar-water mix through your humidifier to dissolve scale; use cleaning solutions with one-part vinegar, three-parts water. Rinse well for equipment safety, preserve humidity levels, and follow maintenance tips.
Can I Use Dawn Dish Soap to Clean My Humidifier?
Yes, you can use Dawn sparingly; its Dawn effectiveness suits gentle Humidifier maintenance. Unplug first, dilute it, and rinse well for Dish soap safety. Use it during regular Cleaning frequency; consider alternative cleaners only when needed.
Conclusion
Keeping your dehumidifier coils clean isn’t glamorous, but neither is watching a dust-clogged machine work like it’s on strike. You’ve unplugged it, brushed off the grime, used vinegar on stubborn buildup, and dried everything before reassembly. Do this regularly, and your unit will run more efficiently, last longer, and waste less energy. If it smells odd, struggles to collect water, or looks dusty, it’s probably begging for another cleaning.