
Affiliate disclosure: As an Amazon Associate I earn from qualifying purchases. This article contains affiliate links to Amazon, so we may earn a commission if you buy through them, at no extra cost to you.
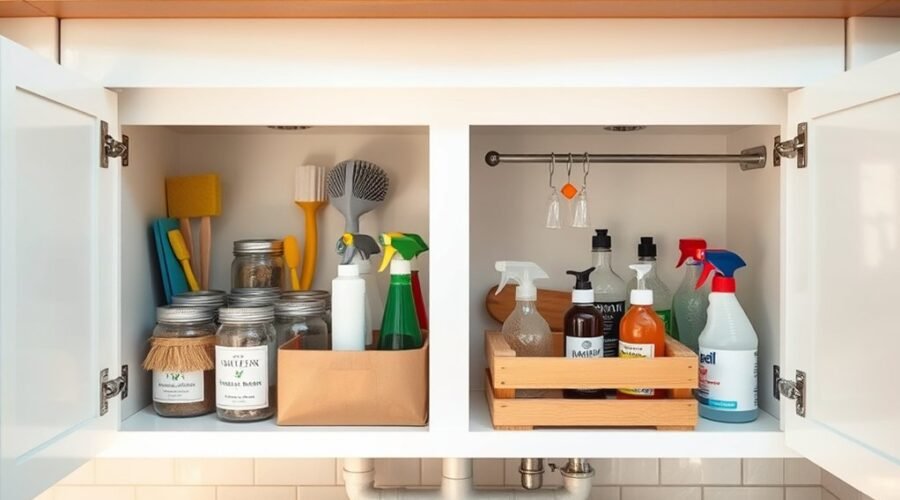
Under sink organization on a budget is easier when you work with the cabinet’s pipes instead of trying to hide them. Simple bins, a narrow shelf, and door hooks can give cleaning supplies a proper place. The best setup also keeps shutoff valves accessible and makes leaks easy to spot.
Quick Answer
Empty and clean the cabinet, measure around the plumbing, and group what you use. Start with repurposed bins or inexpensive caddies. Add a wire shelf for vertical storage and light hooks for gloves. If you need easier access, build a shelf around the pipes or install a pull-out tray that fits your opening.
At a Glance
| Difficulty | Easy for bins and hooks; more involved for a custom shelf or tray |
| Tools Needed | Tape measure and cleaning cloth; optional saw, drill, and screwdriver for DIY builds |
Clear and Measure the Cabinet First
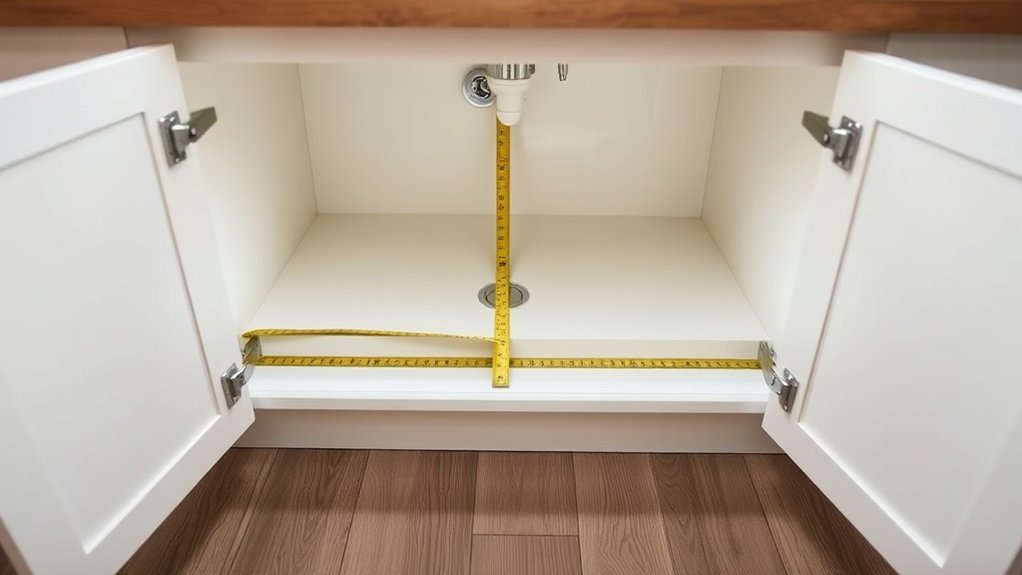
Clear everything out before buying organizers. You will see how much you own, where the pipes sit, and which items actually deserve space. Measure the cabinet only after it is empty.
- Empty the cabinet. Set out all sprays, sponges, gloves, trash bags, and spare supplies so you can sort them.
- Remove what you do not use. Set aside empty containers, expired products, and duplicates. Follow product labels and local disposal rules for leftover chemicals rather than pouring them together.
- Wipe and dry the surfaces. Clean away dust, spills, and residue. Inspect the floor and pipe joints for dampness, stains, or a musty smell.
- Measure the usable space. Write down the interior width, depth, and height. Note the sink bowl, drainpipe, water lines, shutoff valves, garbage disposal, and door hinges.
- Plan the groups. Put everyday dishwashing supplies together, separate refills from frequently used items, and decide what belongs elsewhere.
If you find a leak, fix it before lining the cabinet or adding wood. The EPA’s guidance on moisture and mold explains why controlling the water source matters more than covering damage.
A storage tray must fit through the door opening, not just inside the cabinet. Hinges and the frame can reduce the space available.
The Lowe’s guide to cabinet organizers also recommends checking door, drawer, and hinge clearance before choosing a sliding unit.
Best Under Sink Organization Ideas on a Budget
The cheapest organizers are often items you already own. Choose small, washable containers that keep supplies visible and can be lifted out easily. Buy extra storage only when a clear gap remains.
- Plastic caddies: Inexpensive caddies from Dollar Tree can hold dish soap, brushes, and everyday cleaning supplies. A handle makes it easy to move the whole group.
- Wire shelves: A short freestanding shelf makes use of empty height beside the pipes. Keep tall bottles below or alongside it, wherever they fit upright.
- Repurposed baskets and bins: Reuse sturdy, wipeable containers from another room for spare sponges, refill bottles, trash bags, and recyclables. Choose a separate container for each group.
- Door hooks: Light hooks can hold dish gloves or a sponge holder without taking up floor space. Check the door’s closing clearance first.
- Contact paper or a cabinet liner: Use a wipeable layer to freshen and protect the base from small drips. It will not repair or stop a plumbing leak.
Keep the most-used items at the front and backups behind them. A rectangular bin often makes better use of a narrow cabinet than a round one. Avoid filling every inch, because you still need room to reach the plumbing.
Warning: If children can reach the sink cabinet, move hazardous cleaners to a high, locked location or secure them in a locked cabinet. The U.S. Consumer Product Safety Commission advises keeping cleaners locked and out of children’s reach. Leave chemicals in their original labeled containers, and never mix bleach with other cleaners, as advised by Poison Help.
Build a Shelf Around the Pipes
A custom shelf can turn the open space beside a drainpipe into useful storage. The goal is not to enclose the plumbing. It is to create a level surface while leaving enough room to inspect pipes and turn shutoff valves.
- Sketch the shelf. Use your measurements to mark pipe locations, the disposal unit, and the space needed to remove the drain trap for maintenance.
- Make a template. Cut and test a cardboard pattern around the pipes before cutting wood. The shelf should slide into position without pushing on any plumbing.
- Cut the material. The original DIY option uses ¾-inch plywood. Smooth the cut edges and add birch edge banding to exposed edges for a finished look.
- Choose a support method. Drill holes for adjustable shelf pins if the cabinet sides and shelf design can safely support them. A separate frame can be joined with pocket holes and 1¼-inch pocket screws when working with ¾-inch material; the pocket-hole screw sizing guidance confirms this common pairing.
- Test the fit and finish. Secure the shelf so it cannot tip, seal exposed wood against everyday moisture, and check that you can still reach all valves and connections.
Pro Tip: If you rent or do not want to drill into the cabinet, use a small freestanding wire shelf or two narrow bins on either side of the pipes instead of building a fixed platform.
Add Pull-Out Trays for Easy Access
A pull-out tray brings bottles at the back of the cabinet within easy reach. It is useful when the cabinet is deep, but the slide hardware and tray must clear the door, hinges, pipes, and any disposal unit.
You can make a sturdy DIY tray from ¾-inch plywood, or use a ready-made sliding basket. There is no universal minimum opening of 13 inches wide by 18 inches high. Those measurements may suit one layout, but the required clearance depends on your specific tray and slide hardware.
- Measure the clear door opening. Check the width between the open door or hinges and the opposite side. Measure usable depth and the height above the tray’s full travel path.
- Choose the tray position. Leave tall spray bottles where they will not hit the sink or pipes. If space allows, use different tray heights for bottles and smaller supplies.
- Match the slides to the tray. Follow the slide manufacturer’s side or bottom mounting instructions and required clearances. Check that the mounting surface is sound.
- Dry-fit before drilling. Set the tray in place, pull it forward, and close the cabinet door. Nothing should strike the frame, hinges, drainpipe, or supply lines.
- Secure and test. Fasten the slides as directed, load a few items, and open and close the tray several times. Adjust if it binds or tips.
For a simpler and cheaper option, put a handled plastic bin at the back and pull it out like a drawer. It offers similar access without installing hardware.
Recommended Products

【NOTE】The product is not suitable for cabinets with partitions in the middle.The product is not suitable for cabinets with a bottom frame height higher than 1.5CM (0.6IN).Please carefully confirm the type of cabinet and the size of the inner space of the cabinet before purchasing.(Patent Pending)

𝐌𝐚𝐱𝐢𝐦𝐢𝐳𝐞 𝐔𝐧𝐝𝐞𝐫 𝐒𝐢𝐧𝐤 𝐒𝐩𝐚𝐜𝐞 - Designed with a custom-fit silicone mat and L-shaped structure, this under sink organizer fits perfectly around plumbing while protecting cabinets from water, spills, and leaks. Measuring approximately 11.8"W x 15.9"D x 13.8-16.9"H, it’s ideal for most kitchen and bathroom cabinets.
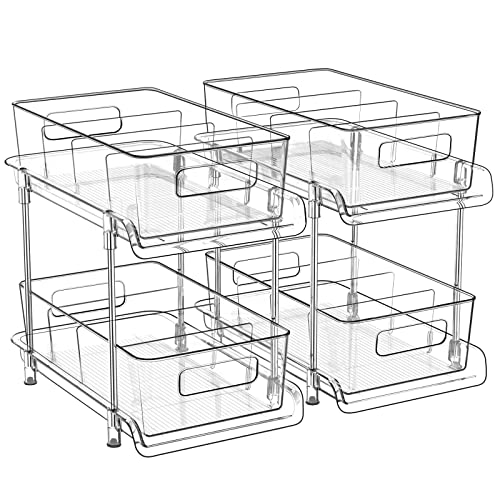
[Upgraded Version]: The pull out cabinet organizer is made of sturdy high-hardness abs plastic and securely linked by four thickened stainless steel support tubes to ensure a stable structure also achieve water-proof and rust-proof. The see-through sides design helps to find your stuff with a glance. The bottom is equipped with four anti-slip feet pads to increase stability, make it non-slip and stable when pull out the organizer bin.
Use the Door for Gloves and Sponges
The inside of the cabinet door is useful for lightweight items you reach for daily. Hooks and shallow baskets free up the bottom shelf, but only if the door closes without hitting the contents.
- Check clearance. Hold the hook or basket in place and close the door slowly to see whether it meets the pipes, bottles, or cabinet frame.
- Attach gloves. Use curtain ring clips on a light hook to hang dish gloves where they can dry after use.
- Add a small basket. A shallow wire basket can hold clean, dry sponges and scrubbers without taking up much room.
- Install adhesive hooks correctly. For compatible Command hooks, clean the smooth, dry surface as directed, press firmly, and wait the time stated on the package before adding weight. The official Command hook instructions specify a one-hour wait for the hook types shown and require you to follow their weight limits.
Use mounting strips suitable for the cabinet finish and conditions. In a damp area, check whether the adhesive is rated for moisture. Do not hang heavy bottles or a basket full of supplies from a small hook.
Recommended Products

2-in-1 Storage Solution: Hang MaraFansie grid storage basket over the cabinet door or on a railing for versatile use in most cabinets, keeping items neat and easily accessible.

8 Pieces Cabinet Hooks: you will get 8 pieces double S shaped hooks; They can be hung on cabinet, partitions and drawer, etc., with a thickness less than 18 mm/ 0.7 inch, such as kitchen or shoe cabinet doors, desks drawers, shower glass doors, closet, wardrobe doors, etc. Please kindly check the size of your cabinet door and hooks before purchase to avoid size mismatch

𝐕𝐞𝐫𝐬𝐚𝐭𝐢𝐥𝐞 𝐇𝐚𝐧𝐠𝐢𝐧𝐠 𝐖𝐢𝐫𝐞 𝐁𝐚𝐬𝐤𝐞𝐭 - MaraFansie adhesive wall mounted basket is ideal for organizing spice bottles, pantry items, snacks, toiletries, cleaning tools, craft supplies, kitchen accessories, and more.
Keep the Cabinet Dry and Easy to Maintain
A tidy setup should stay simple after the first cleanup. You should be able to remove each caddy, see the cabinet floor, and check for drips without dismantling shelves or trays.
After using a sponge or gloves, let them dry before storing them in an enclosed basket. Wipe up bottle leaks, check behind your bins during routine cleaning, and remove empty packaging before it piles up. If a tray begins to catch, check for shifted bottles or loose mounting hardware.
Key Takeaways
- Measure the clear door opening as well as the interior. Hinges can block a tray that otherwise fits.
- Leave water connections and shutoff valves reachable. Fix leaks before installing liners or wooden shelves.
- Keep hazardous cleaners locked away from children, in their original labeled containers.
- For door hooks, test the closing clearance and follow the adhesive maker’s weight and waiting instructions.
Frequently Asked Questions
How Can I Organize Everything Under My Sink?
Empty the cabinet, sort products by use, and measure around the plumbing. Put everyday items in an easy-to-lift caddy, use a shelf for spare supplies, and hang small items on the door. Keep shutoff valves visible and avoid filling gaps that you need for maintenance.
What Are Some Inexpensive Ways to Organize My Kitchen?
Use repurposed bins, small caddies, shelf risers, and hooks to separate supplies without buying custom cabinets. Group similar items, move duplicates out of the way, and keep the things you use most within easy reach. These simple ideas work for drawers and other kitchen cabinets too.
How to Organize Without Spending Money?
Start by removing things you no longer use. Wash and reuse sturdy plastic baskets or caddies you already own, then group supplies by task. Make simple dividers from spare materials and label containers if needed. Leave the area around pipes open instead of buying something to fill it.
What Are Some Common Mistakes to Avoid When Organizing Under Sink Storage?
Common mistakes include buying organizers before measuring, blocking plumbing access, using bins that hide every item, and overstuffing trays. Other problems include leaving damp materials in the cabinet and forgetting to check for leaks. Choose visible, washable storage that you can remove without a struggle.
Is It Safe to Store Cleaning Products Under the Sink?
It can be safe when products are securely stored, but a low cabinet is easy for children to reach. Keep hazardous cleaners locked away and follow every product’s storage directions. Leave chemicals in their labeled containers, close caps tightly, and never mix cleaning products together.
Conclusion
Budget-friendly under-sink storage starts with clearing out clutter and fitting organizers around the pipes. Try a caddy, a small shelf, and a few door hooks before spending money on a custom tray. Your finished cabinet should be easy to use, dry, and open enough for plumbing checks.
Sources
- U.S. Environmental Protection Agency: Moisture problems, leaks, and mold prevention.
- Lowe’s Cabinet Organizer Installation Guide: Measuring and checking door and hinge clearance.
- U.S. Consumer Product Safety Commission: Keeping household cleaners locked away from children.
- Poison Help: Safe storage of cleaners and bleach precautions.
- Pocket-Hole Material Thickness Guide: Choosing screw length for ¾-inch material.
- Command Hook Installation Instructions: Hook application, waiting period, and weight limits.