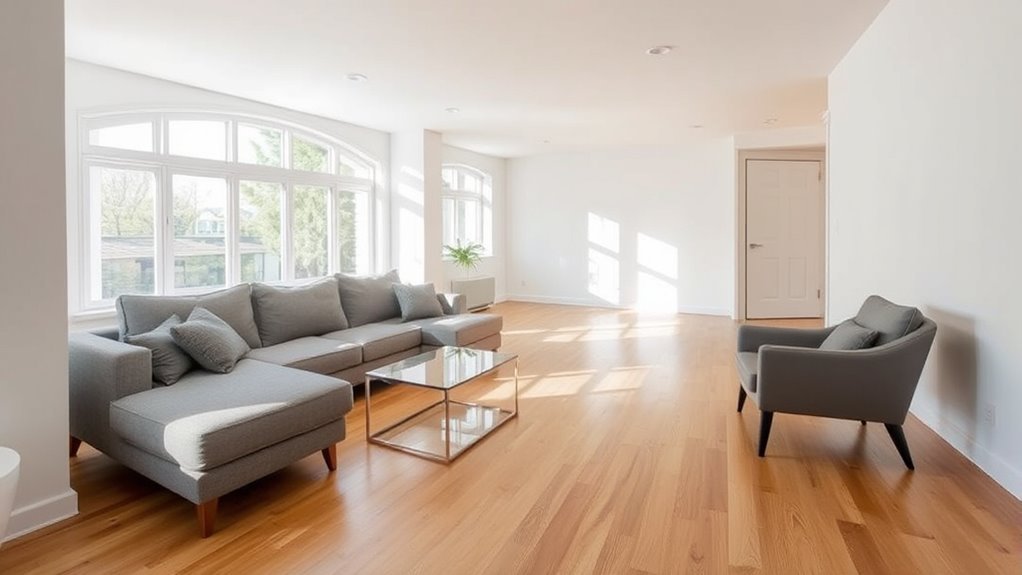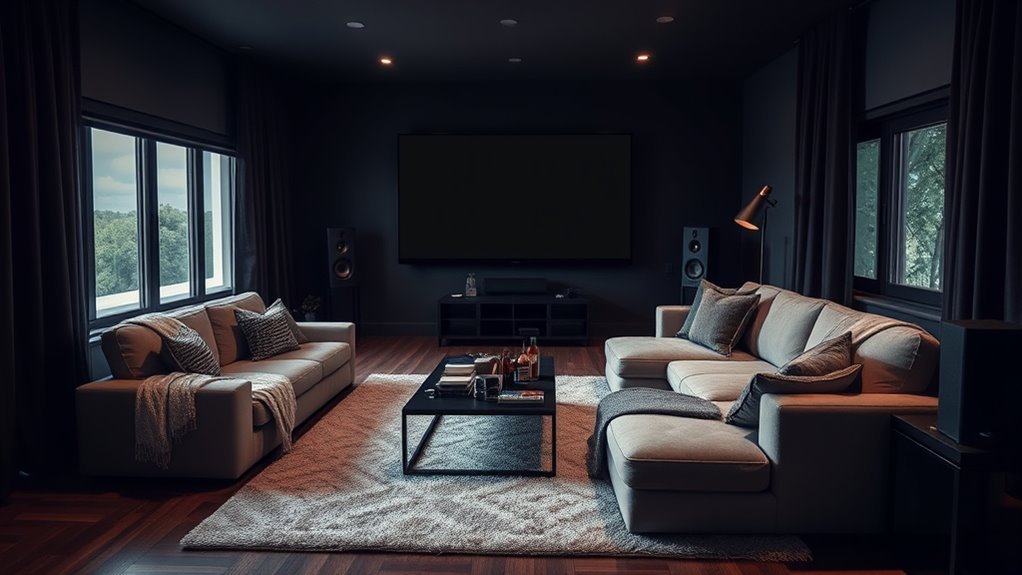
To design a living room for movie watching, start with your room’s geometry and natural light before buying any electronics. A great multipurpose cinema balances a glare-free screen wall, accurate viewing distances, ear-level sound, and comfortable seating that still welcomes everyday conversation, guests, and pets. By planning your sightlines, acoustics, and cable routes together, you can build an immersive theater experience that feels right at home.
Quick Answer
Place your screen on the wall with the least window glare and size it for a 30-to-40-degree field of view from your main sofa. Keep the screen center within 15 degrees of seated eye level, position front speakers at ear height, layer blackout shades with 6500K bias lighting, and route certified cables before mounting gear.
At a Glance
| Time Required | 2 to 4 hours for furniture layout, lighting, and soundbar setup; 1 to 2 days for wall mounting, acoustic treatment, or professional in-wall wiring |
| Difficulty | Easy to moderate for furniture, lighting, and soundbar setups; advanced for in-wall CL2/CL3 wiring, ceiling speakers, or projector mounting |
| Tools Needed | Tape measure, painter’s tape, stud finder, level, handheld mirror, cable ties, surge protector, dimmable bulbs, and device manuals |
| Cost | $0 to $100 for layout, glare, and cable fixes; $800 to $5,000+ when adding a new display, surround audio, seating, or licensed electrical work |
Why Design a Living Room for Movie Watching?
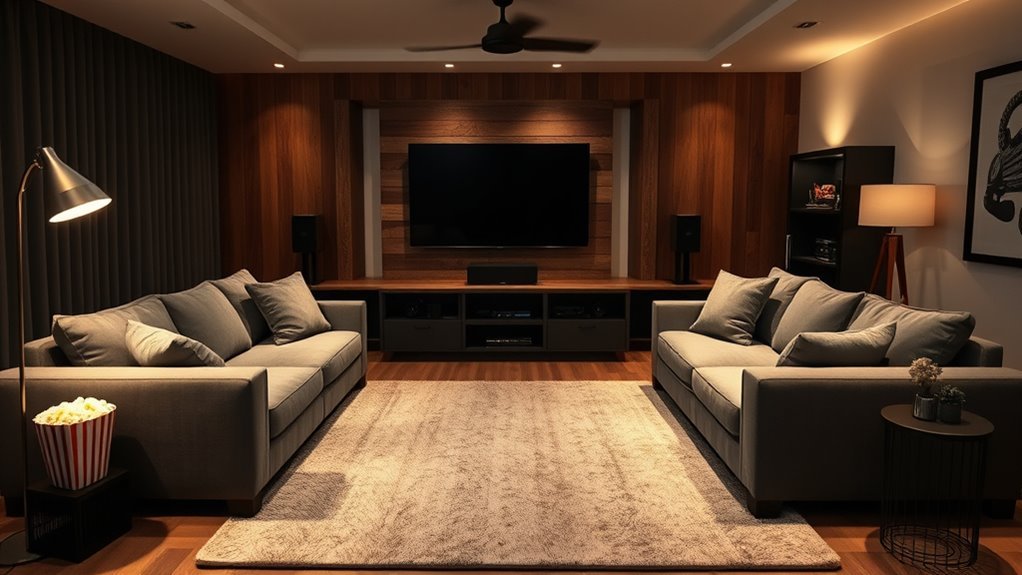
Designing a living room specifically for movie watching turns an everyday gathering space into a comfortable personal cinema without sacrificing style. A thoughtful layout eliminates neck strain, stops window reflections, makes whispered dialogue crisp, and keeps everyone comfortable through three-hour films or weekend sports marathons.
Planning the room before buying gear also prevents expensive mistakes. You avoid mounting the TV too high above a mantel, pushing the sofa into a bass-heavy wall boundary, trapping a soundbar inside a resonant cabinet, or stringing tripping hazards across walkways. Instead of treating the screen as an afterthought, you anchor the room around clear sightlines and balanced acoustics, then soften the space with residential textiles and warm lighting.
Follow a room-first decision rule when choosing your core setup: if you cannot control daylight, start with a bright TV rather than a projector. If viewers often sit in side chairs, prioritize a wide-viewing-angle OLED or mini-LED panel. And if running wire to the back of the room is impractical, choose a 3.1 system or a soundbar with wireless rear speakers.
Step-by-Step Living Room Movie Setup
Follow this nine-step sequence before buying equipment, drilling into studs, or moving heavy furniture. Completing the layout on paper and testing outlines with painter’s tape keeps the design practical and prevents costly returns.
- Measure the room dimensions. Record the wall width, ceiling height, window and door swing clearances, outlet locations, primary seat-to-wall distance, and a minimum 30-to-36-inch walkway path.
- Choose the primary screen wall. Pick a solid wall that receives no direct sunlight from opposite windows and offers an unobstructed sightline from the main seating zone.
- Select a TV or projector. Choose a 4K TV for bright, multipurpose family rooms, or a projector paired with an ambient-light-rejecting (ALR) or matte white screen if you can fully darken the space.
- Calculate the ideal screen size. Match the screen diagonal to your exact eye-to-screen distance so the image fills 30 to 40 degrees of your horizontal vision.
- Position the primary seating. Center the main sofa directly opposite the screen, pulling it at least 12 to 24 inches off the back wall to improve bass clarity and surround speaker separation.
- Map the audio layout. Select a soundbar, 3.1 front stage, 5.1 surround system, or 5.1.2/5.1.4 Dolby Atmos configuration that fits your room width and wiring options.
- Layer the room lighting. Install blackout curtains or cellular shades for daytime control, dimmable lamps for intermissions, and 6500K bias lighting behind the display to prevent eye fatigue.
- Route power and signal cables safely. Plan dedicated outlets, eARC connections, Ethernet, and Ultra High Speed HDMI cables before hanging hardware on the wall.
- Calibrate picture and sound. Switch the display to Filmmaker or Cinema mode, run your receiver’s room-correction microphone, and fine-tune subwoofer placement with real movie scenes.
Warning: Never run standard power cords or extension cords inside walls, ceilings, or floors. Electrical Safety Foundation International guidance and US National Electrical Code (NEC) Article 400.12 prohibit concealing flexible power cords behind drywall because trapped heat creates a severe fire hazard. Always use CL2- or CL3-rated low-voltage cables for in-wall HDMI and speaker runs, and hire a licensed electrician to install recessed wall outlets.
Selecting the Right Room and Layout for Optimal Viewing
The best living room layout for movie watching pairs a low-glare focal wall with unobstructed sightlines, clear walkways, and soft furnishings that absorb echo. You do not need a windowless basement to get theater-grade performance, provided you control light reflections, traffic flow, and room boundaries.
Stand where your primary sofa will sit and look toward your candidate screen walls during the brightest part of the day. The screen should face you directly without forcing a neck turn or competing with an unshaded south- or west-facing window behind your back. If your only usable wall sits opposite a bright window, pair heavy blackout drapes with a mini-LED or high-brightness OLED TV rated for strong reflection handling.
Route foot traffic behind or around the seating zone rather than between the sofa and the screen. Leave 30 to 36 inches of open walkway so family members can grab snacks without blocking the picture, and keep 16 to 18 inches between the sofa edge and the coffee table for comfortable legroom. Avoid pushing the sofa flush against the rear wall; leaving even 1 to 2 feet of breathing room reduces boomy bass buildup and prevents wall reflections from muddying dialogue.
TV vs. Projector: Which Is Right for You?
A 4K TV is the best choice for most living rooms because it delivers high peak brightness, deep black levels in daylight, instant startup, and simple one-cable audio integration. A projector is best when you want a 100-to-150-inch cinema image and can control room light with blackout shades.
Choose a TV if your family watches daytime sports, plays low-lag console games, or prefers a maintenance-free setup. Choose a projector if pure image scale is your priority. Before buying a projector, check its throw ratio (Throw Distance ÷ Screen Width). For example, a standard projector with a 1.5:1 throw ratio needs 11 feet of lens-to-screen distance to cast a 100-inch diagonal (87-inch wide) 16:9 image, whereas an ultra-short-throw (UST) laser projector with a 0.25:1 ratio sits on the media console just inches from the wall.
| Decision Factor | 4K TV (OLED / Mini-LED) | Projector + Dedicated Screen |
|---|---|---|
| Bright rooms & daylight | Excellent; retains contrast and HDR punch in ambient light | Poor unless paired with blackout shades and an ALR screen |
| Practical screen size | 55 to 100 inches (98–100″ models require heavy-duty delivery) | 100 to 150 inches with minimal wall weight |
| Installation complexity | Simple console stand or standard stud wall mount | Requires screen assembly, throw calculation, and ceiling or UST alignment |
| Best for renters | TV on a sturdy media console with a soundbar | Ultra-short-throw or portable gimbal projector with a floor-rising screen |
| Gaming & everyday use | Supports 4K/120Hz, VRR, and low input lag out of the box | Fan noise, bulb/laser heat, and higher input lag on non-gaming models |
Note: Ultra-large 98- and 100-inch mini-LED TVs now compete directly with entry-level projection setups in price. Before choosing a giant TV over a projector, measure your hallway turns, stairwell clearances, and wall-stud spacing—a 98-inch TV is over 85 inches wide and typically weighs 120 to 160 pounds.
Recommended Products

CONVENIENT TO STORAGE AND CARRY : Compact one-piece,lightweight and folding design. You can fold the projector screen in small size and put it in your backpack or suitcase

★【Better Contrast and Color】 Light bleed is eliminated by the black backing layer, significantly improving image quality.

4K ultra HD projector screen: The Anti Light projection screen brings you vivid image and impeccable viewing experience with a 16:9 4K ultra HD resolution. Ambient light rejecting screens could reflects light in a way that minimizes the impact of ambient light. This means that when you're watching a movie or giving a presentation, the colors will look more vibrant and the images will be clearer.
How to Choose the Right Screen Size for Your Space?
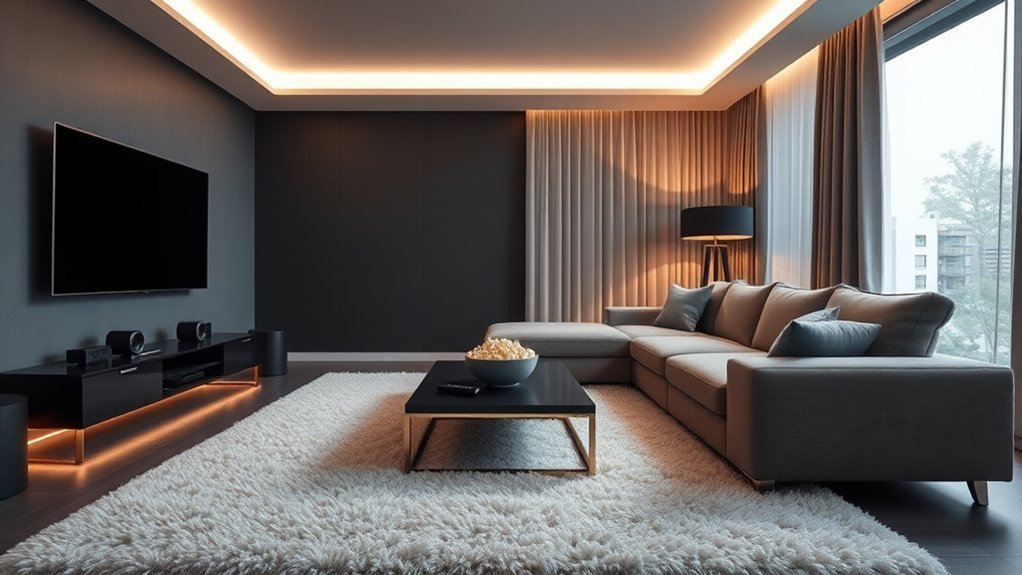
Choose your screen size based on the measured distance from your eyes to the display, aiming for a 30-to-40-degree horizontal field of view. A 30-degree angle (aligned with SMPTE guidelines) suits everyday mixed television and news, while a 36-to-40-degree angle delivers true home cinema immersion.
THX recommends keeping your vertical line of sight within 15 degrees above or below the center of the screen and dividing your screen diagonal by 0.835 to find the maximum viewing distance in inches for 4K immersion. Combine that rule with the field-of-view table below to find the sweet spot for your seating layout.
Screen Size and Viewing Distance Guide
Use this reference table for 16:9 4K TVs to match your measured eye-to-screen distance with the right panel diagonal. The balanced column targets a 30-degree field of view for mixed living room use, while the cinema column targets a 40-degree field of view for film nights.
| Screen Size (Diagonal) | Physical Width (Approx.) | Balanced Distance (30° FOV) | Cinematic Distance (40° FOV) |
|---|---|---|---|
| 55 inches | 48.1 in (4.0 ft) | About 7 ft 5 in | About 5 ft 6 in |
| 65 inches | 56.7 in (4.7 ft) | About 8 ft 10 in | About 6 ft 6 in |
| 75 inches | 65.4 in (5.5 ft) | About 10 ft 2 in | About 7 ft 6 in |
| 85 inches | 74.1 in (6.2 ft) | About 11 ft 6 in | About 8 ft 6 in |
| 98 inches | 85.4 in (7.1 ft) | About 13 ft 3 in | About 9 ft 9 in |
Source: RTINGS TV Size to Distance Calculator.
Pro Tip: Before ordering a screen, mark its exact width and height on the wall with blue painter’s tape and sit on your sofa for 10 minutes. You will immediately spot whether the top edge forces your chin up, whether side lamps reflect inside the frame, and whether enough wall width remains for left and right speakers.
Screen Height and Eye Level
Mount or place your TV so the center of the screen sits at seated eye level, which is typically 40 to 42 inches (102 to 107 cm) from the floor for a standard sofa. Keeping your vertical viewing angle under the 15-degree THX limit prevents neck fatigue and preserves vertical contrast on LED panels.
For a 65-inch TV (about 32.5 inches tall), centering the screen at 42 inches means the bottom bezel rests roughly 25 to 26 inches off the floor—right above a low media console and center channel speaker. If your layout forces you to mount the display above a mantel, test the angle from your primary seat first and review how to arrange seating when the TV is above the fireplace. Recliners that tilt your torso back, or a counterbalanced pull-down mantel mount, can bring an elevated screen back into a comfortable sightline. Always verify the fireplace manufacturer’s heat clearances before mounting electronics above a firebox.
Room Size Considerations
Base your screen size on your actual sofa-to-wall measurement rather than generic “small” or “large” room labels. In a huge open-concept room where the sofa floats 7 feet from the TV wall, a 65- or 75-inch display fits the 30-to-40-degree viewing window far better than an oversized 98-inch panel that forces viewers to scan side to side.
Check the physical width of the display against your surrounding architecture. Leave at least 6 to 12 inches of breathing room on either side of the bezel so the screen does not crowd window curtains, door frames, or front bookshelf speakers. A media console looks best and protects against accidental bumps when it is at least 4 to 6 inches wider than the TV on each side.
Screen Type Options
Choose your display technology based on room lighting and seating width rather than marketing names. OLED panels deliver pixel-level black levels and near-perfect off-axis contrast for dark or dim movie nights, while Mini-LED (QLED) TVs offer higher full-screen brightness to punch through daytime glare.
If family members regularly watch from wide side chairs or the far end of a sectional, check independent viewing-angle performance data before buying. Standard VA-panel LED TVs often lose color saturation and contrast past 20 to 30 degrees off-center, whereas OLED and wide-angle IPS/ADS panels maintain a consistent picture across the room. For projectors, skip bare textured drywall and pair the lens with a tensioned 1.0–1.1 gain matte white screen in dark rooms, or a specialized 0.6–0.8 gain ALR screen in rooms with pale walls and ambient light.
How to Create Immersive Sound for Your Home Cinema?
Create immersive home cinema sound by anchoring clear dialogue at the screen center, placing main speakers at seated ear height, and calibrating channel levels to your primary seat. Even a modest speaker system outperforms built-in TV speakers when positioned at the proper geometry.
Dolby’s speaker setup guidance uses a three-number shorthand—such as 5.1.2—to define every layout:
- First number (5): Standard ear-level speakers (front left, center, front right, and left/right surrounds).
- Second number (.1): Powered subwoofers for low-frequency effects (LFE) and deep bass.
- Third number (.2 or .4): Overhead or upward-firing height channels for three-dimensional Dolby Atmos audio.
| Audio Setup | Best For | Placement & Setup Essentials |
|---|---|---|
| Soundbar + Wireless Sub | Renters, small rooms, clean wiring | Pick a 3.1+ bar with a dedicated center driver; pull flush with the front edge of the console. |
| 3.1 Component System | Crisp dialogue without rear wires | Spread front left/right speakers to a 22°–30° angle from the main seat to widen the soundstage. |
| 5.1 Surround System | True wrap-around movie effects | Place two surround speakers at 90°–110° (to the sides or slightly behind the sofa) at ear level. |
| 5.1.2 or 5.1.4 Dolby Atmos | Full 3D overhead cinema audio | Requires a 7- or 9-channel AVR; ceiling heights at a 30°–55° elevation angle (45° ideal). |
Position all ear-level speakers so their tweeters sit around 3.9 feet (1.2 meters) off the floor—standard seated ear height. Angle the front left and right speakers 22 to 30 degrees off the center axis, and place the center channel directly below the screen, tilted slightly upward toward your ears. Keep surround speakers at least 3 to 5 feet away from the nearest listener’s head so a side seat does not overpower the mix. If you install upward-firing Dolby Atmos modules instead of in-ceiling speakers, confirm your ceiling is flat, hard, and between 7.5 and 14 feet high.
Because low bass wavelengths are longer than most room dimensions, corner placement can make a subwoofer sound loud but one-note and boomy. To find the cleanest bass spot, use the subwoofer crawl: temporarily place the subwoofer on your primary sofa seat, play a movie scene or music track with steady bass, and crawl along the front and side walls at floor level. The spot where the bass sounds tightest and most even is where the subwoofer belongs. In your AV receiver settings, set your speakers to “Small” with an 80 Hz crossover as a starting baseline so the subwoofer handles deep rumble while your main speakers focus on vocals and midrange clarity.
Pro Tip: If movie dialogue sounds hollow or muffled, pull your center speaker or soundbar completely flush with the front lip of the media console. Leaving a speaker pushed back 4 inches on a shelf bounces sound waves off the wood surface right in front of it, causing comb filtering that smears vocal clarity before it ever reaches your ears.
Room Acoustics for Clear Dialogue and Better Bass
Tame living room echo and muddy bass by placing soft, absorptive furnishings at the room’s primary reflection points and pulling seating away from wall boundaries. Hard drywall, bare hardwood floors, and large picture windows bounce sound waves that arrive milliseconds after the direct speaker signal, blurring dialogue.
You can locate and treat these problem spots without turning your living room into a recording studio:
- Cover the floor reflection: Lay a thick, high-pile area rug with a dense felt rug pad on the floor between the front speakers and the sofa.
- Use the mirror trick on side walls: Sit in your main seat while a helper slides a handheld mirror flat along the left and right walls at speaker height. Any spot where you can see a front speaker reflected in the mirror is a first reflection point—place lined curtains, a tall bookshelf filled with varied books, or fabric-wrapped acoustic art panels over those exact marks.
- Soften the center zone: Swap a resonant glass or metal coffee table for an upholstered fabric ottoman, which absorbs early floor reflections and doubles as a footrest.
- Avoid the rear-wall bass trap: Standing bass waves (“room modes”) peak right against room boundaries. Moving your sofa just 12 to 24 inches forward from the back wall immediately tightens boomy low end and gives rear surround speakers room to disperse.
What Are the Best Lighting Solutions for Movie Nights?
The best lighting setup for movie watching layers window blackout treatments, indirect 6500K bias lighting behind the TV, and low-glare dimmable accent lamps. Controlled lighting eliminates screen reflections, boosts perceived contrast, and lets viewers move safely without ruining dark-scene detail.
- 6500K (D65) bias lighting: Attach an LED bias light strip to the back of your TV that matches the industry-standard 6500K reference white point (with a Color Rendering Index of 90+ CRI) and set its brightness to roughly 10% of the screen’s peak luminance. This subtle halo prevents eye strain as scenes cut from dark shadows to bright explosions and makes TV black levels appear deeper.
- Blackout curtains or dual rollers: Hang lined blackout drapes that extend 4 to 6 inches past the window frame on each side, or pair sheer daytime shades with blackout cellular shades in side channels for projector rooms.
- Dimmable floor lamps and sconces: Place warm (2700K) dimmable lamps beside or behind the seating perimeter rather than on the opposite wall where bulbs reflect directly in the glass screen.
- Smart lighting scenes: Group smart bulbs or dimmer switches into three one-tap presets: Pre-Show (30% warm dim for settling in with snacks), Feature Presentation (overhead lights off, bias light at 10%), and Intermission (15% pathway glow).
Recommended Products
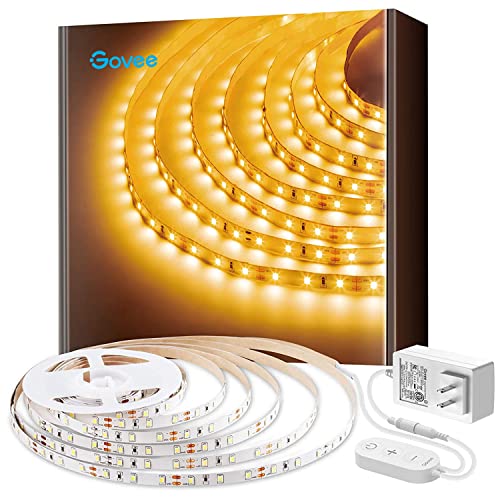
Warm White LED: With 300 LEDs and a 3000K color temperature, you'll enjoy an incredibly warm and bright illumination with improved color quality. Light up those dark rooms, cabinets and any corners with ease.

9.8Ft LED Strip Lights Kit: HOUHUI 9.8Ft LED strip light consists of 90 bright SMD 5050 LED beads with dimming control, perfect for TV backlight, gaming lights, wall decorative lights, monitor lights, cabinet lights, bookshelf lights, desk lights, etc
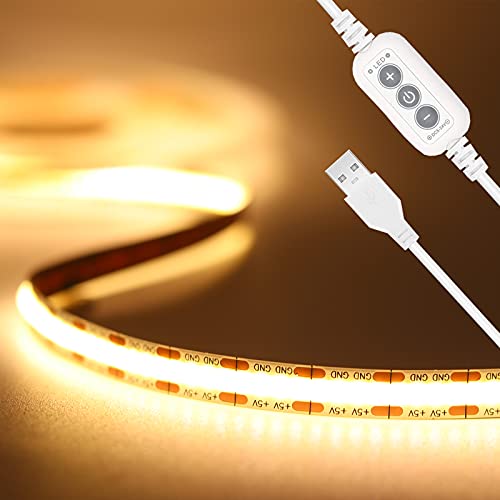
【Brighter TV Backlight】With 640LEDs in total(320LEDs/m),PAUTIX warm white COB USB LED strip lights creates brighter and super even lighting performance,which is ideal for reducing eyestrain(watching TV in the dark causes the eyes to constantly adjust between a bright screen and dark surrounding area)
Comfortable Seating Arrangements for Long Viewing Sessions
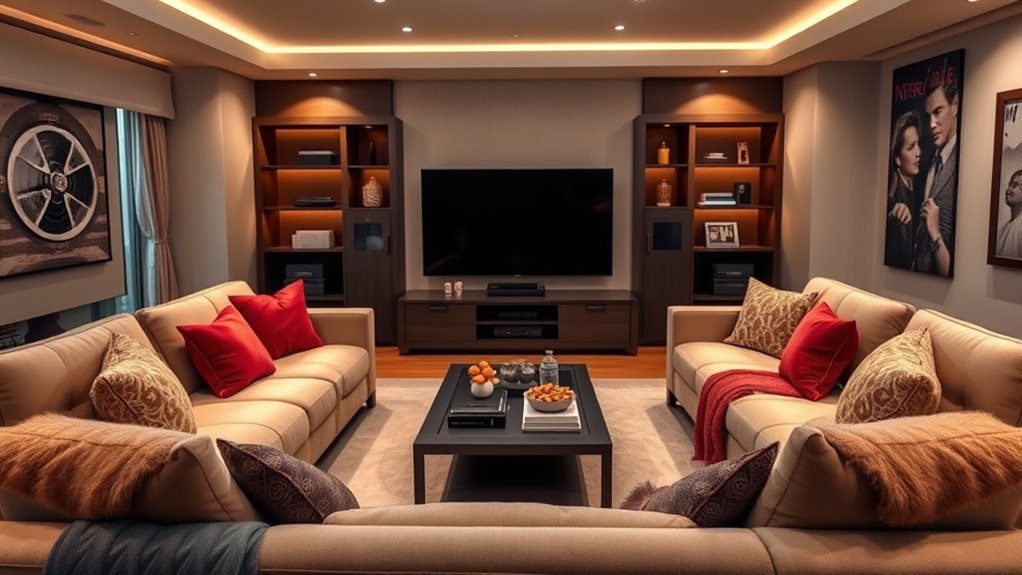
Arrange your living room seating so the primary seats sit dead-center to the screen and center speaker, while secondary chairs angle inward within a 30-degree viewing cone. Supportive cushions, proper headrest height, and easy access to side tables keep viewers relaxed through a three-hour epic.
Recommended Products

Premium Corduroy Fabric & Cozy Texture Sofas & Couches :Wrapped in soft, breathable corduroy fabric, this modular sectional sofa features a delicate ribbed texture that adds warmth and modern style to any living space. The skin-friendly upholstery creates a cozy, inviting feel while offering durability for everyday use, making it the perfect corduroy couch for living rooms, apartments, bedrooms, and offices.

【Soft-Padded Wooden Armrests Combine Comfort and Durability】 The 22.80-inch high armrests offer exceptional support, perfectly cradling your arms whether you're sitting upright to read or reclining to unwind. Reinforced with a solid inner frame, they boast long-lasting durability, resisting daily wear and tear without sagging or loosening. Their smooth, rounded edges add to the ease of use, making them ideal for families of all ages while elevating the living room couch's modern, sophisticated aesthetic.

Multiple Package Issues: Multiple package may not arrive at the same time. If you have any questions about the tracking numbers or the tracking state of the sectional sleeper sofa we will help you
Optimal Furniture Arrangement
In small and medium rooms, an L-shaped sectional or a three-seat sofa with a reversible chaise keeps family members clustered inside the acoustic and visual sweet spot. In wider living rooms, flank a centered sofa with one or two swivel club chairs angled toward the center of the display so nobody has to twist their spine.
If you choose reclining sofas or theater chairs, measure their fully extended footprint before finalizing the floor plan. Standard recliners need 10 to 18 inches of rear wall clearance, whereas wall-hugger power recliners glide forward on their tracks and require only 3 to 5 inches behind the backrest. Keep headrest height in mind as well: high leather headrests support your neck, but an overly tall solid back directly behind your ears can block high-frequency sound waves from rear surround speakers.
Versatile Seating Options
Balance everyday living room flexibility with marathon movie comfort by mixing anchored sofas with movable footrests and side tables. Choose durable, tightly woven performance fabrics (such as microfiber, chenille, or stain-treated linen blends) that absorb room echo better than slick leather and shrug off popcorn butter or pet claws.
| Seating Type | Best Room Fit | Movie-Watching Advantage |
|---|---|---|
| L-shaped sectional | Medium to large family rooms | Clusters multiple viewers near the center sightline and sweet spot. |
| Wall-hugger recliners | Compact rooms & dedicated rows | Full leg and lumbar support while needing only 3–5 inches of rear clearance. |
| Deep-seat sofa + loveseat | Small apartments & multipurpose spaces | Preserves 30–36 in walkways while keeping a clean residential look. |
| Upholstered ottomans & poufs | Any room hosting extra guests | Absorbs floor sound reflections and converts any sofa into a chaise. |
Cables, Sources, and Smart Home Theater Setup
Map your signal path, HDMI bandwidth, and cabinet airflow before mounting hardware or closing up cable channels. A clean wiring plan lets your TV, streaming player, 4K Blu-ray deck, game console, and audio system communicate over a single remote without audio dropouts or overheating.
Connect your soundbar or AV receiver to the TV’s dedicated eARC (Enhanced Audio Return Channel) port. Unlike older optical cables or basic ARC, eARC carries uncompressed 24-bit/192kHz audio—including lossless Dolby TrueHD, Dolby Atmos, and DTS:X—from the TV’s internal apps or console inputs back to your sound system over one HDMI cable.
Match your HDMI cables to your equipment’s bandwidth rather than paying extra for gold-plated marketing claims. HDMI.org certification standards specify two scannable label tiers for modern home theaters:
- Ultra High Speed HDMI Cable (HDMI 2.1): Supports up to 48Gbps for 4K at 120Hz, 8K at 60Hz, Variable Refresh Rate (VRR), Dynamic HDR, and eARC. Keep passive copper runs under 15 to 25 feet, or switch to an active optical HDMI cable for longer projector conduit runs.
- Ultra96 HDMI Cable (HDMI 2.2): Supports up to 96Gbps for next-generation high-frame-rate and uncompressed chroma configurations.
Finally, protect your electronics from heat buildup inside media cabinets. AV receivers and current-generation game consoles draw significant wattage; leave at least 5 to 6 inches of open clearance above an AV receiver and 2 inches on each side, remove solid cabinet back panels behind hot gear, or install quiet USB-powered 120mm exhaust fans.
Decor Ideas to Enhance Your Home Cinema Experience
Choose living room decor that absorbs stray light and sound waves near the screen while keeping the room warm and inviting when the TV is off. Matte finishes, layered textiles, and concealed storage give you the visual calm of a cinema without making the space look like a dark cave.
A great movie room is not just darker and louder. It is easier to watch, easier to hear, and more comfortable to sit in.
- Paint the screen wall in a matte or flat finish: Medium-to-deep neutral tones (such as charcoal, warm slate, or deep sage) in a flat finish stop light from bouncing off the wall and washing out screen contrast.
- Hang glass-framed art on back walls only: Keep glass picture frames, mirrors, and polished metallic objects off the front third of the side walls so they do not catch bright screen reflections or bounce early sound waves.
- Use slatted wood or fabric console doors: Never hide a center speaker behind solid wood doors; choose cabinets with acoustically transparent mesh or open center shelves.
- Tuck C-tables or a sofa console bar nearby: A narrow 10-to-12-inch-deep console table right behind a floating sofa holds drinks, remotes, and phone chargers without cluttering the floor.
Small Living Room and Rental-Friendly Movie Setup
Build a high-impact movie setup in a small apartment or rental by using a console-mounted 55- or 65-inch TV, a Dolby Atmos soundbar with wireless surrounds, and removable cable raceways. You do not need to drill into studs, open drywall, or anger downstairs neighbors to enjoy theater-grade picture and sound.
Place your TV on a sturdy media console whose top shelf sits 22 to 26 inches high, or use a heavy-duty freestanding floor TV stand with a weighted glass or steel base that slips right behind the cabinet—giving you the floating wall-mounted look with zero drywall holes. If you prefer a 100-inch projected image, pair a tabletop ultra-short-throw projector with a motorized floor-rising ALR screen that retracts into its casing after the credits roll.
To keep neighbors happy in shared-wall buildings, place your subwoofer on a dense rubber isolation pad to decouple floor vibrations, and turn on your soundbar or AVR’s Night Mode (Dynamic Range Compression) after 10 p.m. to tame sudden explosions while keeping quiet dialogue clear. Hide speaker and power cords along baseboards using paintable, peel-and-stick PVC cord channels that remove cleanly when your lease ends.
Budgeting for Your Home Cinema Setup: Key Considerations
Divide your living room movie budget across four balanced buckets—display, audio, light and acoustic control, and seating—rather than spending every dollar on the largest screen. A well-calibrated 65- or 75-inch TV paired with a dedicated 3.1 audio system and blackout shades delivers a far better movie night than a giant display with harsh built-in speakers and window glare.
Prioritize upgrades in the order that solves your room’s weakest link:
- Starter upgrade ($100–$600): Re-center the sofa to the 30–40° viewing window, hang blackout curtains, add a 6500K LED bias strip, tidy cables with raceways, and add a 2.1 or 3.1 soundbar.
- Balanced living room cinema ($1,500–$3,500): Step up to a 65-to-85-inch OLED or Mini-LED TV, add a 5.1 surround system or premium Atmos soundbar with rear speakers, lay a thick area rug, and upgrade to aventilated media console.
- Enthusiast home theater ($4,000+): Combine a 85-to-100-inch flagship TV or 4K laser projector and ALR screen with a 7- or 9-channel AV receiver, calibrated 5.1.2/5.1.4 speakers, dual subwoofers, acoustic wall panels, and licensed in-wall wiring.
Common Movie Room Problems and Fixes
Most living room theater frustrations come from placement and calibration errors rather than faulty electronics. Use this troubleshooting guide to fix glare, neck ache, muddy voices, and uneven bass before spending money on new gear.
| Problem | Likely Cause | Practical Fix |
|---|---|---|
| Glare or reflections on screen | Opposite window or lamp in the reflection zone | Add blackout shades, move lamps outside the screen’s reflection angle, and switch to 6500K rear bias lighting. |
| Neck strain during movies | TV mounted more than 15° above seated eye level | Remount the screen so its center sits 40–42 in off the floor, use a lower console, or install a pull-down mount. |
| Dialogue is hard to hear | Center speaker set back on shelf or bare-room echo | Pull the speaker flush with the cabinet front lip, boost the center channel by +1 to +2 dB, and add a thick rug. |
| Bass sounds boomy or hollow | Subwoofer stuffed in a corner or sofa flush against wall | Pull the sofa 12–24 in from the back wall, perform the subwoofer crawl, and set an 80 Hz crossover. |
| Projector image looks washed out | Ambient light hitting a bare wall or white screen | Seal window light leaks, pair the projector with an ALR screen, or reduce the projected image size to boost brightness. |
| Movies look like a soap opera | Factory motion-smoothing and Vivid preset enabled | Switch the TV picture preset to Filmmaker Mode or Cinema/Movie to preserve 24fps film cadence. |
Key Takeaways
- Size your display from your actual seat-to-screen distance: aim for a 30-degree field of view for mixed TV use or 40 degrees for cinema immersion.
- Keep the screen center around 40 to 42 inches off the floor so your vertical viewing angle stays within the 15-degree THX comfort zone.
- Position front and surround speakers near seated ear height (about 3.9 feet), flush with shelf edges, and pull the sofa 1 to 2 feet off the back wall.
- Pair blackout window shades with a 6500K (D65) LED bias light behind the TV and enable Filmmaker Mode for accurate dark-room contrast.
- Use certified 48Gbps Ultra High Speed HDMI cables on the eARC port, leave 5 to 6 inches of ventilation above receivers, and never run power cords inside drywall.
Frequently Asked Questions
How far should the sofa be from the TV?
Your sofa distance depends on your TV size and preferred field of view rather than a single fixed measurement. For a 65-inch 4K TV, sit about 8 feet 10 inches away for a balanced 30-degree everyday view, or about 6 feet 6 inches away for a cinematic 40-degree view. For a 75-inch TV, aim for 7 feet 6 inches to 10 feet 2 inches.
How do you set up a living room for a movie night?
To set up your living room for movie night, close blackout curtains, turn off overhead lights, and switch on a dim 6500K bias light behind the screen. Angle secondary chairs toward the center, switch your TV to Filmmaker or Cinema mode to disable motion smoothing, and confirm your center speaker is unobstructed for clear dialogue.
Is a TV or projector better for a living room?
A 4K TV is better for most multipurpose living rooms because it maintains high brightness and deep contrast in daylight without extra maintenance. A projector is better when you want a 100-to-150-inch image and can darken the room with blackout shades and an ambient-light-rejecting (ALR) screen.
How do you design your living room step by step?
Start by measuring the room and choosing the wall with the least window glare. Next, pick a TV or projector, calculate screen size from your seating distance, center the main sofa at eye level (40 to 42 inches high), place speakers at ear height, layer blackout and bias lighting, route certified HDMI cables, and calibrate picture and sound.
Is a soundbar enough for a living room home theater?
Yes, a quality 3.1 or 5.1.2 soundbar with a dedicated center channel and wireless subwoofer is enough for most apartments, rentals, and small-to-medium living rooms. While a separate AV receiver and component speakers offer wider stereo separation and upgrade flexibility, a modern eARC soundbar delivers crisp dialogue and immersive bass with minimal wiring.
Should the TV go above the fireplace?
Avoid mounting a TV above a high fireplace if another glare-free wall is available, as tilting your head more than 15 degrees upward causes neck strain during movies. If the fireplace is your only option, verify the manufacturer’s heat clearances and install a pull-down mantel mount to lower the screen to eye level when the fire is off.
Conclusion
A comfortable, theater-grade living room always starts with a room-first plan: choose the least-glare wall, size the screen for a 30-to-40-degree viewing angle, keep the center near seated eye level (40 to 42 inches), position speakers at ear height, and layer blackout shades with 6500K bias lighting. Before ordering any hardware, grab a tape measure and a roll of painter’s tape to mark your proposed screen outline on the wall and test the sightline from every seat for 10 minutes.
Sources
- Dolby Atmos Speaker Setup: speaker channel numbering, ear-level height (3.9 ft), placement angles, and subwoofer integration
- Dolby Atmos Speaker Setup Guides: reference diagrams for 3.1, 5.1, 5.1.2, and 5.1.4 home theater configurations
- THX TV Positioning Guidance: 15-degree maximum vertical viewing angle and 4K seating distance formula
- HDMI.org Ultra HDMI Cables: 48Gbps Ultra High Speed HDMI (2.1) and 96Gbps Ultra96 HDMI (2.2) certification specs
- HDMI.org eARC: uncompressed multi-channel audio return from TV apps and inputs to an AVR or soundbar
- ESFI Extension Cord Safety: electrical safety rules prohibiting flexible power cords inside walls, ceilings, or floors
- RTINGS TV Size to Distance Calculator: 30-degree mixed-use and 40-degree cinema viewing distances for 55-to-98-inch TVs
- RTINGS TV Viewing Angle: off-axis contrast and color accuracy testing for wide living room seating