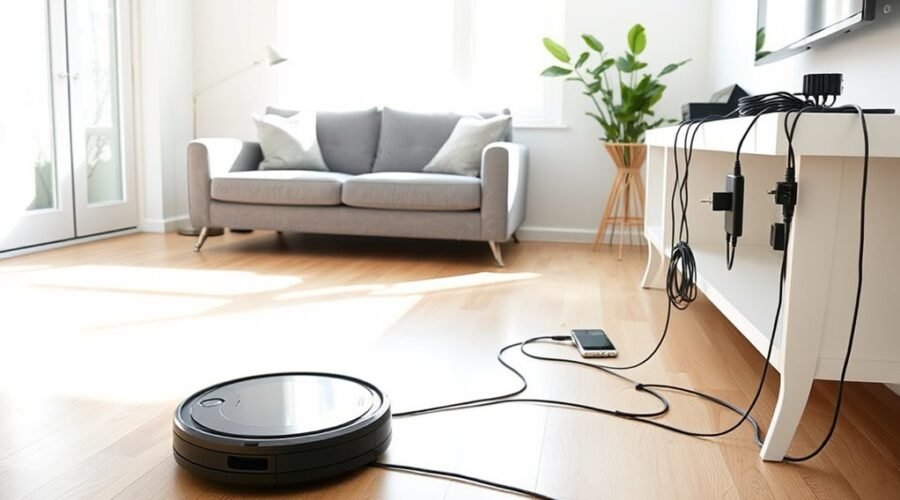
Knowing how to keep cords away from a robot vacuum can prevent tangled brushes, interrupted cleaning, and damaged charging cables. Phone chargers, power strips, and wires behind furniture are common trouble spots. The best approach combines simple cable management with clear cleaning paths and your vacuum’s available navigation features.
Quick Answer
To keep cords away from a robot vacuum, remove loose charging cables, bundle and secure permanent wires, and route them along walls or behind furniture. Lift power strips off the floor, use cable covers where needed, and create no-go zones if your vacuum supports them. Always check for remaining hazards before cleaning.
At a Glance
| Difficulty | Easy |
| Tools Needed | Reusable cable ties, cable clips, cord covers, and optional app-based no-go zones |
Identify the Cords Most at Risk
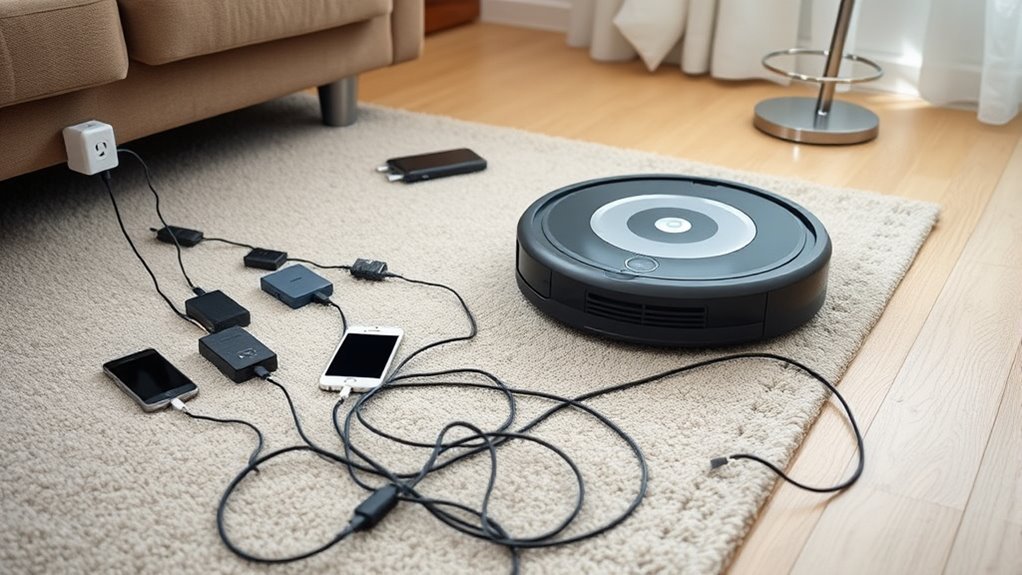
Start by finding every cable your robot vacuum might reach. Focus on loose charging cables, entertainment center wires, floor-level power strips, and cords that blend into the flooring.
Check these common trouble spots:
- Phone and laptop chargers: Thin cables can lie flat against the floor and get caught in a brush or wheel.
- TV and entertainment centers: Several cables may hang behind the stand or gather near its legs.
- Desk areas: Computer cables, chargers, and power strips often collect beneath the work surface.
- Floor lamps: Moving a lamp can pull its cord into the cleaning path.
- Charging docks: Excess power cable near the vacuum’s own station can become an obstacle.
Pay special attention to cords in areas with heavy foot traffic. People may move them while walking through the room or using nearby devices.
These cords are the first to manage because they’re common, exposed, and easily caught during routine vacuuming.
Also inspect beneath sofas, beds, and cabinets. A cable may look safely hidden from above while remaining directly in the robot’s path.
Repeat this inspection after rearranging furniture or adding electronics.
Clear the Floor Before Each Cleaning
Removing loose items before each cleaning cycle is the simplest way to prevent cord tangles. Even a robot with obstacle detection may miss a thin cable lying flat on the floor.
Use this quick preparation routine:
- Pick up phone chargers, headphones, and other loose cables.
- Remove toys, shoes, clothes, and similar items from the cleaning path.
- Check corners and spaces beneath furniture for hidden wires.
- Move temporary electrical cords away from the robot’s route.
- Confirm that permanent cables remain secured before starting the vacuum.
Look for cords hanging from a desk or table. A side brush may catch a cable even when most of it sits above the floor.
For scheduled cleaning, prepare the room before leaving home. Otherwise, a charger dropped after the last cleaning may become the next obstacle.
A clear floor also helps the robot reach more of the room instead of repeatedly working around clutter.
Bundle Loose Cords With Cable Ties
Reusable cable ties and hook-and-loop straps keep loose wires together and reduce the number of cables exposed to your robot vacuum.
They work particularly well behind desks, TV stands, and entertainment centers.
- Unplug the devices when needed before reorganizing their cables.
- Separate cables by device or destination.
- Gather excess length into loose, manageable bundles.
- Secure each bundle with an adjustable tie or strap.
- Attach the bundle to furniture or a suitable cable holder above the floor.
Do not pull ties so tightly that they crush or sharply bend the cables. Leave enough flexibility for normal movement and future adjustments.
Adjustable or reusable cable ties keep cords flexible, making future changes easy without waste or hassle.
Bundling alone is not always enough. A bundle resting on the floor can still become tangled in a robot’s wheels or brushes.
Lift it out of reach using clips, hooks, or a suitable cable management tray.
Inspect the bundles regularly for worn insulation, fraying, and loose fasteners. Replace damaged cables rather than hiding the damage inside a sleeve.
Recommended Products
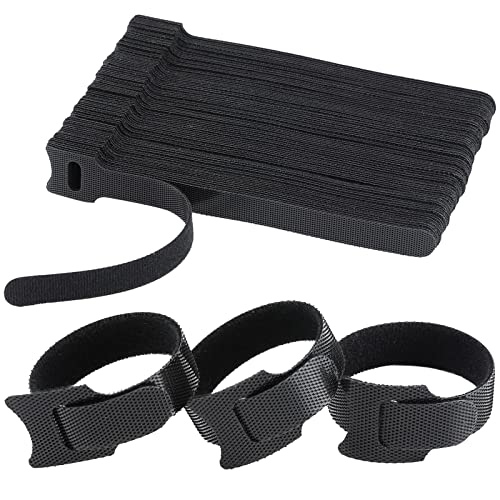
One pack gives you 120 ties, enough to tidy cords across a home office, a desk setup or an entertainment center

INSTANT ORGANIZATION: Our pre-cut ties make cable management a breeze. Just insert the end through the slot, pull tight, and enjoy a secure hold every time!

Secure Locking Buckle : With a secured buckle(thickness:0.33") desgin, our lamicall silicone cable ties makes you easier to roll the strap to be bundled. The cord tie organizer is more secure while fastening the cables exactly where you want them. Even when loosened, the cords will not eay to fall off
Use Cord Covers Along Walls
Cord covers provide a fixed route for cables that cannot be removed from the room. They keep loose wires contained and reduce the chance of a robot vacuum pulling them into its cleaning path.
Wall-mounted cable raceways are especially useful along baseboards and behind furniture.
Recommended Products

Passing the UL94 V-0 Rating test, a plastics flammability standard released by Underwriters Laboratories of the United States, UL94 V-0 Rating is defined as Burning stops within 10 seconds on a vertical part allowing for drops of plastic that are not inflames, which means it's safer than ordinary materials because of the higher flame retardancy and brings greater security to your daily use

1.18in Width x 0.59in Height, can accommodate 3x 0.18in (4.5mm) outer diameter cords for example

Kit Content: Each cable raceway comes with dimensions of 0.57 inch inner height, 0.96 inch inner width, ensuring a total length of 116 inches. The cable cover channel kit includes 6 couplings, 2 L-elbows, 1 T-fattings & 1 instruction, for maximum cable concealment
Install Wall Cord Covers
A wall cord cover, also called a cable raceway, encloses cables along a wall or baseboard. It creates a tidier cable route and keeps wires from hanging onto the floor.
For a simple installation:
- Measure the route from the device to its power source.
- Choose a cover with enough room for the cables.
- Clean the mounting surface and let it dry.
- Attach the cover with its supplied adhesive or mounting hardware.
- Place the cables inside and close the cover securely.
Choose a cover that fits the room’s layout and does not interfere with the vacuum’s cleaning route.
Do not force too many cables into a narrow channel or sharply bend them at corners.
Hide Loose Wire Runs
Route long cable runs behind furniture or along the wall instead of leaving them across open flooring.
For a TV stand, gather the cables at the back, guide them into a raceway, and keep excess length above the robot’s reach.
Adhesive-backed covers offer a simple option when you do not want to drill into furniture or walls. Some models can also be painted to match the surrounding surface.
Where cables must cross a walkway, use a purpose-made floor cable protector suitable for the cable and location.
Avoid creating a raised edge that the robot repeatedly climbs or catches.
Warning: Never hide electrical cords beneath rugs or carpets, pinch them under furniture, or run them through doorways where they can suffer damage. Follow the cable and cover manufacturers’ instructions, and never overload a power strip.
The U.S. Fire Administration’s electrical safety guidance recommends replacing damaged cords and avoiding locations where cables can become pinched or worn.
Protect High-Traffic Edges
Cables along busy room edges need secure mounting because furniture movement and foot traffic can loosen them.
Use this checklist:
- Choose wall-mounted cord covers when possible.
- Secure excess slack with suitable cable clips.
- Keep cable runs away from moving furniture parts.
- Check that adhesive covers remain firmly attached.
- Reinspect the route whenever furniture moves.
Do not use ordinary tape as a permanent electrical cord protector. It may peel away, leave the cable exposed, or fail to prevent damage.
A secure wall-mounted route keeps the cable out of the vacuum’s reach without creating another obstacle.
Lift Chargers and Power Strips Off the Floor
Mounting chargers and power strips above the floor removes a common source of robot vacuum tangles. A charging cable can still hang down, so secure the entire cable route rather than just the power strip.
Suitable locations include the back of a desk, a shelf, or a designated mounting point behind furniture.
- Choose a secure mounting location that remains accessible.
- Use the power strip’s approved mounting method or a suitable holder.
- Route its supply cord without pinching or sharply bending it.
- Secure loose charging cables with clips or straps.
- Check that no cable loops hang into the cleaning path.
Use hooks and clips to support cables, not to suspend heavy electrical equipment by its power cord.
Keep power strips accessible for inspection and follow their mounting and ventilation instructions.
Do not cover them with fabric or overload their outlets.
If a hook loosens or a cable begins to sag, secure it again before the next cleaning cycle.
Recommended Products

【12 IN 1 Power Strip Surge Protector】- The 3-side power strip features 12AC widely spaced outlets (1625W/125V/13A), 5 feet power cord, 900 Joules surge protector and overload protector switch protects against spikes and fluctuations.
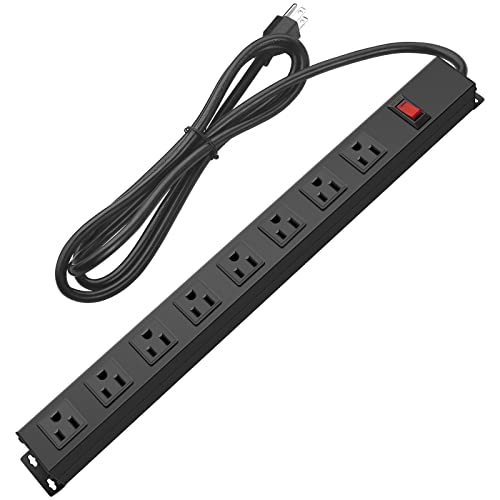
Metal Wide Spaced Power Strips: It has 8 wide spaced outlets, the distance between the sockets is 0.55inch, which is very suitable for large plugs, with screw holes and 4 screws to help mount, great addition to the workbench.

Power Strip with USB: This power strip transforms a regular wall outlet into 5 grounded AC outlets, plus 2 USB-A and 2 USB-C charging ports, providing power and charging for up to 9 devices. Maximum power: 1875W, 125V/15A, AC 100-250V. Each USB-A port supports a maximum output of 2.4A, while the USB-C port supports up to 3A. The total USB output is 3.0A/15W
Hide TV and Desk Cables
TV and desk areas often contain several cables in a small space. Combining furniture-mounted clips, cable sleeves, and management boxes keeps these wires accessible without leaving them on the floor.
Start with the cables that hang lowest, then organize the remaining slack.
Tuck Cords Behind Furniture
Routing cables behind a desk or entertainment center keeps them away from open floor space. However, simply pushing loose wires behind furniture does not guarantee protection.
The robot may still reach them from the side or underneath.
- Move the furniture enough to access the cables safely.
- Gather loose wires into separate bundles.
- Route them along the rear or underside of the furniture.
- Use clips or hooks to keep the bundles elevated.
- Confirm that furniture legs and moving parts do not pinch the cables.
For desks with adjustable height, leave enough cable slack for the desk’s full movement without allowing a loop to rest on the floor.
Check the setup after adding equipment or moving the furniture.
Use Cable Management Boxes
Cable management boxes collect excess cord length and keep loose wires from spreading beneath a TV stand or desk.
They are useful when several chargers or electronic devices share the same area.
Choose a box that fits the intended cables and electrical equipment without forcing plugs or adapters into tight spaces.
Look for suitable cable openings and ventilation, particularly when the box will contain a power strip or charging equipment.
Place the box where it cannot tip, obstruct ventilation, or become an obstacle itself.
A box resting on the floor may still be pushed or struck by the vacuum. An elevated or secured location offers better protection.
Follow the power strip and enclosure manufacturers’ instructions. Do not place electrical equipment inside an enclosure that is not suitable for it.
Bundle Loose Desk Wires
Desk wires should follow an organized route from each device to its power source. This reduces loose loops beneath the desk and makes future changes easier.
Use the following arrangement:
- Group cables according to the devices they serve.
- Fasten each group with reusable straps.
- Guide the bundles along the rear or underside of the desk.
- Keep extra cable length inside a suitable sleeve, tray, or management box.
For cables that need regular access, such as phone chargers, attach a clip near the desktop edge. The charging connector can remain within reach without allowing the cable to fall onto the floor.
Recheck the setup after changing devices or moving the desk.
Create App-Based No-Go Zones
A no-go zone tells a compatible robot vacuum to avoid a selected area on its saved map. It is useful around permanent cable clusters, power strips, and spaces behind furniture.
Feature names vary by manufacturer. Some models use no-go zones, Keep Out Zones, virtual walls, or physical boundary strips.
To set up an app-based zone:
- Open your vacuum’s app and select its saved floor map.
- Find the no-go zone or restricted-area feature.
- Draw a boundary around the cable hotspot.
- Leave enough room between the boundary and exposed cables.
- Save the map and run a short supervised cleaning test.
The following table shows where these zones can help.
| Area | Action | Result |
|---|---|---|
| Behind TV stands | Mark the cable cluster as a no-go zone | Reduces contact with exposed wires |
| Under desks | Adjust the boundary around permanent cables | Keeps more safe floor space available |
| After furniture moves | Review and update the saved map | Maintains appropriate cleaning boundaries |
According to iRobot’s obstacle review guidance, temporary items such as charging cords can be treated differently from permanent hazards such as power strips and entertainment center wiring.
Do not assume every robot vacuum supports these features. Check your model’s available controls before relying on them.
Also, remember that obstacle detection and virtual boundaries are not substitutes for physically removing dangerous items.
A thin cable may be difficult for a robot to detect, even when the machine has an advanced navigation system.
Review your boundaries after remapping, moving the dock, or changing the room layout. Make sure the robot can still reach its charging station.
Move Water Bowls Out of Reach
Keep pet water bowls and other liquid sources outside your robot vacuum’s cleaning path. A robot may bump a bowl or spread spilled water across the floor.
This is especially important when nearby cables, chargers, or power strips could come into contact with moisture.
Place Bowls on Mats
A non-slip mat helps keep a pet bowl steady and catches small spills. However, a mat alone does not prevent the robot from reaching or pushing the bowl.
For a safer feeding area:
- Choose a stable bowl with a non-slip base.
- Place it on an easy-to-clean mat.
- Move the feeding station outside the cleaning route when possible.
- Consider a raised or spill-resistant bowl if it suits your pet.
- Keep nearby electrical cords and equipment away from possible spills.
Clean and dry the mat regularly so trapped moisture does not remain beneath it.
If the robot can still reach the bowl, use an appropriate boundary rather than relying on the mat alone.
Set Water Zones Clear
Keep the robot away from pet bowls, plant trays, and other areas where water may collect.
If your model supports no-go zones, mark the area around the water source on its map.
For models without this feature, use a stable physical barrier or keep the room closed during cleaning.
Philips also identifies liquids and wet areas as locations to avoid in its robot vacuum troubleshooting guidance.
Before each run, wipe up spills and check that water containers remain stable.
Do not allow a standard dry robot vacuum to travel through spilled water.
Test Robot Vacuum Cord Hotspots
After organizing your cables, run a short supervised cleaning test. Watching the robot move through previously cluttered areas helps reveal remaining snag points.
Pay close attention to desk legs, furniture corners, charging stations, and entertainment centers.
- Identify the locations where cords previously caused trouble.
- Confirm that visible loose wires have been secured or removed.
- Start a short cleaning cycle while remaining nearby.
- Watch for cables that move, hang too low, or approach the brushes.
- Stop the robot if a cable becomes trapped.
- Adjust the cable route or no-go zone before testing again.
A smartphone can help record the robot’s path. Review the footage to identify cables that were difficult to see during the run.
Some robot vacuums also offer obstacle image review. On supported models, the manufacturer’s obstacle detection documentation explains how the robot can identify objects such as cords and present images for review.
These features depend on the model and its settings.
For temporary low-voltage cables, suitable cord clips or covers may prevent movement. Avoid using tape to conceal damaged wiring or hold mains power cords beneath rugs.
Repeat the test when adding devices or changing furniture placement.
If a hotspot remains difficult to manage, exclude it from cleaning until the cables have been secured properly.
Free a Tangled Cord Safely
If a robot vacuum catches a cable, stop the cleaning cycle immediately. Do not pull the wire while the brushes or wheels can still move.
Work carefully because a tightly wrapped cord can damage both its own insulation and the vacuum’s moving parts.
Warning: Turn off the robot and unplug the trapped electrical cable from its power source before removing it. Never cut an energized cord. If the cable is damaged, do not reconnect or reuse it until it has been safely replaced or repaired as appropriate.
Follow these steps:
- Stop the vacuum and switch it off according to its manual.
- Disconnect the trapped cable from the outlet and attached equipment where possible.
- Turn the robot over on a stable surface.
- Identify whether the cable is wrapped around a wheel, side brush, or main brush.
- Gently unwind any loose sections without pulling against the robot’s wiring or components.
- If needed, remove the main brush following the manufacturer’s instructions.
- Inspect the cable, brush, wheels, and surrounding parts before reassembly.
If the cord is tightly wound and cannot be freed, scissors or a seam ripper may be used only after the cable is fully disconnected from power.
Cut the trapped cable only when necessary, keeping the tool away from the vacuum’s body and internal wiring. Do not reuse a cut cable.
Manufacturer procedures vary. For example, iRobot’s main brush maintenance instructions explain how to remove the brush and clear trapped debris on supported models.
After removing the obstruction, check for:
- Cuts, fraying, or exposed conductors on the cable.
- Bent or damaged brush components.
- Debris trapped around wheel axles.
- Brushes that no longer rotate as expected.
- Unusual sounds or error messages when the robot restarts.
Replace damaged cables. If the vacuum has damaged parts or continues reporting a brush or wheel error, consult its manual or contact the manufacturer before using it again.
Key Takeaways
- Pay special attention to cables beneath desks, behind TV stands, and near the charging dock.
- A cable bundle must remain above the cleaning path; bundling wires on the floor does not eliminate the hazard.
- Smart obstacle detection varies by model and may miss thin wires.
- Use no-go zones for permanent cable hotspots, but do not rely on software alone to prevent electrical hazards.
- Never pull or cut a trapped electrical cable while it remains connected to power.
Frequently Asked Questions
How to Keep a Vacuum Cord Out of the Way?
Keep the cord along a wall or furniture edge using suitable cable clips, ties, or covers. Bundle excess length and prevent loose loops from reaching the floor. For a robot vacuum, use no-go zones where supported and keep its charging dock cable secured.
What Are Some Clever Ways to Hide Cords?
Use baseboard cable covers, adhesive clips, furniture-mounted cable trays, or suitable cable management boxes. Route TV and desk wires behind furniture while keeping them elevated. Decorative covers can also blend with the room, provided they do not pinch cables or obstruct ventilation.
Should You Leave Your Robot Vacuum Plugged in All the Time?
Leaving a robot vacuum on its charging dock is generally appropriate for regular use when the manufacturer recommends it. Keep the station properly positioned and its cable secured. For extended storage, follow your model’s battery and charging instructions.
What Are the Most Common Problems With Robot Vacuums?
Common problems include tangled brushes, blocked wheels, navigation errors, weak suction, and battery or charging issues. Loose cords and floor clutter can also interrupt cleaning. Regular maintenance, clear routes, and properly configured navigation settings help reduce these problems.
Can Robot Vacuums Detect Charging Cables?
Some robot vacuums can detect and avoid charging cables, but the ability depends on the model and its sensors. Thin cables lying flat may still go unnoticed. Removing or securing cables before cleaning is safer than relying entirely on obstacle detection.
Can You Use Tape to Keep Cords Away From a Robot Vacuum?
Tape may temporarily secure a suitable low-voltage cable, but it is not a replacement for proper cable management. Use clips, raceways, or purpose-made cord protectors for a lasting solution. Never tape over damaged wiring or hide electrical cords beneath rugs.
Conclusion
Keeping cords away from a robot vacuum works best when you combine cable organization with a clear cleaning route. Secure permanent wires, remove loose chargers, and use no-go zones where available.
Start with the areas beneath desks and behind entertainment centers. Once those hotspots are safe, a short supervised test run can confirm whether your robot has a clear path.
Sources
- eufy Support: Robot Vacuum Cable Entanglement: Explains why thin cables may be difficult to detect and recommends removing cables, cable management, and no-go zones.
- U.S. Fire Administration: Appliance and Electrical Fire Safety: Supports electrical cord inspection, safe cable placement, and power strip precautions.
- iRobot Support: Obstacle Review and Keep Out Zones: Explains temporary obstacles and permanent restricted areas.
- iRobot Support: Camera, PrecisionVision, and Obstacle Image Review: Explains cable detection and model-dependent obstacle recognition.
- Philips Support: Robot Vacuum Troubleshooting: Covers cable hazards, restricted cleaning areas, and keeping robots away from liquids.
- iRobot Support: Main Brush Maintenance: Provides manufacturer guidance for removing brushes and clearing trapped debris.
- eufy Support: Leaving a RoboVac on Its Charging Base: Explains regular charging and extended-storage recommendations.