
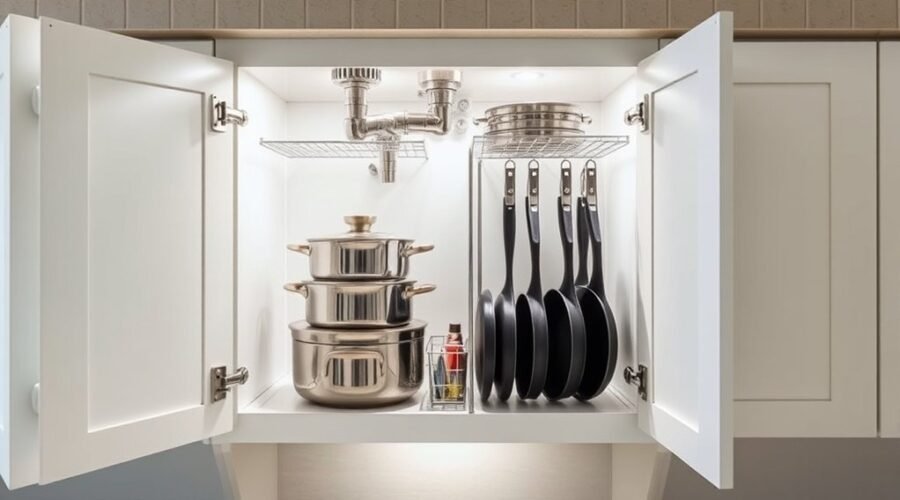
Storing pots and pans under the sink frees up prime cabinet space in a small kitchen, provided you protect your cookware from plumbing moisture and household chemicals. Because a standard 24-inch-deep sink base cabinet is split by a drain pipe, P-trap, and water supply lines, tossing cookware inside without a plan quickly creates a noisy, hard-to-reach pile. With a waterproof base mat, chemical-free storage rules, and vertical dividers sized around your plumbing, you can turn this awkward cabinet into a clean, accessible cookware zone.
Quick Answer
You can safely store pots and pans under the sink by removing all chemical cleaners, laying down a waterproof silicone mat, and installing vertical lid racks or pull-out wire organizers on the open sides of the P-trap. Keep stainless steel and anodized aluminum here, store pots upside down, and keep rust-prone raw cast iron in a dry upper cabinet.
Last checked: October 17, 2026. Dates and figures were verified against official sources.
At a Glance
| Time Required | 45 to 90 minutes (including clearing, cleaning, and installing racks) |
| Difficulty | Easy (freestanding racks) to Moderate (screw-mounted pull-out slides) |
| Tools Needed | Tape measure, flashlight, waterproof under-sink mat, and Phillips screwdriver |
| Cost | $8 to $35 for freestanding racks; $60 to $230 for heavy-duty pull-out systems |
Why Store Pots and Pans Under the Sink?
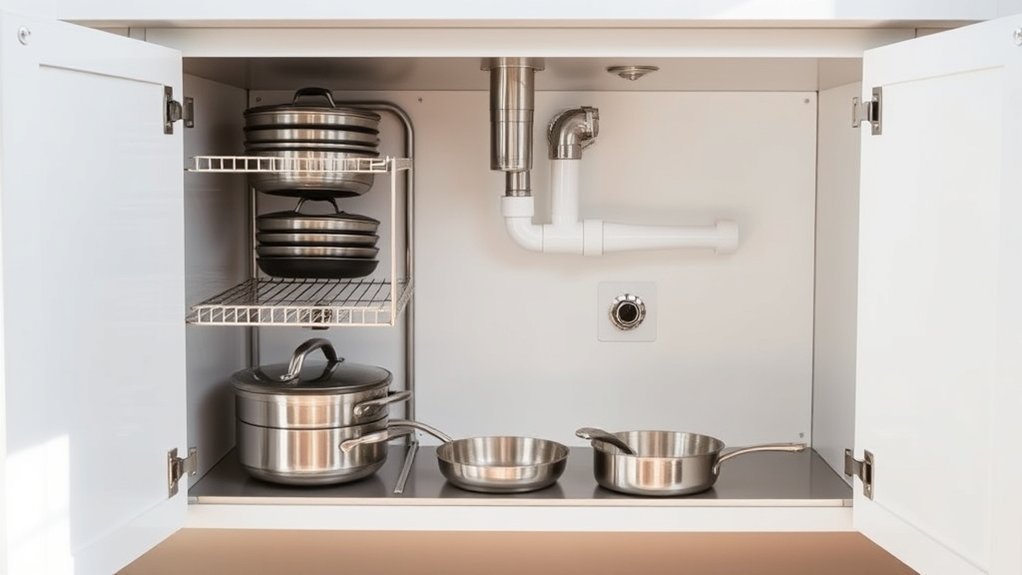
Storing pots and pans under the sink reclaims 30 to 36 inches of wide base cabinet space that is often wasted on half-empty spray bottles and plastic bags. Moving bulky stockpots, saucepans, and skillets into this lower zone frees up eye-level upper cabinets and countertops for daily food prep.
Standard kitchen base cabinets measure 24 inches deep and 34.5 inches tall before the countertop is installed. Even after accounting for an 8- to 10-inch-deep sink basin, a garbage disposal, and the curved P-trap pipe, you typically have 14 to 18 inches of vertical clearance on one or both sides of the drain and up to 22 inches of usable depth.
Keeping heavy cookware in this lower cabinet also improves kitchen ergonomics. Because the sink sits next to the dishwasher and usually within a step or two of the stove, storing cookware here lets you unload clean pots straight from the drying rack or dishwasher without lifting heavy metal above shoulder height.
Clear Out the Under-Sink Cabinet
Before placing a single pan inside, empty the under-sink cabinet completely, relocate all cleaning chemicals, and inspect the plumbing for moisture. Preparing the cabinet properly protects your cookware from contamination and water damage. Follow these five steps to reset the space:
- Remove every item and relocate chemicals: Take out all sponges, trash bag rolls, and cleaning bottles. Never keep bleach, drain openers, or dishwasher pods in the same cabinet as pots and pans. Follow US Environmental Protection Agency (EPA) household hazardous waste guidelines and Poison Control guidelines on automatic dishwashing detergents, which note that liquid dishwasher detergents have a corrosive alkaline pH between 10 and 13 and belong in a separate, latched cabinet away from foodware.
- Perform a plumbing leak and condensation test: Fill the sink basin with warm water, pull the stopper, and run the garbage disposal for 15 seconds. Shine a flashlight on the P-trap slip nuts, the dishwasher drain hose loop, and the hot and cold shutoff valves, then wipe a dry paper towel along each joint to confirm zero drips.
- Scrub and dry the cabinet floor: Wash the cabinet interior with warm soapy water and wipe it completely dry. According to the EPA mold and moisture prevention guide, damp surfaces must be dried within 24 to 48 hours and indoor relative humidity kept below 60% (ideally 30% to 50%) to prevent mold spores from growing on cabinet wood.
- Install a lipped waterproof mat: Lay down a non-absorbent silicone or heavy-duty vinyl under-sink mat with a raised ½-inch to 1-inch perimeter lip. Unlike cloth liners that trap dampness, a lipped silicone tray catches accidental drips and keeps pot bottoms off the wood floor.
- Measure your usable zones: Use a tape measure to record the exact width, depth, and height on the left and right sides of the P-trap, plus the distance from the cabinet floor to the bottom of the sink bowl.
Warning: Never store chemical cleaners, aerosol sprays, or bleach in the same under-sink cabinet as your cookware. Fumes and slow bottle leaks can leave toxic residues on cooking surfaces, and mixing leaked acid cleaners with bleach releases dangerous chlorine gas.
Best Under-Sink Organizers for Cookware
Tiered shelves, full-extension pull-out racks, and expandable stainless steel dividers are the most effective under-sink organizers because they work around drain pipes while bringing back-corner pans within easy reach. Instead of unstacking four heavy pots to grab the skillet on the bottom, each piece slides out or stands in its own slot.
When shopping for under-sink cookware organizers, match the hardware to your cabinet opening and the weight of your pans:
| Organizer Type | Required Clearance | Best Cookware Match | Typical Price (US) |
|---|---|---|---|
| Expandable Stainless Steel Rack (e.g., IKEA VARIERA) | 3.25 to 19.75 in. long × 5.75 in. wide × 4 in. high (plus lid height) | Pot lids, light skillets, sauté pans, and baking sheets | $7.99 to $18 |
| Two-Tier Pull-Out Wire Rack (e.g., Rev-A-Shelf 5CW2) | 11.5 in. wide × 22 in. deep × 22 in. high minimum opening | Heavy saucepans, Dutch ovens, and up to 7 lids on the top tier (100 lb slide rating) | $150 to $226 |
| Single-Tier Sliding Base Caddy | 9 to 14 in. wide × 18 to 21 in. deep × 12 in. high | Medium stockpots and nested mixing bowls beside a low P-trap | $35 to $85 |
| Heavy-Duty Lazy Susan Turntable | 12 to 18 in. diameter circle on one side of the cabinet | Small saucepans, colanders, and steamer inserts in corner sink bases | $18 to $40 |
Stackable open-front bins and adjustable tension dividers also work well if you rent and cannot drill into the cabinet floor. In corner sink cabinets, an 18-inch lazy Susan turntable eliminates dead zones so you can spin small pots to the front with one finger.
Recommended Products
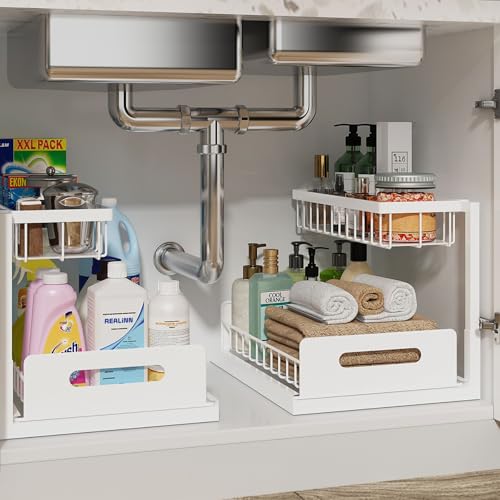
【L-SHAPED DESIGN FITS AROUND PIPES AND GARBAGE DISPOSALS】 The narrow top basket mounts left or right to clear your plumbing. The wide lower tier reclaims full vertical space under the sink, turning a blocked corner into organized, easy-to-use cabinet storage.

Sliding basket for easy access in limit space and stackable design. (Buy 2 sets and stack them together.)
How to Store Pots, Pans, and Lids
Smart under-sink cookware storage relies on separating pots, skillets, and lids into dedicated vertical and horizontal zones. Storing lids separately in a vertical rack lets you nest or shelve pots tightly without lids sliding onto the cabinet floor every time you open the door.
Smart Pot Storage
Divide your under-sink cabinet into three clear zones based on plumbing clearance: the left side bay, the center drain area, and the right side bay. If your garbage disposal hangs on the left side, mount a pull-out rack or tiered shelf on the wider right side where you have the full 16 to 22 inches of vertical height.
For permanent, heavy-duty storage on the clear side of the cabinet, a screw-in system like the Rev-A-Shelf 5CW2 Series two-tier cookware organizer ($225.99) uses 100-pound-rated full-extension ball-bearing slides and fits into a minimum 11.5-inch-wide by 22-inch-deep cabinet opening. If your cabinet is shallower or blocked by low shutoff valves, stand large frying pans on end in a freestanding vertical peg rack beside the sink basin.
Pro Tip: Always store pots and saucepans inverted (upside down) on under-sink shelves, and never place a pot directly below the P-trap slip joint. Storing cookware upside down follows commercial sanitation standards in the 2022 FDA Food Code (Sections 4-903.11 and 4-903.12), keeping dust and accidental condensation drips out of the inside cooking surface.
Lid Organization Ideas
Keep pot lids quiet and upright by placing a freestanding stainless steel rack in the shallower 10- to 12-inch center zone directly in front of the P-trap. The IKEA VARIERA stainless steel pot lid organizer ($7.99) expands from 3.25 inches to 19.75 inches long (5.75 inches wide and 4 inches tall) with synthetic rubber feet that prevent sliding and rust in humid cabinets.
You can also reclaim the empty space on the back of your cabinet doors by hanging over-cabinet or screw-mounted door lid holders. Before mounting a door rack, measure the gap between the closed cabinet door and the front edge of the sink bowl and P-trap—most door-mounted lid racks need 3 to 4 inches of interior depth clearance so the door can shut fully without hitting your pots.
Store Bulky and Odd-Shaped Cookware
Bulky stockpots, woks, and odd-shaped roasting pans fit best when you match both their size and their metal type to the right storage spot. While tall pantry shelves handle oversized 12-quart stockpots that cannot clear under-sink plumbing, medium Dutch ovens and skillets can live under the sink if their material tolerates occasional humidity.
Bulky cookware fits best on tall shelves or vertical dividers where height creates order, protects finishes from scratches, and frees valuable cabinet space near the stove.
Before placing specialty cookware under the sink, check how each material reacts to cabinet moisture:
| Cookware Material | Under-Sink Suitability | Moisture & Care Requirements |
|---|---|---|
| Stainless Steel | Excellent | Corrosion-resistant and non-absorbent; dry after washing and store inverted on racks. |
| Hard-Anodized Aluminum & Nonstick | Good | Resists rust; use vertical dividers or felt pan protectors so metal handles never scratch nonstick coatings. |
| Enameled Cast Iron | Fair (with rim care) | Porcelain resists moisture, but the exposed iron rim can rust; oil the rim lightly and use bumper protectors to prevent chipping. |
| Raw Cast Iron & Carbon Steel | Not Recommended | High risk of flash rust from pipe condensation; store in a dry upper cabinet, oven, or pantry shelf instead. |
If you store an enameled Dutch oven under the sink, follow the Lodge Cast Iron enameled care guide: dry the pot thoroughly, rub a tiny amount of cooking oil around the exposed iron rim to seal out dampness, and place rubber or felt pot protectors under the lid to allow airflow and prevent enamel chips.
Make Under-Sink Storage Easy to Reach
Organize your under-sink layout by cooking frequency so your everyday skillet and 3-quart saucepan sit at the very front of the cabinet. Reserve the deeper 12 to 24 inches at the back of the cabinet for seasonal cookware like stockpots, canning racks, or steamer baskets.
Keep cookware handles pointed toward the cabinet opening and angle them slightly away from the center stile so they never snag on the door hinges. Use these three layout rules to make every pan easy to grab without kneeling on the kitchen floor:
- Divide vertical space with adjustable shelves: Set your lower shelf height at 8 to 10 inches for heavy pots and use the upper tier for shallow frying pans and sauté pans.
- Keep heavy cookware at floor level: Place 8- to 15-pound Dutch ovens and multi-ply stockpots on bottom pull-out slides or directly on the silicone mat at the front of the cabinet to protect your lower back.
- Frame the center plumbing with lids and skillets: Stand large skillets upright along the outer cabinet walls and tuck a low-profile lid rack in the center space below the P-trap.
Tips for an Organized Setup That Lasts
Maintaining an organized under-sink cookware cabinet takes less than five minutes a month when you dedicate the space strictly to pots, pans, and lids. Once cleaning bottles, extra sponges, and trash bags have their own home in a utility closet or high cabinet, the under-sink zone stays clean and dry.
Follow a simple 60-second monthly check to keep your setup working smoothly:
- Dry cookware 100% before putting it away: Never put a damp pot away under an enclosed sink cabinet, where trapped moisture can raise relative humidity above 60%.
- Add a battery-powered water leak sensor: Set a compact Wi-Fi or audible leak detector ($12 to $25) on the back corner of the waterproof mat next to the water supply valves so you hear an alert the moment a fitting weeps.
- Audit the cabinet every six months: Remove warped pans, orphan lids that no longer match a pot, and scorched nonstick skillets so your racks never become overcrowded.
Frequently Asked Questions
What Are Some Clever Ways to Store Pots and Pans?
The cleverest ways to store pots and pans include installing full-extension pull-out wire racks, using expandable stainless steel lid dividers like the IKEA VARIERA, mounting over-the-door lid holders, and adding tiered corner shelves. Separating lids from pots lets you store skillets vertically on end so you can lift any pan out without unstacking a pile.
Can You Store Pots and Pans Under the Sink?
Yes, you can safely store pots and pans under the sink as long as the plumbing is leak-free and you move all household cleaners, bleach, and dishwasher detergents to another cabinet. Lay down a lipped waterproof silicone mat, store pots upside down away from the center drain pipe, and stick to moisture-resistant materials like stainless steel and hard-anodized aluminum.
What Are Some Smart Ways to Organize Under the Kitchen Sink?
Smart under-sink organization splits the cabinet into three zones around the P-trap and garbage disposal. Place a two-tier pull-out rack on the wider, unobstructed side for pots, set an expandable lid rack in the shallow center space, and use a lazy Susan turntable or vertical pan divider on the opposite side.
What Are Some Common Mistakes to Avoid When Organizing Under Sink Storage?
The biggest mistakes are storing toxic cleaning chemicals next to cookware, failing to measure around the P-trap and shutoff valves before buying organizers, and storing raw cast iron skillets in a humid sink cabinet where they can rust. Skipping a waterproof mat and stacking heavy pots without dividers also leads to scratched coatings and cabinet water damage.
How Do You Keep Cookware Clean and Dry Under the Kitchen Sink?
Keep cookware clean and dry by placing a raised-lip silicone mat on the cabinet floor, wrapping cold-water supply pipes with foam insulation if they sweat in summer, and storing every pot upside down or with its lid on. Placing a small moisture absorber or leak alarm near the back wall also alerts you to plumbing drips before mold can form.
Conclusion
Storing pots and pans under the sink works best when you treat the cabinet as a clean, dry cookware zone rather than a catchall for household cleaners. Start today by emptying the cabinet, testing the drain pipes for drips, and measuring the open space on both sides of your P-trap so you can choose a waterproof mat, lid rack, and pull-out organizer that fit on the first try.
Sources
- US Environmental Protection Agency (EPA) – Household Hazardous Waste (HHW): Guidelines on keeping household cleaners and hazardous chemicals separate from food and kitchenware areas.
- National Capital Poison Center (Poison Control) – Automatic Dishwashing Detergents: Alkaline pH levels (pH 10 to 13) of dishwashing detergents and safe cabinet storage away from food items.
- US Environmental Protection Agency (EPA) – A Brief Guide to Mold, Moisture and Your Home: Drying wet areas within 24 to 48 hours and maintaining indoor relative humidity below 60% (ideally 30% to 50%).
- IKEA US – VARIERA Pot Lid Organizer: Stainless steel material specifications, expandable dimensions (3.25 to 19.75 inches long), and US retail pricing ($7.99).
- Rev-A-Shelf – 5CW2 Series Two-Tier Cookware Organizer: Minimum base cabinet opening dimensions (11.5 inches wide by 22 inches deep), 100 lb ball-bearing slide rating, and pricing ($225.99).
- Lodge Cast Iron – Cleaning & Care for Enameled Cast Iron: Preventing rim rust in damp storage areas with cooking oil and using pot protectors to prevent moisture buildup and chipping.
- U.S. Food and Drug Administration (FDA) – 2022 Food Code: Sanitary storage principles for clean cookware and utensils (Sections 4-903.11 and 4-903.12), including inverted storage and protection from overhead plumbing drips.