
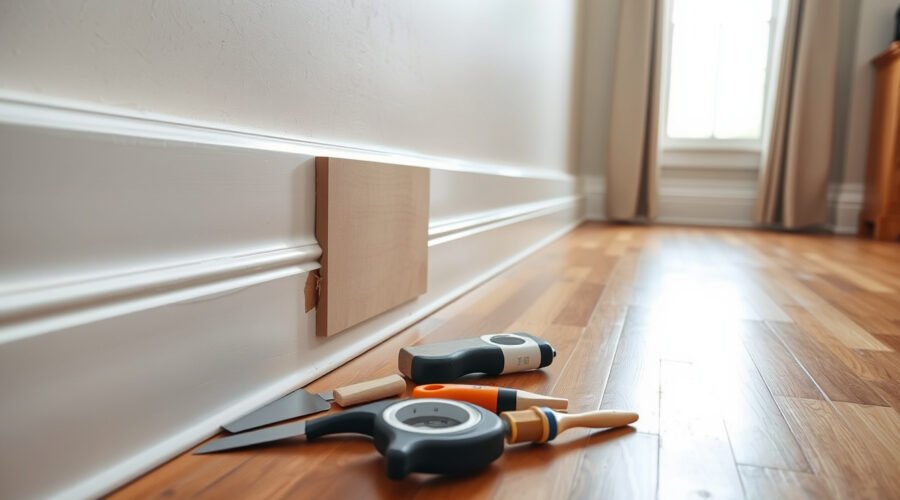
Scuffed, gouged, or chipped trim can make an entire living room look worn down, even when the walls and floors are spotless. Learning how to repair damaged baseboards on the wall saves you the hassle of prying off long trim runs, breaking paint seals, and re-cutting tricky mitered corners. Whether you are dealing with shallow pet scratches, a vacuum-cleaner dent, or a crushed corner that needs a recessed wood patch, matching the right repair method to your baseboard material will give you a durable, invisible finish.
Quick Answer
To repair damaged baseboards, match the method to the depth of the damage: fill dents and nail holes under 1/4 inch deep with wood filler or two-part polyester putty, glue a fitted wood or MDF patch into gouges 1/4 inch or deeper, and replace rotten or swollen boards. Sand flush, caulk, prime, and paint.
At a Glance
| Time Required | 1–3 hours of active work, plus 30 minutes to 24 hours for filler, glue, caulk, and primer curing |
| Difficulty | Beginner for filler and spackle repairs; intermediate for routed dutchman patches or stained wood trim |
| Tools Needed | Tape measure, combination square, utility knife, 1-1/2-inch putty knife, 1/2-inch bevel-edge chisel, sanding block (120-, 180-, and 220-grit), clamps or painter’s tape, caulk gun, 2-inch angled sash brush, HEPA vacuum, and optional router with a 1/4-inch straight bit |
| Cost | $10–$40 for filler, caulk, sandpaper, and adhesive if you own basic hand tools; $50–$120 if buying primer, trim paint, two-part filler, or replacement trim |
When Should You Patch, Fill, or Replace Damaged Baseboards?
Choose your baseboard repair method by measuring the depth and length of the damage and checking whether the core material is still firm. Shallow surface flaws under 1/8 inch deep only need spackle or wood filler, whereas gouges 1/4 inch or deeper require either a two-part rebuilding filler or a fitted wood patch (often called a dutchman patch). If the trim is soft, swollen from moisture, moldy, or split across more than 6 inches, cut out and replace the damaged section rather than patching it.
Identify whether your baseboards are solid wood (such as pine, oak, or poplar) or medium-density fiberboard (MDF) before picking a product. Solid wood can be chiseled cleanly along the grain and accepts stainable fillers. MDF has a compressed paper-like core that crumbles if chiseled aggressively and swells if water-based filler or latex paint hits raw fibers without a sealer.
| Damage Type & Size | Best Repair Method | Cure / Dry Time | Why It Works Best |
| Brad nail holes, pinholes, or scratches under 1/8 inch deep | Lightweight vinyl spackle or water-based wood filler | 1–2 hours | Wipes flush easily and sands smooth with 220-grit paper with minimal dust |
| Pet chew marks, dents, or gouges 1/8 to 1/4 inch deep | Solvent-based wood filler (layered) or two-part polyester wood filler | 30 minutes (two-part) or 2–6 hours per 1/4-inch layer | Resists shrinking and cures hard enough to hold a shaped corner or edge |
| Missing chunk, crushed profile, or gouge 1/4 inch deep and 1–6 inches long | Fitted wood or MDF dutchman patch glued into a square recess | 30–60 minutes clamped; 24 hours full cure | Restores solid backing and molded contours without thick filler cracking |
| Water swelling, dry rot, mold, or splits longer than 6 inches | Splice in a new baseboard section with 45-degree scarf joints or replace the board | 2–4 hours including caulk and paint | Patching cannot stabilize decaying wood, active moisture, or delaminated MDF |
When rebuilding a crushed outside corner or deeper gouge without cutting a wood patch, use a two-part polyester wood filler such as 3M Bondo Wood Filler. Once you mix the filler and hardener to a uniform golden color, you have 3 to 4 minutes of working time to press and contour it, and it cures hard enough to sand in 30 minutes without shrinking.
Why Patching Is Better Than Replacing Baseboards
Patching localized baseboard damage on the wall is faster, cheaper, and less destructive than prying off an entire length of trim. Removing a full baseboard breaks the caulk seal along the top edge, frequently tears drywall paper, and risks splitting adjoining inside coped joints or outside mitered corners. In older homes with custom or discontinued Colonial, ogee, or Craftsman profiles, finding a matching replacement board at a home center is often impossible without ordering custom millwork.
A glued dutchman patch or two-part filler repair keeps the original trim anchored to the wall studs and limits your work to a few inches of surface area. However, patching is the wrong choice when water leaks have caused MDF baseboards to puff up like wet cardboard, when wood rot has softened the fibers, or when the board is pulling away from the drywall across several feet. In those cases, cutting out the failed section with an oscillating multi-tool and splicing in a new piece between wall studs (typically spaced 16 inches on center) will last much longer.
Tools and Materials You’ll Need for Baseboard Repair
Having the right cutting, clamping, and finishing supplies ready before you mix filler or apply glue prevents rushed mistakes. Gather your tools based on whether you are doing a surface fill or cutting a recessed patch pocket.
- Measuring and marking: Tape measure, combination square, sharp pencil, and 1.5-inch painter’s tape
- Template material: Stiff cereal-box cardboard (for knife-and-chisel layouts) or 1/4-inch hardboard/MDF (for router template guides)
- Cutting tools: Utility knife with fresh snap-off blades, sharp 1/2-inch bevel-edge wood chisel, and a fine-tooth pull saw or miter saw for cutting the patch
- Optional power tool: Compact trim router fitted with a 1/4-inch straight bit or top-bearing flush-trim bit for uniform patch recess depth
- Application and sanding: 1-1/2-inch flexible putty knife, rigid rubber or cork sanding block, and 80-, 120-, 180-, and 220-grit sandpaper
- Dust and safety gear: HEPA vacuum or shop vacuum with a fine-dust filter bag, wrap-around safety glasses, work gloves, and a NIOSH-approved N95 respirator (or P100 half-mask respirator when lead paint may be present)
- Patch and filler materials: Matching scrap baseboard, pine, poplar, or MDF patch piece; apply wood filler in layers no deeper than 1/4 inch (such as DAP Plastic Wood) or use a two-part polyester wood filler
- Adhesives and fasteners: PVA wood glue (for wood-to-wood or MDF bonds) or polyurethane construction adhesive, plus spring clamps, painter’s tape, or a 23-gauge pin nailer (or 18-gauge brad nailer with a 1/32-inch nail set)
- Caulk and finishes: Paintable siliconized acrylic-latex caulk, shellac-based or high-hide stain-blocking primer, 2-inch angled sash brush, and matching trim enamel (typically semi-gloss or satin) or wood stain and clear polyurethane
Note: Painted baseboards hide patches easily, while stained wood trim requires careful grain and color matching. If you are repairing stained trim, test your wood filler, stain, and clear coat on a scrap piece first; if you are repairing MDF trim, always seal raw cut MDF fibers with shellac-based primer before applying water-based filler or paint so the core does not swell.
Recommended Products
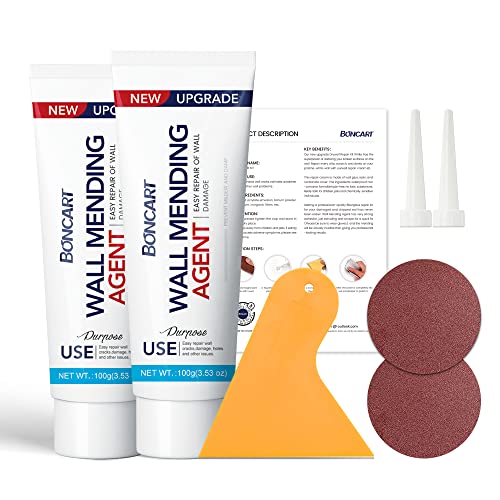
The drywall repair kit includes 2x Wall mending agent (100g), 2x Nozzle Extender, 1x Scrapers, and 2x Sandpaper.

Trim Saving - The trim removal tool has a larger, flatter and wider contact area than clumsy traditional tools and features an integrated wedged center that provides increased removal efficiency and prevents damage to both the trim and wall

MAKES REPAIRS 3X FASTER than traditional vinyl spackling
Step-by-Step Guide to Installing Baseboard Patches
Installing a recessed baseboard patch takes about 60 to 90 minutes of hands-on cutting, fitting, and gluing before drying and painting. Follow each step in order so the replacement piece sits dead-flat with the surrounding molding.
1. Inspect the Damage and Work Safely
Press firmly around the damaged section with the tip of a putty knife to verify that the surrounding wood or MDF is solid and dry. If the baseboard crumbles, feels spongy, or shows dark water staining, fix the moisture leak and replace that length of trim instead of patching it.
Warning: If your home was built before 1978, painted baseboards may contain lead-based paint. Before sanding, routing, scraping, or cutting, review the EPA’s lead-safe renovation guidance for DIYers or hire a lead-safe certified contractor. Keep children, pets, and non-workers out of the area, contain dust with 6-mil plastic sheeting, and clean with wet methods and a HEPA vacuum.
Under federal rule 40 CFR 745.83, the U.S. Environmental Protection Agency defines minor interior maintenance as disturbing 6 square feet or less of painted interior surface per room, but even small dry-sanding or routing jobs on untested pre-1978 trim can release toxic lead dust. Because peeling or chipping lead-based paint and airborne dust pose severe health risks to children and pregnant women, mist older painted trim with water before scraping or cutting and never use a standard household vacuum without a true HEPA filter. Even in newer homes, the Occupational Safety and Health Administration warns that airborne wood dust hazards from sanding and routing wood or resin-bonded MDF can irritate airways and cause allergic sensitization, so wear an N95 respirator and connect a vacuum to your tools.
2. Clean and Mark the Repair Area
Vacuum away loose splinters and dust, then scrub the baseboard around the damage with a damp cloth and a drop of mild dish soap to remove floor wax, shoe polish, or silicone residue. Slice away any loose, peeling caulk along the wall or floor line with a utility knife and let the wood dry completely for 20 to 30 minutes.
Apply 1.5-inch painter’s tape to the floor and wall immediately behind the work zone to guard against chisel slips and glue drips. Using a combination square and a sharp pencil, draw a clean rectangle or square around the damaged spot that extends 1/4 inch into solid, undamaged material on all sides.
3. Create a Template for Patching
A rigid template ensures your recessed cutout and your replacement patch share identical dimensions. Measure the penciled rectangle on the baseboard, transfer those exact dimensions onto stiff cardboard or 1/4-inch hardboard, and cut out the template window using a straightedge or jigsaw.
| Step | Action | Pro Execution Tip |
| 1 | Measure the damaged area | Extend layout lines 1/4 inch past crushed fibers into sound wood |
| 2 | Cut the template | Use cardboard for hand-chiseled outlines or 1/4-inch hardboard for a router bearing guide |
| 3 | Secure the template | Lock it down with double-sided woodworking tape or clamps so it cannot creep |
| 4 | Cut or route the opening | Match recess depth (typically 1/4 to 3/8 inch) to the exact thickness of your patch stock |
| 5 | Dry-fit the patch | Check flushness with a straightedge across the face before applying any glue |
4. Cut the Opening
Set your cutting depth to match the thickness of your patch piece—usually 1/4 inch to 3/8 inch deep so you leave solid baseboard backing intact against the wall studs. If you are working by hand, score deeply along your layout lines with a sharp utility knife using 3 to 4 firm passes to sever the paint film and surface wood fibers cleanly.
Hold a sharp 1/2-inch bevel-edge chisel with the bevel facing down to pare out waste wood in thin 1/16-inch layers, then flip the chisel vertical (flat back against the scored line) to crisp up the walls and flatten the bottom of the recess. If you use a trim router with a 1/4-inch straight bit, take shallow passes of no more than 1/8 inch at a time while keeping a shop vacuum nozzle next to the baseplate. On MDF baseboards, light passes prevent the edges from tearing or fuzzing.
5. Cut and Dry-Fit the Patch
Cut your replacement patch slightly oversized (by about 1/32 inch) from matching scrap baseboard, clear pine, poplar, or MDF of the exact same thickness. If the damaged area includes the top molded edge of the baseboard, cut your patch from a scrap piece that carries that identical router profile.
Test-fit the patch in the recess without glue, shaving or sanding the edges with 120-grit sandpaper on a rigid block until it presses in snugly by hand. Lay a combination square blade or putty knife flat across the patch and surrounding baseboard to confirm the face is completely flush—neither recessed nor sticking out.
Pro Tip: Draw an upward arrow and the letter “F” (for front) in pencil on the face of your patch before cutting. Small rectangular trim blocks are easy to flip upside down or backward, which throws wood grain and subtle profiles out of alignment.
6. Glue and Secure the Patch
Brush a thin, uniform coat of PVA wood glue across the back and edges of the recess and the back of the patch. For end-grain cuts that drink up glue, dab on a light prime coat of glue diluted with a few drops of water, wait 2 minutes, and apply your main glue layer. According to manufacturer guidance from Franklin International, you should clamp or tape an unstressed joint for 30 to 60 minutes using Titebond wood glue and allow 24 hours for a full cure before heavy machining or sanding so moisture at the glue line does not swell and later sink.
Press the patch firmly into the pocket until it seats flush, then wipe away any wet glue squeeze-out immediately with a warm, damp rag. Stretch two or three strips of painter’s tape tightly across small patches, or pin larger patches in place with one or two 23-gauge headless micro-pins (or 18-gauge brad nails countersunk 1/16 inch below the surface with a nail set).
7. Fill, Sand, and Caulk
Once the glue has cured, press wood filler or lightweight spackle across the perimeter seams and any countersunk nail holes using a 1-1/2-inch putty knife held at a 45-degree angle. Leave the filler slightly mounded (about 1/32 inch proud) to account for minor drying shrinkage. If you are repairing raw MDF, brush a quick coat of shellac primer onto exposed fibers before applying water-based filler so the edges do not puff up.
After the filler dries completely (1 to 2 hours for spackle; 2 to 6 hours for solvent or latex wood filler), wrap 120-grit sandpaper around a flat sanding block and sand level with the surrounding trim, then step up to 180-grit and finish with 220-grit. Vacuum all dust and inspect the top joint where the baseboard meets the drywall. For gaps up to 1/2 inch wide, apply a smooth 1/8-inch bead of DAP ALEX PLUS acrylic-latex caulk, tool it smooth with a damp finger within 5 minutes, and let it skin over for at least 30 minutes before painting.
8. Prime, Paint, or Stain
Never apply topcoat paint directly over raw wood patches or sanded filler, or the porous patch will absorb the paint binders and leave a dull, flat halo (“flashing”). Spot-prime the repair with a shellac-based primer-sealer such as Zinsser B-I-N, which dries to the touch in 20 minutes, permanently seals porous MDF and wood knots, and is ready for topcoating in 45 minutes.
Lightly buff the dried primer with 220-grit paper, wipe away dust with a tack cloth, and brush on two thin coats of matching semi-gloss or satin trim enamel using a 2-inch angled sash brush. To prevent a visible sheen transition in bright living-room light, feather your first coat past the patch and carry your final coat along the entire baseboard from one inside wall corner to the next. For stained baseboards, apply pre-stain wood conditioner to raw softwood patches, brush on matching oil- or water-based stain, blend the perimeter line with a fine-tip touch-up grain marker, and seal with two coats of clear satin polyurethane.
Should You Round or Square the Patch Corners?
Whether you leave rounded corners or chisel square 90-degree corners depends on whether you cut the recess with a spinning router bit or hand tools. Squared corners are faster to match when cutting a replacement patch with a straight saw blade, while rounded corners eliminate hand-chiseling inside the baseboard pocket if you round the back corners of your patch to match the router bit radius.
Rounded Corners Benefits
A spinning 1/4-inch router bit naturally leaves a 1/8-inch inside corner radius at all four corners of a patch recess. Leaving those corners rounded avoids the risk of splitting delicate wood grain or crushing brittle paint edges with a chisel. To fit the patch, simply rasp or sand a matching 1/8-inch radius onto the four corners of your replacement block until it drops smoothly into the routed pocket.
Squared Corners Advantages
Squared corners allow you to cut your replacement patch with four straight, 90-degree saw cuts and align two edges directly with the horizontal grain of the baseboard. If you routed the opening, place the flat back of a sharp 1/2-inch chisel along each layout line and tap lightly with a mallet to pare out the tiny corner radii. Squared corners also conceal vertical glue seams more cleanly along crisp, flat modern profiles.
Aesthetic Considerations Comparison
On painted baseboards, both rounded and squared corners disappear completely once the hairline joint is skimmed with filler, sanded to 220-grit, primed, and painted. On stained hardwood baseboards, however, squared corners cut parallel and perpendicular to the wood grain—or diamond/angled ends cut at 30 to 45 degrees along the grain pores—blend far better with the natural figure of the wood than rounded corners.
Expert Tips for an Invisible Baseboard Patch Finish
Professional finish carpenters rely on grain orientation, beveled test fits, and raking-light inspections to make baseboard repairs undetectable from a standing or seated view. Apply these three carpentry techniques to elevate your final result.
Template Creation Techniques
If you use a router with a top-bearing flush-trim bit, make your template from 1/4-inch MDF or Baltic birch plywood rather than cardboard, which compresses under the bearing roller. Stick the template to the baseboard with double-sided carpet tape and attach a scrap block of identical thickness alongside the baseboard on the floor so the router baseplate stays dead-level at 90 degrees without tipping.
Corner Fitting Strategies
Slightly back-bevel the four outside edges of your replacement patch by 1 to 2 degrees using a sanding block so the back of the patch is a hair narrower than the front face. Just like a carpenter’s mitered door casing, a slight back-bevel lets the patch slide into the pocket without binding on the bottom corners while creating a tight, zero-gap seam at the visible front surface.
Adhesive Application Methods
Spread adhesive with an acid brush, wood shim, or gloved finger so every square millimeter of the patch face is wet without puddling in the corners. Never wipe glue squeeze-out with a dripping-wet sponge on bare wood that will be stained, as diluted glue seals wood pores and blocks stain absorption; instead, let the squeeze-out gel for 15 to 20 minutes into a rubbery bead and slice it cleanly off with a sharp chisel.
What Mistakes Should You Avoid When Repairing Baseboards?
Most visible baseboard repairs fail because of rushed surface prep, thick single-coat filler shrinkage, or skipped primer. Avoid these eight common DIY mistakes to ensure your patch holds up to vacuum bumps and seasonal humidity swings:
- Skipping lead-paint precautions in pre-1978 homes: Dry-sanding or routing old alkyd or lead-based paint spreads hazardous dust across living-room floors and upholstery.
- Applying deep water-based filler in one thick glob: Filling gouges deeper than 1/4 inch in a single pass causes the center to sink, crack, and pull away from the edges as water evaporates.
- Sanding without a rigid backing block: Sanding wood filler with bare fingertips dishes out the softer filler faster than the surrounding cured paint, leaving a noticeable dip.
- Painting or filling directly over raw MDF: Unsealed MDF core fibers absorb water from spackle and latex paint, swelling into rough, fuzzy ridges that require re-sanding.
- Using glue as a gap filler: Standard PVA wood glue has zero structural gap-filling strength; wide perimeter gaps must be filled with wood filler or epoxy after the glue dries.
- Using 100% silicone caulk on painted trim: Paint beads up and peels off pure silicone; always verify the tube states “paintable acrylic-latex” or “siliconized acrylic.”
- Skipping spot-primer over patches and filler: Raw filler and wood soak up topcoat gloss, leaving an obvious dull patch even after two coats of paint.
- Stopping the paintbrush right at the patch edge: Spot-painting only the 3-inch patch leaves heavy brush marks and a mismatched sheen; always paint corner to corner or feather out carefully.
Troubleshooting Common Baseboard Patch Problems
Even careful repairs can reveal a raised edge, sunken seam, or color mismatch once the primer or stain goes on. Shine a flashlight sideways (“raking light”) along the baseboard before your final topcoat and use these targeted fixes if you spot a flaw.
The Patch Sits Proud
If your patch sits higher than the surrounding baseboard face during dry-fitting, remove it and sand the back face on a sheet of 80-grit sandpaper taped to a flat workbench. If the glue has already cured on a painted baseboard and the patch is only 1/32 inch proud, wrap 80-grit paper around a hard wood block and sand it flush, then refine with 120- and 220-grit before priming.
The Seam Is Visible After Painting
A visible rectangular outline after painting means either the filler shrank slightly into the joint or the patch moved before the glue set. Let the paint cure for 24 hours, scuff the area with 180-grit sandpaper, and skim a paper-thin coat of lightweight spackle or glazing putty across the seam with a wide 3-inch putty knife. Sand with 220-grit under raking light, spot-prime, and apply a fresh coat of trim enamel.
The Stain Does Not Match
New patch wood and wood fillers rarely absorb liquid stain at the same rate as aged, oxidized trim. If the repaired area dries lighter than the existing baseboard, apply a tinted gel stain or furniture touch-up marker in thin layers using an artist’s brush, drawing fine faux grain lines across the seam before locking the color in with clear satin lacquer or polyurethane.
The Baseboard Is Loose
If pushing on the patch causes the entire baseboard to flex against the wall, the trim nails have pulled out of the framing. Locate the nearest wall studs (16 inches on center) with a stud finder and drive two 2-inch 18-gauge brad nails (or 6d finish nails) through the solid section of the baseboard into each stud, angled slightly upward and downward in a “V” pattern to lock the board tight before caulking the top gap.
Explore More DIY Resources for Home Improvement
Consulting official safety standards and manufacturer technical data sheets (TDS) before starting a trim project prevents product compatibility mistakes. Always verify recoat windows, temperature limits (typically 40°F to 100°F for adhesives and caulks), and ventilation rules on the product label.
The best-looking baseboard repair is not just the patch itself. It is the prep, dust control, dry fit, sanding, caulk line, primer, and final finish working together.
- EPA lead-safe resources: Essential for containment, wet-cleaning, and HEPA vacuum protocols on painted trim in pre-1978 homes.
- Manufacturer technical data sheets: Provide exact clamp times, maximum filler depths per layer, and paint-ready cure times for glues and sealants.
- Woodworking and trim tutorials: Helpful for mastering flush-trim router templates, bevel-edge chisel paring, and profile matching.
- Paint and primer specifications: Confirm whether your topcoat requires shellac, oil-based, or high-build acrylic primer over patched MDF or resin fillers.
Key Takeaways
- Match the repair to the damage depth: use spackle under 1/8 inch, layered wood filler or 30-minute two-part polyester putty from 1/8 to 1/4 inch, and a glued dutchman patch for deeper gouges up to 6 inches long.
- In pre-1978 homes, assume painted trim may contain lead; use wet misting, plastic containment, and a HEPA vacuum rather than dry sanding or high-speed routing.
- Always seal raw MDF edges with fast-drying shellac primer (20 minutes touch-dry) before applying water-based filler or latex paint so the core fibers do not swell.
- Clamp glued wood patches for 30 to 60 minutes (allowing 24 hours for full cure), tool paintable acrylic-latex caulk within 5 minutes, and paint corner to corner for an uniform sheen.
Frequently Asked Questions
How do you fix damaged interior trim?
Fix small nail holes and dents under 1/8 inch deep by cleaning the trim, pressing in wood filler or spackle, sanding smooth with 220-grit paper, priming, and painting. For deeper gouges or missing corners up to 6 inches long, chisel or route a clean recess, glue in a matching wood or MDF patch, fill the seams, caulk, and repaint. Replace the trim section if the board is rotten, water-swollen, or moldy.
Can I repair baseboards without removing them?
Yes, you can repair most dents, pet chew marks, and localized missing chunks while the baseboard stays nailed to the wall. Keeping the board in place prevents tearing drywall paper or breaking adjoining corner miters. You only need to remove the baseboard when moisture, rot, or splitting affects a long run.
Should I use wood filler or a patch for baseboard damage?
Use water- or solvent-based wood filler in layers up to 1/4 inch deep for nail holes, shallow scratches, and minor dents. Use a fitted wood patch or two-part polyester filler when a decorative edge is crushed or a gouge is deeper than 1/4 inch, because standard single-part filler shrinks and cracks in deep cavities.
Do I need to caulk after repairing baseboards?
Yes, apply a bead of paintable siliconized acrylic-latex caulk along the top joint if there is a gap up to 1/2 inch wide between the baseboard and drywall. Smooth the bead with a damp finger within 5 minutes and let it dry for at least 30 minutes before priming and painting. Never use flexible caulk to fill face gouges on the baseboard itself, because caulk cannot be sanded flush.
How do I make the repaired baseboard blend in?
Make the repair invisible by sanding the patch or filler dead-flat with a rigid sanding block up to 220-grit, sealing raw spots with stain-blocking primer to prevent dull flashing, and painting the full baseboard run from corner to corner. On stained wood baseboards, test your stain on scrap wood first and blend the patch seam with a fine-tip grain marker before clear-coating.
How do you repair chewed or swollen MDF baseboards?
Slice away any loose, fuzzy, or raised MDF fibers with a sharp utility knife, then seal the exposed core immediately with a coat of shellac-based primer so moisture cannot make it swell further. Once the primer dries in 20 to 45 minutes, rebuild the missing profile with two-part polyester wood filler or wood filler, sand flush with 180- and 220-grit paper, prime again, and paint.
Conclusion
Fixing localized baseboard damage comes down to choosing the right material for the depth of the flaw and taking time with surface preparation. Inspect your trim for moisture or lead-paint risks first, seal raw MDF before filling, dry-fit any wood patch until it sits completely flush, and sand with a rigid block before priming and painting corner to corner.
Sources
- U.S. EPA — Lead-Safe Renovations for DIYers: Supports lead-paint containment, wet-sanding, and HEPA vacuum safety practices in pre-1978 homes.
- U.S. EPA — Minor Repair and Maintenance Activities (40 CFR 745.83): Supports the 6-square-foot interior surface threshold for minor repair and maintenance work.
- U.S. EPA — Protect Your Family from Sources of Lead: Supports warnings on peeling lead-based paint and household renovation dust hazards.
- OSHA — Wood Dust: Supports respiratory and dust-control precautions when cutting and sanding wood or MDF trim.
- 3M — Bondo Wood Filler Specifications: Supports the 3-to-4-minute working time and 30-minute sandable cure time for two-part polyester wood filler.
- DAP — Plastic Wood Filler Application Guide: Supports applying wood filler in layers up to 1/4 inch deep and 2-to-6-hour drying times.
- Titebond — Wood Glue Clamping and Cure FAQs: Supports the 30-to-60-minute clamp time and 24-hour full cure before heavy sanding.
- DAP — ALEX PLUS All-Purpose Acrylic Latex Caulk Plus Silicone: Supports paintable acrylic-latex caulk tooling times and 30-minute paint-ready skin formation on baseboards.
- Rust-Oleum — Zinsser B-I-N Shellac-Base Primer: Supports 20-minute touch-dry and 45-minute recoat times for sealing porous MDF edges and wood patches.
- Schema.org — HowTo: Original reference for step-based instructional structure.