How to Install a Crawl Space Dehumidifier
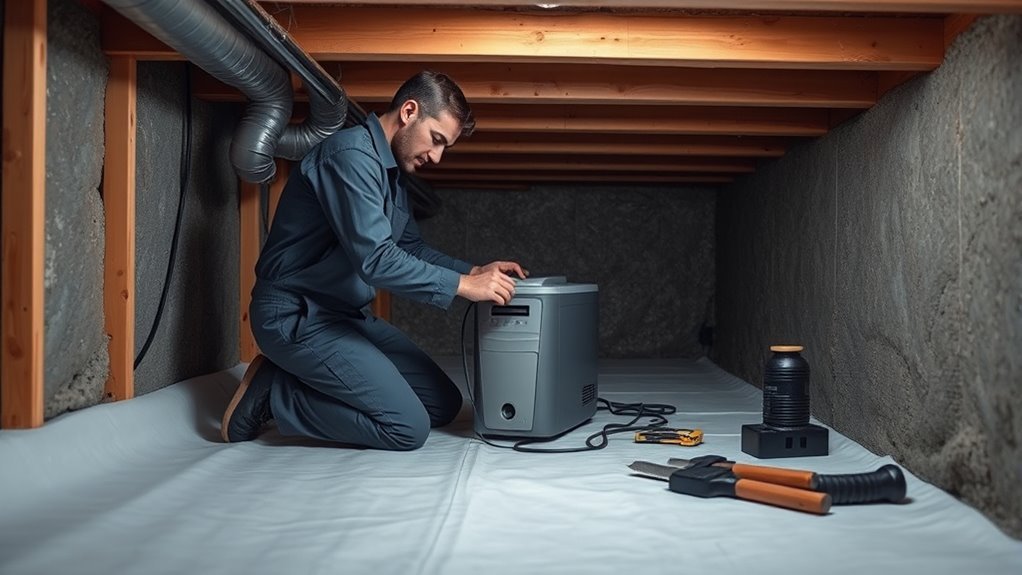
To install a crawl space dehumidifier, fix active leaks and standing-water problems first, then confirm whether the crawl space will remain vented or is being converted to a code-compliant unvented or encapsulated space. Size the unit from its manufacturer guidance and any locally adopted code requirement. Place it level, keep the required intake, discharge, filter, and service clearances open, connect a continuous gravity drain or condensate pump, and power it from a properly grounded, GFCI-protected circuit where required. For a sealed crawl space, a practical starting target is often about 50%–55% relative humidity unless the manufacturer or moisture-control design specifies otherwise. Test the drain and verify the result with a separate hygrometer.
Quick Answer
A successful crawl space dehumidifier installation has five parts: stop bulk water, control ground and outside moisture, choose the correct unit, provide safe drainage and power, and verify humidity after startup. Do not use a universal clearance, drain slope, cord length, or pints-per-square-foot rule. Those details depend on the exact dehumidifier and the building code adopted where you live.
Crawl Space Dehumidifier Installation at a Glance
| Step | What to Do | Key Check |
|---|---|---|
| 1 | Stop active water intrusion | No plumbing leak or standing water |
| 2 | Confirm crawl-space moisture strategy | Vented or code-compliant unvented/encapsulated |
| 3 | Size and place the unit | Level, serviceable, airflow unobstructed |
| 4 | Connect drainage and power | No drain backup; compliant grounded power |
| 5 | Set and test humidity control | Independent hygrometer confirms results |
How a Crawl Space Dehumidifier Works
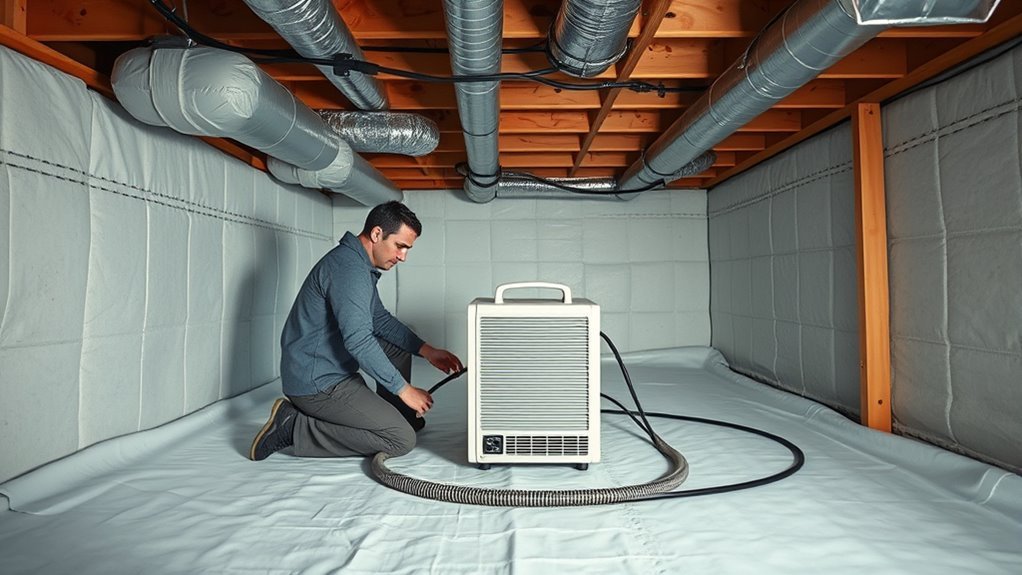
A crawl space dehumidifier moves humid air across a cold evaporator coil. Water vapor condenses on the coil, drains out of the machine, and the unit returns warmer, drier air to the space. The humidistat cycles the compressor according to the measured relative humidity.
Rated moisture-removal capacity varies by model and by the conditions used for the rating. Do not assume that one pint-per-day number applies to every crawl space. Use the capacity, operating-temperature range, airflow requirements, drainage instructions, and electrical requirements for your exact model.
A dehumidifier controls airborne moisture. It does not repair a plumbing leak, stop groundwater, replace foundation drainage, or make an incomplete encapsulation system watertight. The EPA’s moisture guidance emphasizes correcting leaks and moisture sources as part of mold control. See EPA moisture-control guidance.
Pick the Right Dehumidifier Size
Size a crawl space dehumidifier from the manufacturer’s application guidance and the actual moisture load, not from a universal “one pint per square foot” formula. Measure the crawl-space floor area, then consider whether the space is sealed, how much outside air enters, whether the ground is covered, the climate, temperature, drainage conditions, and the severity of the moisture problem.
Building-code requirements can also affect sizing. For example, some adopted versions of the International Residential Code include a specific dehumidification-capacity provision for certain unvented crawl spaces. Codes change and jurisdictions adopt different editions, so confirm the requirement enforced by your local building department rather than applying an old code number automatically. See the ICC crawl-space provisions.
| Sizing Factor | Why It Matters |
|---|---|
| Floor area | Sets the basic amount of space the unit must serve |
| Air leakage | Outside humid air can increase the moisture load |
| Ground moisture | Exposed earth can continually add water vapor |
| Standing water or leaks | Must be corrected instead of solved by oversizing |
| Temperature | Must remain within the unit’s allowed operating range |
| Local code | May set requirements for an unvented crawl-space design |
If the crawl space is divided by foundation walls or has poor air communication between sections, one large machine may not distribute dry air evenly. Depending on the layout and the equipment, ducting, transfer openings, circulation, or more than one unit may be appropriate. Follow the equipment manufacturer’s design guidance rather than assuming every space above a particular square footage automatically requires two machines.
Recommended Products

120 PPD Crawl Space Dehumidifier: The Sentinel HD55S Energy Star Certified dehumidifier removes up to 120 pints of moisture per day at saturation (55 PPD at AHAM) and effectively controls humidity in spaces up to 1,300 sq. ft. Its rugged metal housing is built for demanding environments and long-term reliability, making it ideal for crawl spaces, basements, warehouses, offices, factories, and storage areas

Specially Designed for Crawl Spaces— The AIUSEVO commercial dehumidifier features a high-performance compressor and a powerful 265 CFM airflow, removes up to 125 pint/d(at 95°F, 90% RH). Covers up to 6500 sq. ft. It can keep humidity at an ideal level and prevent excessive moisture from damaging your personal belongings. With compact dimensions of 19.3" x 17.8" x 17.5" , it fits between floor joists and in low-clearance crawl spaces. Ideal for Garage,warehouses, offices, factories, shops

PRO-GRADE 70-PINT PERFORMANCE – This AlorAir Crawl Space Dehumidifier removes up to 70 pints per day under saturated conditions (35 pints per day under AHAM standards). The advanced R32 system efficiently controls humidity in areas up to 1,000 sq. ft. Ideal for crawl spaces, basements, garages, attics, commercial and industrial environments. Serious performance meets modern efficiency.
Gather Tools and Prep the Crawl Space
Before installing the dehumidifier, remove debris and inspect the crawl space for standing water, plumbing leaks, foundation seepage, damaged drainage, wet insulation, and visible mold. Correct active water entry first. A dehumidifier is a humidity-control appliance, not a substitute for waterproofing or plumbing repair.
For a basic freestanding installation, the required tools may include a tape measure, level, flashlight, manufacturer-approved drain tubing or pipe, hose clamps or fittings, and the hardware supplied with the unit. Hanging, ducted, electrical, or pump installations may require additional components specified in the manual.
Before moving the machine into place, confirm:
- The crawl-space opening is large enough for the unit.
- The intended location is protected from flooding.
- The unit can sit or hang in its approved operating orientation.
- The filter and service panels will remain accessible.
- The drain route can reach an approved discharge location.
- The factory power cord can reach a suitable receptacle without strain.
- The crawl-space temperature stays within the dehumidifier’s operating range.
Recommended Products

DEHUMIDIFERS FOR HOME: Removes up to 70 pints of moisture per day to help maintain a healthier, more comfortable home. This AprilAire Whole-House Dehumidifier is ideal for basements, crawl spaces, or ducted to HVAC—prevents mold, odors, and wood damage.
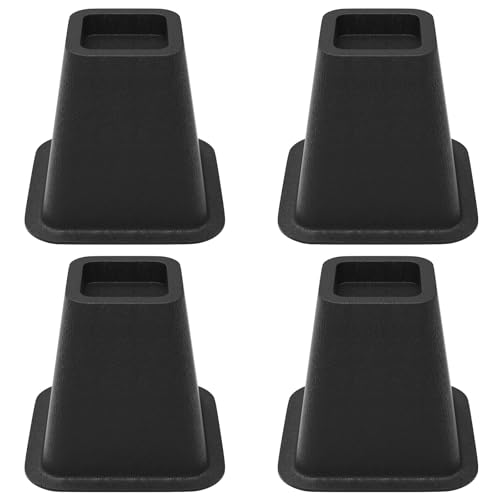
Universal Compatibility - Designed to accommodate ALL crawl space dehumidifier models, ensuring seamless integration with your existing system
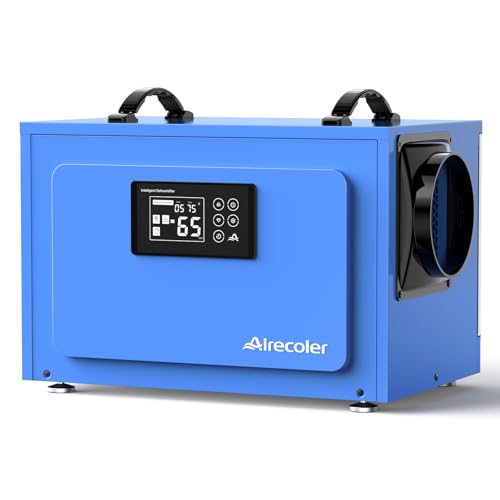
Enhanced Commercial Dehumidification: Airecoler commercial dehumidifier GT-X5 stands out for its exceptional moisture removal, capable of extracting up to 125 pints daily (Max.) and 60 pints at AHAM, being an optimal drying solution in expansive, damp places like crawl spaces, basements, warehouses, garages, and even commercial/industrial areas.
Where to Place the Dehumidifier
Place the dehumidifier where humid air can reach the intake and dry discharge air can move through the crawl space without being blocked by foundation walls, stored materials, insulation, or ductwork. A central location can work well in an open crawl space, but easy drainage, electrical access, filter removal, and service access are equally important.
Do not use a universal “43 square feet of clearance” or “6 inches above the ground” rule. Dehumidifier clearances are model-specific. For example, current manufacturer instructions can specify different distances at the intake, supply, filter, and service sides. Follow the diagram in your manual.
The machine must also be level if its drainage system depends on level operation. If flooding is possible, use a manufacturer-approved elevated platform, riser, or hanging kit rather than leaving the appliance where water can reach it. Current Santa Fe installation guidance, for example, specifically addresses level installation, service clearance, airflow clearance, and hanging the equipment when flood exposure is possible. See the Santa Fe installation manual example.
Set Up Drainage the Right Way
Choose gravity drainage when condensate can flow continuously downhill from the dehumidifier to an approved drain. Use a condensate pump when the water must be lifted to a higher discharge point or the layout cannot maintain an unrestricted gravity route.
| Drainage Method | Use It When | Main Risk to Check |
|---|---|---|
| Gravity drain | The discharge point is low enough for continuous flow | Kinks, trapped water, or uphill sections |
| Condensate pump | Water must be lifted or routed farther | Pump failure, blocked tubing, or poor termination |
Recommended Products

80-PINTS COMPACT COMMERCIAL DEHUMIDIFIER: Control excess moisture efficiently with this crawlspace dehumidifier. Designed for crawl spaces, basements, and warehouses up to 1,200 sq. ft., it removes up to 80 pints of water per day at saturation, with 38 Pints per Day at AHAM standards (80°F, 60% RH).

[Commercial Grade Dehumidifier] This Airzentti crawl space dehumidifier with large capacity removes moisture from basement, attic, large room and small rooms efficiently up to 155 pints per day under nearly saturated condition (70 PPD in AHAM), with 220 CFM airflow, it is ideal for space up to 7,500 square feet.

70-Pint Crawl Space Dehumidifier - This powerful 70-pint commercial dehumidifier features a high-efficiency motor with up to 158 CFM rated circulation, capable of extracting up to 70 pints of water per day (95°F, 90% RH). It effectively reduces humidity in spaces up to 5,000 sq. ft. The adjustable humidity range of 10%-90% RH provides greater control than most models (20%-80% RH). Well-suited for commercial and crawlspaces, storage rooms, garages, living areas, and offices
Drain Hose Placement
Connect the drain using the hose, adapter, trap, pipe, or fitting required by the exact dehumidifier. Different models use different condensate arrangements, so do not add a trap or fitting merely because another model uses one.
For gravity drainage, keep the line unrestricted and continuously routed toward the approved drain. Avoid kinks, crushed tubing, sharp bends, or low sections that retain water. Do not route a gravity drain to a termination higher than the appliance’s drain outlet unless the manufacturer specifically permits that configuration.
| Checkpoint | Action |
|---|---|
| Connection | Use the fitting and tubing specified for the unit |
| Route | Maintain an unrestricted gravity path when using gravity drainage |
| Low spots | Avoid trapped sections and kinks |
| Discharge | Terminate at an approved drainage location |
| Maintenance | Inspect for sludge, algae, debris, or blockage |
Gravity vs Pump Drainage
Gravity drainage is simpler because it has no pump motor or reservoir to fail, but it works only when the site provides a suitable downhill route. Do not rely on a universal 1–2 degree or “1 inch per 8 feet” rule unless your appliance or drainage specification actually calls for it.
If gravity cannot carry the condensate to its destination, install a compatible condensate pump according to the pump and dehumidifier instructions. Check the pump’s allowable lift, tubing size, shutoff or safety provisions, and discharge location before installation.
Check For Leaks
After connecting the drainage system, run the dehumidifier long enough to produce condensate and inspect the drain outlet, fittings, hose, pump reservoir if used, and final discharge point. Correct seepage, loose connections, kinks, or backup immediately.
Also confirm that discharged water cannot flow back toward the foundation. If you are unsure where condensate may legally or safely terminate, check local plumbing/building requirements or ask a qualified contractor.
Connect Power Safely
Use the voltage, grounding, receptacle, circuit-capacity, and GFCI requirements stated on the dehumidifier’s nameplate and installation manual. Crawl spaces are damp locations, so electrical protection is not an area for improvised wiring.
If the existing receptacle, branch circuit, grounding, or GFCI protection cannot be confirmed as suitable, have a licensed electrician evaluate it before operating the dehumidifier.
GFCI Outlet Safety
A GFCI-protected receptacle or circuit can disconnect power when a ground-fault condition is detected. Current dehumidifier manuals commonly require or recommend GFCI/GFI protection in damp or potentially wet installation locations, and locally adopted electrical codes may impose additional requirements.
Use an existing compliant receptacle if one is available. Installing or modifying permanent crawl-space wiring, receptacles, circuit breakers, or GFCI devices should be done in accordance with the locally adopted electrical code and by a qualified person where required.
Avoid Extension Cords
Place the unit where the factory power cord reaches the intended receptacle without tension. Do not assume an extension cord is acceptable simply because it has a three-prong plug. Follow the appliance manufacturer’s instructions; if the manual prohibits extension cords, do not use one.
If the cord cannot reach a compliant outlet, moving or adding permanent electrical service is usually a better installation solution than creating a long temporary cord run through the crawl space.
Check Circuit Load
Read the dehumidifier’s nameplate and installation manual for its required voltage, current, and minimum circuit capacity. Do not substitute a generic “80% rule” for the manufacturer’s electrical specifications or a proper branch-circuit evaluation.
- Confirm that the receptacle voltage matches the appliance.
- Confirm the grounding and GFCI protection required for the installation.
- Check that the circuit capacity satisfies the appliance instructions.
- If the branch circuit is shared or its capacity is uncertain, have a licensed electrician check it.
Seal Vents and Check for Leaks
Do not seal foundation vents as a standalone moisture fix. If you are converting the crawl space to an unvented or encapsulated design, follow the building code adopted in your jurisdiction and complete the required moisture-control system rather than simply closing openings.
A sealed crawl space commonly requires control of ground moisture as well as outside air. That can involve a continuous ground vapor retarder or encapsulation liner, sealed penetrations and access openings, drainage or waterproofing where needed, and an approved method of humidity control. Requirements vary with the code edition, climate, construction, and local amendments.
| Checkpoint | Action | Goal |
|---|---|---|
| Standing water | Correct drainage or leak source first | Stop bulk water |
| Ground | Use the required vapor-control system | Limit ground moisture |
| Exterior openings | Seal only as part of the approved unvented design | Limit humid-air infiltration |
| Pipe and wiring penetrations | Inspect for air and water leakage | Reduce uncontrolled moisture entry |
If the crawl space has active water entry, structural damage, extensive mold, or a complicated existing ventilation/HVAC arrangement, correct those conditions before expecting a dehumidifier to stabilize humidity.
Test the Dehumidifier After Installation
After installation, power the unit on and choose an initial humidity set point consistent with the manufacturer’s instructions. For many sealed crawl spaces, roughly 50%–55% RH is a practical starting range. The goal is to keep humidity controlled, not to force it as low as the machine can go.
Fix water sources first, keep airflow and drainage unobstructed, then verify crawl-space humidity with a separate hygrometer.
- Check operation. Confirm the fan and compressor cycle normally and no error code appears.
- Check the drain. Verify that condensate leaves the unit without leaking, backing up, or collecting in a low spot.
- Check airflow. Make sure the intake and dry-air discharge are not blocked.
- Check vibration. Correct rattling, unstable supports, or contact with framing or ductwork.
- Check humidity independently. Place a separate hygrometer away from the dehumidifier’s discharge and monitor conditions over several days.
If the machine runs almost continuously but humidity stays high, investigate the cause rather than immediately lowering the humidistat. The unit may be undersized, the crawl space may still admit outside or ground moisture, the filter may be restricted, or the drainage/airflow setup may be wrong.
Set the Humidistat and Airflow
For a sealed crawl space, start around 50%–55% relative humidity unless the manufacturer, building-science design, or local requirements specify another target. EPA general indoor-moisture guidance says RH should stay below 60% and ideally between 30% and 50% where practical, while dehumidifier manufacturers may recommend somewhat different operating ranges for their equipment. See EPA humidity guidance and AprilAire dehumidifier guidance.
Use a separate hygrometer to compare actual crawl-space humidity with the dehumidifier’s displayed reading. In a large or divided crawl space, take readings in more than one area. If one end remains damp while the area around the unit is dry, air distribution may need improvement.
Keep the intake and discharge clear according to the manufacturer’s specified distances. Do not impose a generic 2-foot-clearance rule if the manual gives different dimensions.
Leave humidity control to the humidistat rather than running the appliance only on an afternoon timer. Automatic operation lets the machine respond when the actual relative humidity rises.
Common Crawl Space Dehumidifier Installation Mistakes
- Trying to dry standing water: repair the water source first.
- Closing vents without a complete unvented-crawl-space plan: this can leave major ground or leakage moisture sources uncontrolled.
- Using a room-dehumidifier sizing shortcut: crawl-space sealing, temperature, layout, and code requirements matter.
- Blocking intake, discharge, or filter access: follow the exact clearance diagram for the unit.
- Leaving the machine exposed to flooding: elevate or hang it with an approved system when necessary.
- Routing a gravity drain uphill: use an unrestricted downhill route or add a compatible pump.
- Using improvised electrical connections: use compliant grounded power and required GFCI protection.
- Setting humidity unnecessarily low: verify actual RH instead of making the unit run continuously.
Keep It Running Smoothly
A crawl-space dehumidifier needs periodic filter, drain, and general condition checks. The correct interval comes from the manual for the exact unit; dusty spaces can require more frequent service.
- Inspect the filter. Clean or replace it according to the manufacturer’s schedule and whenever dirt begins restricting airflow.
- Inspect the drain. Check the hose, rigid drain, trap if the model uses one, and condensate pump for algae, sludge, sediment, kinks, or leaks.
- Check humidity. Compare the machine’s reading with a separate hygrometer periodically.
- Inspect the installation. Make sure supports remain level and secure and that insulation or stored materials have not blocked airflow.
- Follow fault codes. Use the manufacturer’s troubleshooting procedure rather than bypassing switches or controls.
If performance drops suddenly, check the filter, airflow, drain, room temperature, and moisture sources before assuming that the refrigerant system has failed.
When to Call a Professional
Stop the DIY installation and get qualified help when the crawl space has standing water, recurring foundation seepage, extensive visible mold, damaged structural wood, unsafe wiring, no suitable receptacle, or no practical drainage route. These problems extend beyond normal appliance setup.
A licensed electrician should handle permanent electrical modifications when required. An HVAC or dehumidification contractor can help with ducted systems, difficult airflow distribution, equipment sizing, or controls. Waterproofing, drainage, mold-remediation, or structural work may require separate specialists.
If you are changing a traditionally vented crawl space into an unvented or encapsulated one, check the locally adopted residential code before sealing it. The dehumidifier is only one component of that moisture-control system.
Authoritative References
- U.S. EPA: humidity and mold-control guidance
- U.S. EPA: controlling moisture in the home
- ICC: unvented crawl-space provisions
- Santa Fe: current dehumidifier installation-manual example
- AprilAire: current dehumidifier guidance
Frequently Asked Questions
How Do You Install a Dehumidifier in a Crawlspace?
First correct plumbing leaks, groundwater, or standing water. Confirm the crawl-space moisture-control design, size the dehumidifier from manufacturer guidance and local requirements, place it level with the required airflow and service clearance, connect an approved gravity drain or condensate pump, plug it into suitable grounded and GFCI-protected power where required, set the humidistat, and verify humidity with a separate hygrometer.
Can I Put a Dehumidifier in My Crawl Space Without Encapsulation?
You can operate a dehumidifier in some crawl spaces that are not fully encapsulated, but performance depends on how much ground moisture and outside humid air continuously enter the space. A dehumidifier should not be used as a substitute for fixing bulk water. If you plan to close foundation vents and create an unvented crawl space, follow the locally adopted code and complete the required moisture-control work rather than simply sealing the vents.
What Humidity Should a Crawl Space Dehumidifier Be Set To?
For many sealed crawl spaces, about 50%–55% RH is a reasonable starting point unless the equipment manufacturer or moisture-control design specifies another setting. Keep the space below 60% RH and verify conditions with a separate hygrometer. There is usually no benefit in forcing the setting much lower just to make the machine run longer.
Where Should a Crawl Space Dehumidifier Be Placed?
Place it on a stable, level surface or manufacturer-approved hanging system where the intake and discharge can move air freely. Keep the filter, drain, controls, and service panels accessible. Choose a location protected from flooding and close enough to suitable drainage and electrical service. Follow the clearance dimensions for the exact model.
Do I Need a Condensate Pump for a Crawl Space Dehumidifier?
You need a condensate pump when gravity cannot carry the collected water to an approved drain or when the discharge point is above the dehumidifier’s gravity-drain outlet. If the machine can drain continuously downhill without trapped sections, a pump may not be necessary.
Does a Crawl Space Dehumidifier Need a GFCI Outlet?
Follow the electrical requirements for the exact dehumidifier and the electrical code adopted in your area. Crawl spaces are damp locations, and current equipment instructions commonly require or recommend GFCI/GFI protection. Do not modify permanent electrical wiring unless you are qualified and permitted to do so.
How Much Does It Cost to Have a Dehumidifier Installed in a Crawlspace?
Installation cost varies substantially with dehumidifier capacity, access, drainage, condensate-pump requirements, new electrical work, and whether the project also includes waterproofing, vapor-barrier work, encapsulation, mold remediation, or structural repairs. Ask for quotes that separate the dehumidifier and installation from those larger crawl-space repairs so you can compare the same scope of work.
Conclusion
A crawl space dehumidifier works best after the major moisture sources have been controlled. Fix active water entry, confirm the crawl-space ventilation or encapsulation strategy, choose a properly sized unit, install it level with manufacturer-specified clearance, provide reliable drainage and compliant power, and verify humidity with a hygrometer.
Do not compensate for a wet crawl space by buying an oversized machine or setting the humidistat extremely low. If the unit cannot hold the target humidity after several days, recheck water intrusion, ground vapor, outside-air leakage, airflow, filter condition, drainage, and equipment sizing. Call the appropriate professional when the problem involves permanent wiring, major water entry, extensive mold, structural damage, or conversion to an unvented crawl space.