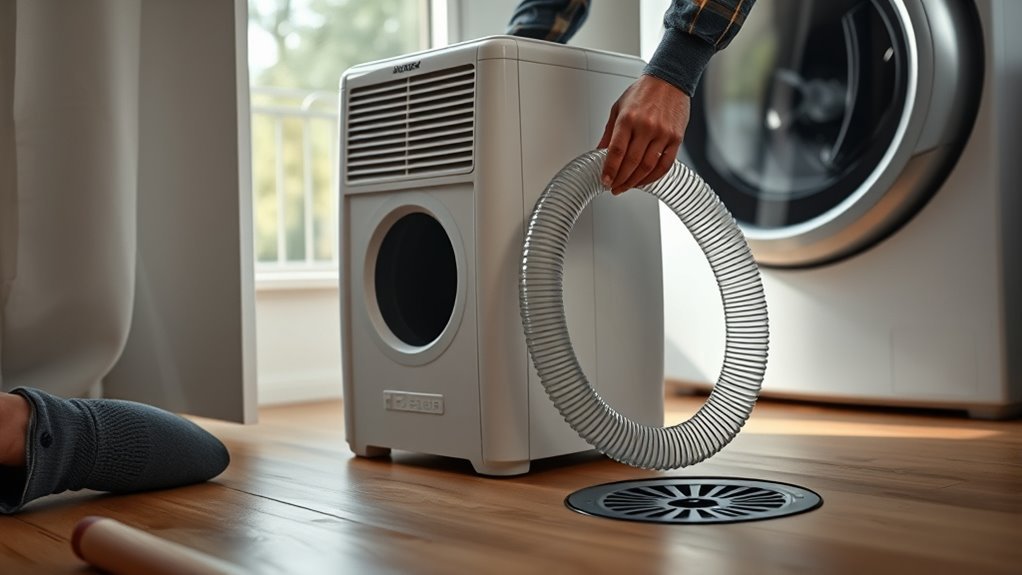
Connecting a dehumidifier drain hose can give you hands-free water removal, but the correct parts and steps depend on the model. Some units accept a threaded garden hose, some use a push-on tube or supplied adapter, and pump models often require a separate small discharge tube. Start with the owner’s manual, then build a leak-free path to a safe drain.
Quick Answer
Turn the dehumidifier off and unplug it, identify the drain-port type in the manual, and attach the specified hose or adapter with its washer or clamp. For gravity drainage, place the unit level and route the hose continuously downhill without kinks. Use only an approved pump system when the drain is higher than the outlet.
Key Takeaways
- Do not assume every dehumidifier uses the same hose, knockout, adapter, clamp, or tube direction.
- A gravity hose must stay below the unit’s drain outlet and slope downward to the drain.
- A threaded connection usually needs an intact rubber washer; a push-on tube may need a clamp only when the manual calls for one.
- Test the setup while the unit runs, then check for leaks, a filling bucket, slow flow, and hose blockage.
- Use the built-in pump or a compatible condensate pump only when gravity cannot reach the drain.
At a Glance
| Time Required | About 15–30 minutes, plus time to confirm drainage |
| Difficulty | Easy, provided the correct hose and drain are available |
| Tools Needed | Owner’s manual, approved hose or tube, supplied adapter, washer or clamp if specified, and a towel or shallow tray |
| Cost | Usually low if the fitting or hose is included; a compatible pump costs more |
Warning: Turn the unit off and unplug it before opening a drain cover, removing a knockout, fitting an adapter, trimming approved tubing, or cleaning the drain. Never cut a hose or remove a panel unless the model’s manual specifically instructs you to do so.
What You Need to Connect a Drain Hose
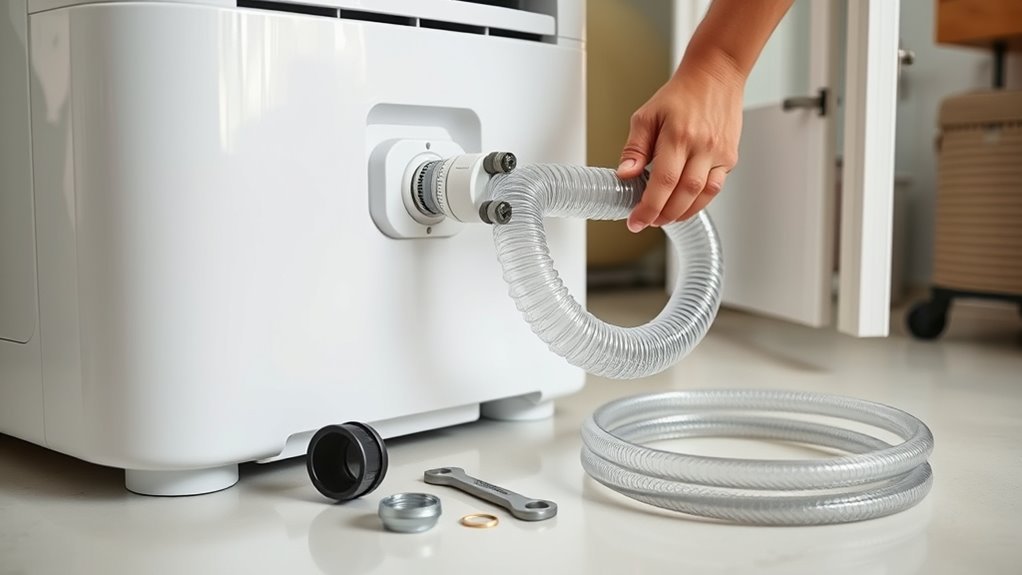
Before gathering tools, find the model number and read the continuous-drain section of the owner’s manual. Manufacturers use several connection systems, so there is no single hose size that fits every portable dehumidifier. For example, one unit may accept a female garden-hose connector, another may require flexible tubing with a stated inside diameter, and a pump-equipped model may use only the small tube supplied with the appliance.
Prepare the parts that match your model:
- Threaded gravity-drain port: an approved garden or dehumidifier hose with a sound rubber washer inside the female connector.
- Push-on drain spout: tubing with the exact inside diameter listed in the manual and a hose clamp only if the manufacturer requires one.
- Adapter or drainage joint: the original supplied part, installed in the stated direction and sequence.
- Pump outlet: the manufacturer-supplied pump tube or another tube specifically approved for that model.
- Basic setup items: a towel or shallow tray for drips and, when the manual calls for it, a screwdriver or hand-tightening tool.
A utility knife is not a standard requirement. Use one only for tubing the manual explicitly allows you to cut, and make a square, clean cut without crushing the tube. Likewise, do not add a clamp to a threaded garden-hose fitting; that connection seals with its washer and threads.
Note: Official guidance differs by brand and model. Frigidaire discusses a large-diameter garden or dehumidifier hose, GE Appliances describes a garden-hose connection, and Midea directs owners to the model manual and requires a downhill gravity path.
Recommended Products

[Convenient] This drain hose automatically drains water from the dehumidifier to the drain for uninterrupted use.
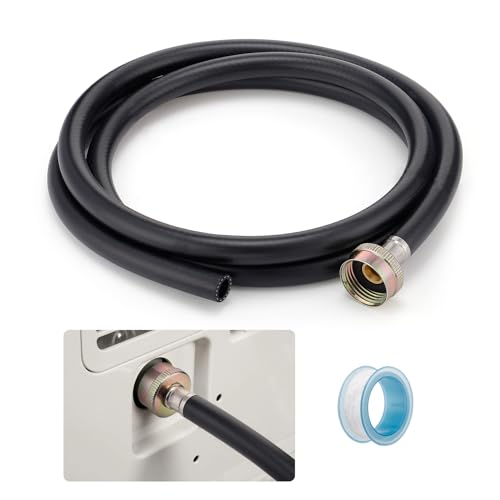
Leak-Proof Design: Our dehumidifier drain hose features sealing tape and rubber gaskets at the connector, ensuring a tight and secure connection with dehumidifier, effectively eliminating the risk of leakage. The galvanized iron connector is rust-resistant and durable, providing reliable protection for your drainage system.

Versatile Universal Hose: This 20-foot hose is designed for multiple applications, including dehumidifier drainage and a variety of gardening tasks. It can be easily cut to the desired length, offering customizable flexibility to fit your specific needs.
Identify the Drain Port and Hose Type
Look at the back or side of the unit for a drain cap, threaded connector, rubber plug, push-on spout, or labeled pump outlet. Do not confuse the gravity-drain port with a pump outlet. Gravity and pump systems use different tubing and operating rules.
| Port Type | Typical Connection | What to Check |
|---|---|---|
| Threaded gravity port | Female garden-hose or model-specific threaded hose | Correct thread, intact washer, hand-tight fit |
| Push-on spout | Flexible tube with specified inside diameter | Full insertion, approved clamp, no split tubing |
| Adapter or drain joint | Supplied adapter plus approved hose | Correct orientation and gasket placement |
| Pump outlet | Small supplied discharge tube | Pump mode, lift limit, tube length, secure outlet |
Remove the Knockout and Install the Tube
Some older or model-specific dehumidifiers have a removable rear knockout. Many current models do not. Remove a knockout only when the owner’s manual identifies it as part of the continuous-drain procedure. Turn the unit off, unplug it, protect the floor with a towel, and use only the tool and method shown by the manufacturer.
Recommended Products

Multi-Purpose Hose, 6ft Cut-to-Fit:This 6-foot hose is designed for various applications, including dehumidifier drainage and gardening tasks. It can be easily cut to the desired length for flexible use. Please confirm the required length before purchase.

MULTIFUNCTIONAL UNIVERSAL DRAIN HOSE: This drain hose has multiple uses, in addition to being suitable for dehumidifier drainage, it is also suitable for air conditioner drainage as well as being suitable for a variety of gardening tasks. Additionally our dehumidifier drain hose can be cut to your desired length to customize it for different situations.

Better Compatibility and Leak Free Design: this universal dehumidifier hose features an elastic rubber adapter with a secure connecting clamp, ensuring a tight seal with no leaks, compatible with most dehumidifiers brands (Note: please confirm your dehumidifier drain outlet size before purchasing)
Remove the Rear Knockout Only When Required
Confirm that the round piece is a drain knockout rather than a permanent cabinet feature. Follow the manual’s direction for prying or pushing it out, and avoid forcing the surrounding plastic. Once removed, do not block the opening if the manual says it must remain open for drainage.
| Check | Action |
|---|---|
| Model instructions | Verify that a knockout must be removed |
| Drain opening | Remove loose plastic and leave the flow path clear |
| Cabinet condition | Stop if the housing cracks or the part does not match the manual |
Insert the Approved Drain Tube
If the unit uses a push-in tube or supplied drain joint, insert it to the depth shown in the manual. The connection should feel stable without excessive force. Fit the matching hose to the exposed end, then install the specified clamp or threaded connector. Do not substitute a washing-machine hose merely because it appears close in size.
Some designs require the bucket to remain installed so a safety switch stays engaged. Others bypass the bucket entirely. Reinstall the bucket whenever the manual requires it, making sure it sits flat and fully engages the switch.
Follow Any Arrow or Orientation Mark
An arrow is meaningful only when it appears on your unit’s supplied tube, adapter, or label and the manual explains its direction. If your model says the arrow must face up, align it that way before seating the part. Do not apply this instruction to an unmarked hose or assume that every dehumidifier uses the same orientation.
Pro Tip: Take a clear photo of the original cap, washer, adapter, and tube orientation before disassembly. The photo makes it easier to restore bucket operation later and helps you spot a missing gasket.
Attach the Dehumidifier Drain Hose Securely
With the correct port identified, attach the approved hose without cross-threading, stretching, or twisting it. A secure connection should remain dry while the hose stays relaxed and points toward the drain.
Recommended Products
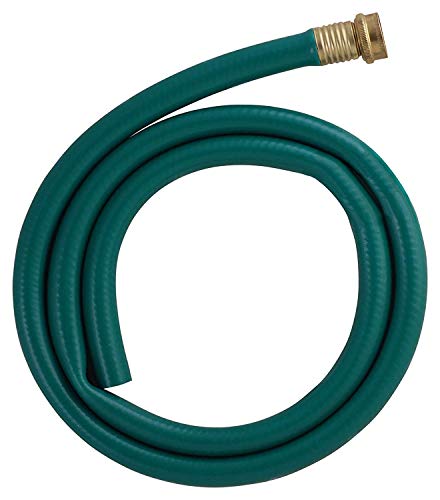
FUNCTIONALITY: This 5ft Drain Hose will provide you convenience as this can help you with any small maintenance job around your house, garden, garage or to reach hanging house plants. It can also use as dehumidifier drain hose.

**Compatible Fit**: Designed specifically for TCL dehumidifier models DET50EP and DET80EP, ensuring a perfect fit and seamless connection for water drainage.

Versatile Drain Hose: The dehumidifier drain hose is designed for multi-applications, including dehumidifier drainage and various household and garden equipment. It can be easily cut to the desired length, efficiently solve daily drainage problems
Secure a Threaded Hose Connection
- Check that the female hose connector contains a flat rubber washer in good condition.
- Align the connector squarely with the drain threads.
- Turn it clockwise by hand until snug.
- If the manual permits tool tightening, use only a slight additional turn. Overtightening can crack a plastic drain fitting.
- Support the hose so its weight does not pull sideways on the connector.
A leaking threaded joint often needs a new washer rather than more force. Frigidaire’s leak guidance specifically advises checking for a missing, worn, or cracked washer in garden-hose-style connections.
Fit a Push-On Drain Tube Properly
For a barbed or smooth drain spout, use tubing with the inside diameter named in the manual. Push the tube on evenly until it reaches the specified stop. Add a hose clamp only if the instructions call for one, placing it over the supported section of the spout rather than at the very edge.
- Keep the tube aligned instead of twisting it around the fitting.
- Do not stretch undersized tubing over a larger connector.
- Replace hard, cracked, cloudy, or loose tubing.
- Do not let the hose’s weight pull the tube off the spout.
Check for Leaks
Dry the fitting and the floor around the unit, restore power, and run the dehumidifier in a humid room or continuous mode as the manual allows. Inspect the drain connection, the underside of the cabinet, the bucket area, and the hose path. Do not pour water into the appliance unless the manufacturer gives a specific test procedure.
If you see seepage, unplug the unit before correcting the connection. Reseat the adapter, replace the washer, or refit the tube as appropriate. Do not seal a poor connection with glue or permanent caulk because that can damage the unit and make future service difficult.
Run the Hose to a Floor Drain
Gravity drainage works only when water can travel downhill from the dehumidifier outlet to the final discharge point. Place the appliance on a firm, level surface, then route the hose with a continuous downward slope. Keep the line as short and direct as practical.
- Remove high spots, loops, kinks, crushed sections, and sharp bends.
- Do not run the hose uphill, even briefly, unless the manual specifically allows a siphon arrangement.
- Keep the discharge end above standing water. A submerged end can interfere with flow.
- Secure the end so it cannot jump out of a sink, floor drain, standpipe, or sump opening.
- Protect the hose from foot traffic, doors, furniture, freezing temperatures, and pests.
GE Appliances advises routing the hose downward, cutting off unnecessary excess, keeping the outlet above the water line, and cleaning both the drain and hose if flow slows. Frigidaire also recommends a flat, straight, kink-free hose below the unit’s connection.
For gravity drainage, the entire hose route matters: one hidden rise or kink can send water back into the bucket and stop continuous draining.
Use a Pump When the Drain Is Higher Than the Outlet
A pump is needed when the discharge point is above the dehumidifier’s gravity-drain outlet or when no safe downhill route exists. The height of the appliance itself is not the deciding factor. What matters is whether water must be lifted.
If the dehumidifier has a built-in pump, use the supplied pump tube, select pump mode if required, and follow the stated maximum lift, distance, and routing limits. Do not remove a “black cover” or insert tubing into an opening unless those exact steps appear in the model’s manual. Pump designs vary widely.
For a separate condensate pump, place the pump on a stable surface, route the dehumidifier’s gravity outlet into the pump reservoir, and send the pump discharge to an approved drain. Use a pump rated for condensate service and follow its instructions for check valves, lift height, overflow switches, electrical placement, and cleaning.
Warning: Never let a pump’s discharge tube hang loosely over a sink or window where it can fall out. Secure the outlet, stay within the pump’s lift limit, and keep electrical connections away from possible leaks.
Check for Kinks, Leaks, and Proper Flow
Watch the setup closely during the first operating cycle and check it again after several hours. Continuous drainage is working when the hose connection remains dry, water reaches the drain, and the bucket does not fill unexpectedly.
- Trace the full hose: remove bends, high spots, pinched sections, and trapped debris.
- Check the unit: confirm it is level and that the bucket is installed if the safety switch requires it.
- Check the outlet: keep the hose end above standing water and firmly secured.
- Check the connector: replace a damaged washer or loose tube instead of overtightening.
- Clean periodically: unplug the unit, disconnect the hose, and flush or brush the drain path according to the manual.
Dust and biological growth can form sludge inside a hose over time. Frigidaire recommends periodically flushing the hose with clean water, while GE advises cleaning the drain and hose when blockage is suspected. Never use harsh drain cleaner inside the dehumidifier.
Troubleshoot a Dehumidifier That Will Not Drain
| Symptom | Likely Cause | Fix |
|---|---|---|
| Bucket fills with hose attached | Loose adapter, blocked hose, uphill section, or incorrect drain mode | Reseat the fitting, clear the line, restore a downhill slope, and check the control setting |
| Water leaks at threaded port | Missing washer, cross-threading, damaged fitting, or side load | Replace the washer, reconnect squarely, support the hose, or service a cracked fitting |
| No water reaches the drain | Room humidity is already low, hose is blocked, or outlet is submerged | Confirm the compressor is collecting water, clean the hose, and raise the outlet above standing water |
| Pump runs but discharge is weak | Excess lift, kinked pump tube, blocked check valve, or dirty reservoir | Stay within pump limits and clean or reroute the system according to its manual |
| Full-bucket light stays on | Bucket not seated, float stuck, or backup into bucket | Reseat the bucket, inspect the float, and correct the drainage problem |
Maintain the Drain Hose
Inspect the hose and drain connection at least whenever you clean the dehumidifier filter, and more often in dusty or continuously damp spaces. Look for slime, mineral deposits, brittle tubing, insect damage, loose fittings, and water marks around the appliance.
- Turn the unit off and unplug it.
- Place a shallow tray or towel under the connection.
- Disconnect the hose without pulling on the cabinet fitting.
- Flush the hose with clean water and use a soft flexible brush if the manufacturer permits it.
- Clean the unit’s drain opening only with the method listed in the manual.
- Reconnect the hose, restore the downhill route, and test for leaks.
If the unit will be stored where temperatures may freeze, drain and dry the hose first. Ice can split tubing and block flow.
Frequently Asked Questions
How do you connect a drain hose to a dehumidifier?
Unplug the unit, identify the gravity or pump port in the owner’s manual, and attach the specified hose, adapter, washer, or clamp. For gravity drainage, place the unit level and route the hose continuously downhill to a secure drain. Restore power and inspect the full path for leaks and steady flow.
Can you hook up a hose so a dehumidifier drains itself?
Yes, if the model supports continuous drainage. A gravity-drain hose works when the entire route stays below the outlet. A pump-equipped unit or compatible condensate pump is needed when water must travel upward.
Where does the hose go on a dehumidifier?
The hose connects to the labeled drain port, usually on the back or side of the unit. Some models use a cap and threaded fitting, while others use a push-on spout, supplied adapter, or separate pump outlet. Follow the diagram for your exact model.
Can I use any garden hose for a dehumidifier?
No. Use a garden hose only when the manual specifies a compatible threaded connection. The connector needs an intact washer, and the hose should be clean, undamaged, and easy to route downhill. Other models require a particular tube diameter or a proprietary hose.
Can a dehumidifier drain uphill without a pump?
Normally, no. Gravity drainage needs a continuous downhill path. When the sink, standpipe, or other outlet is higher than the dehumidifier’s drain connection, use the model’s built-in pump or a compatible condensate pump.
Why is the bucket filling when the drain hose is connected?
Common causes include a blocked or kinked hose, an uphill section, a loose adapter, a submerged hose end, an incorrectly seated bucket, or the wrong operating mode. Unplug the unit, correct the route and connection, clean the hose, and test again.
Does a dehumidifier help with rhinitis?
It may help when allergic rhinitis is triggered by dust mites or mold and indoor humidity is high. It is not a direct treatment or a substitute for medical care. The American College of Allergy, Asthma & Immunology recommends controlling indoor humidity and reducing allergen exposure; ask a clinician about persistent or severe symptoms.
Sources
- GE Appliances: Dehumidifier Drain Hose Issues — hose washers, downhill routing, outlet placement, and blockage troubleshooting
- Frigidaire: Dehumidifier Not Draining — hose size guidance, straight routing, and periodic cleaning
- Midea: Dehumidifier Support FAQ — model-specific hose setup and gravity-drain height limits
- ENERGY STAR: Dehumidifiers — water-removal options and recommended indoor relative humidity
- U.S. EPA: Care for Your Air — moisture control and a general indoor humidity range of 30%–50%
- American College of Allergy, Asthma & Immunology: Hay Fever — humidity and indoor-allergen control for allergic rhinitis
Conclusion
A dehumidifier drain hose works reliably when the connection matches the model and the water has a clear path to the outlet. Use the specified hose, washer, adapter, clamp, or pump tube; keep a gravity line continuously downhill; and test the system for leaks and backup. Regular inspection and cleaning will help prevent clogs, floor damage, and unexpected bucket shutdowns.