
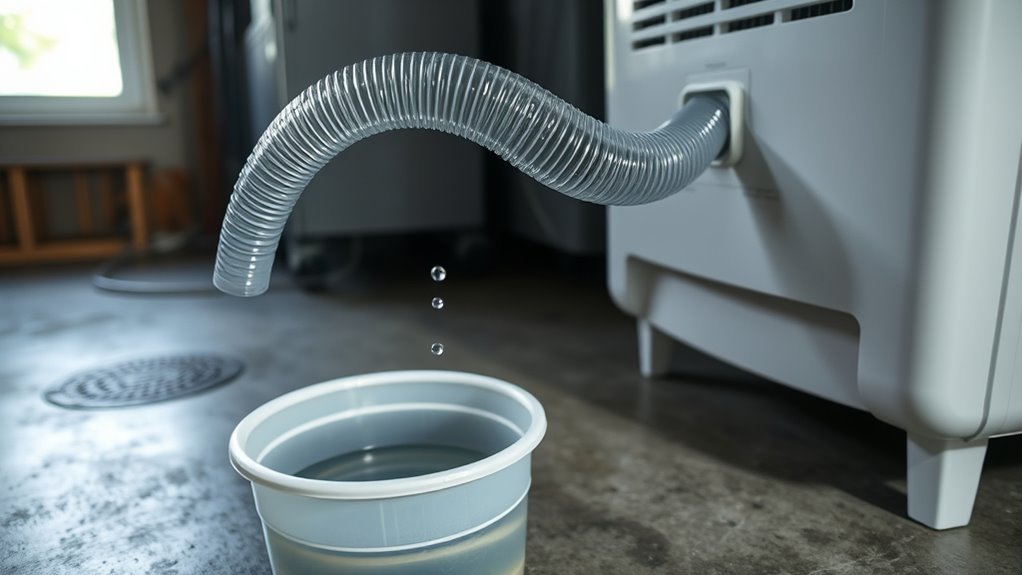
A dehumidifier not draining through the hose is usually a drain-setup problem, not a failed appliance. The most common causes are a kinked or clogged hose, an uphill section, a hose end sitting in water, a missing washer, or a drain cap that is still in place. Fix the route and connection first.
For a gravity drain, the hose has to leave the unit’s drain port and run downhill to an open drain with no loops or pinch points. If your model has a pump, pump mode must also be active.
Dehumidifier Drain Troubleshooting: Fast Diagnosis
| What you see | Check first | Why |
|---|---|---|
| Bucket fills and the hose stays dry | Kinks, clogs, uphill sections, low spots, or a submerged hose end | A gravity drain needs a clear, continuous downhill path. |
| Water at the hose connection and in the bucket | Washer, adapter seating, hose connection | A loose or damaged connection leaks and diverts water. |
| Hose flows when disconnected but not when installed | Hose routing and the drain outlet position | The installed line may have a raised section, sag, or an outlet below standing water. |
| Pump model does not discharge water | Pump mode, bucket seating, pump hose | Pump operation depends on the model and its setup. |
| Unit runs but makes little or no water | Room humidity, room temperature, frost on the coil | A dry or cool room produces less condensate even when the drain is clear. |
Why Is My Dehumidifier Not Draining Through the Hose?
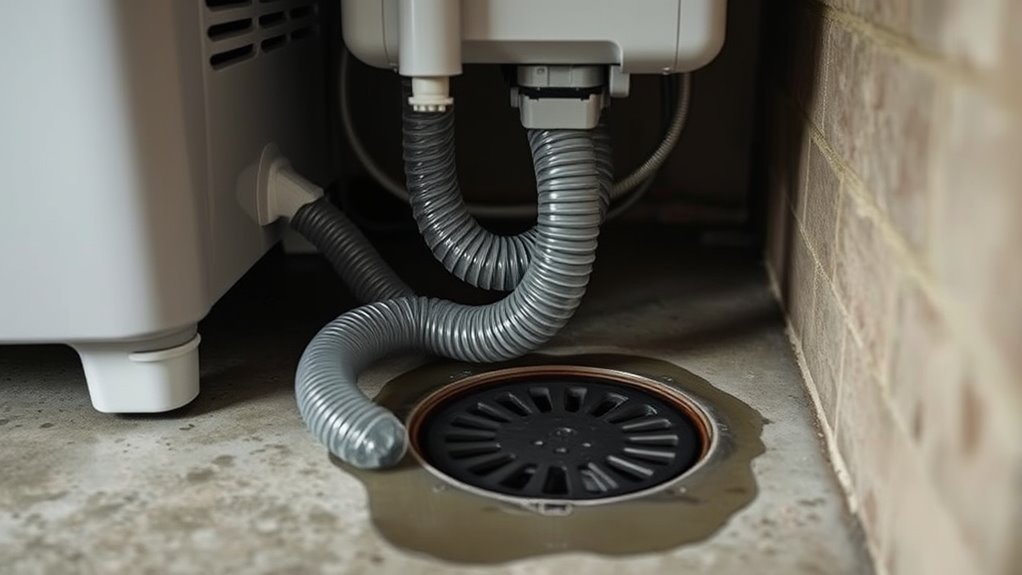
A dehumidifier can collect water normally yet fail to send it through the hose. With gravity drainage, the water must travel downhill without a kink, loop, high spot or blocked outlet. With pump drainage, the pump must be enabled and the pump hose must follow the limits in the owner’s manual.
For the full setup from scratch, see how to drain a dehumidifier using a hose or gravity and the step-by-step drain hose connection guide.
Also check the parts that direct water away from the bucket. Depending on the model, that may be a drain cap, adapter, diverter, rubber washer, bucket or float. Frigidaire’s guidance describes gravity drainage as replacing the continuous drain cap with a drain hose, so a cap left in place or a loose part can keep sending water to the bucket.
Safety: Turn the dehumidifier off and unplug it before disconnecting the hose or cleaning the drain opening. Do not open the sealed refrigerant system or work near wet wiring. Stop and arrange service if you see damaged wiring, smell burning or find water near electrical parts.
Check the Hose for Kinks and Clogs
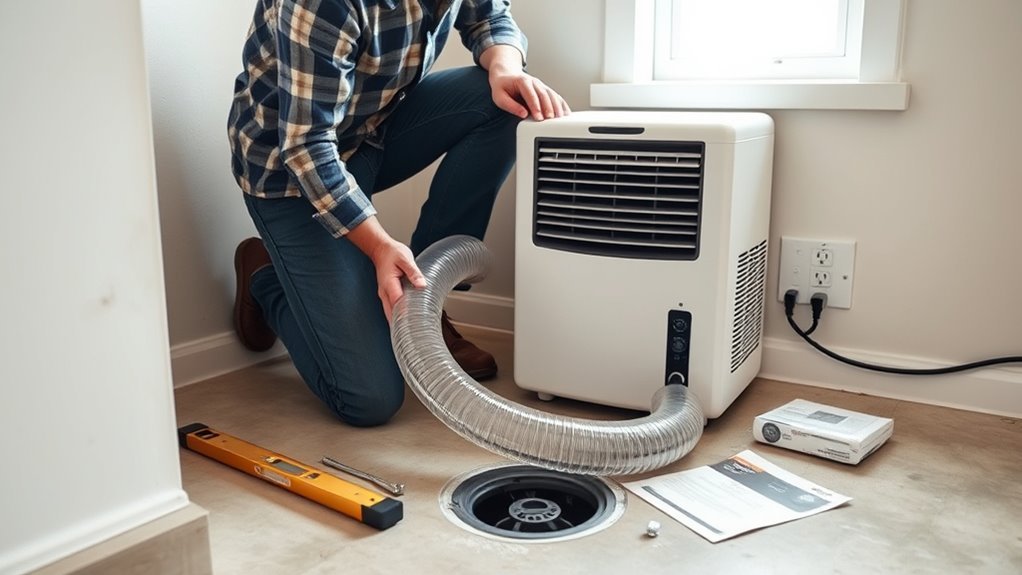
Inspect the whole hose from the dehumidifier to the drain. Straighten tight bends, crushed sections and loops, and look for places where furniture or the unit itself pinches the line. Trim extra hose if the manual allows it, because a long coil creates low spots that hold water and debris.
- Turn off and unplug the dehumidifier.
- Place a towel under the drain connection.
- Disconnect the hose and inspect both ends.
- Run clean water through the hose.
- Use a soft bottle brush or pipe cleaner for reachable residue.
- Replace a brittle, split, cloudy or permanently kinked hose.
Hose requirements vary by model. Frigidaire recommends a garden hose of 1/2 inch or larger (or a dehumidifier hose) for its units and warns that small-diameter hoses clog easily. Your owner’s manual is the final authority on hose size and connection type.
Before reconnecting, hold the hose over a sink and pour clean water through it. A steady stream confirms the hose itself is open.
Does a Dehumidifier Drain Hose Need to Run Downhill?
Yes, for gravity drainage. Frigidaire says the hose should sit below the unit’s connection and lie flat and as straight as possible with no kinks. Support the line so it cannot sag into a water-filled loop.
A specific slope such as “1 to 2 inches per foot” is not a universal dehumidifier rule, so follow your model’s routing instructions.
Keep the hose outlet open to air and above the water line in a floor drain, sink or standpipe. GE Appliances notes that if the hose is touching water, it will not drain, so pull it back from the water. Do not seal a gravity hose tightly into a closed pipe unless the manual or a qualified installer requires it.
Do not add a P-trap just to fix a portable unit that will not drain. Use one only if the appliance manual or a qualified condensate-drain design calls for it.
Stop Leaks at the Hose Connection
If water is reaching the floor rather than the bucket, see why a dehumidifier leaks from the bottom.
GE advises making sure the garden hose connection is secure and that a rubber washer is installed in the hose end. A loose connection can leak into the bucket and out of the hose at the same time. Seat the hose squarely, tighten by hand until snug, and avoid overtightening, which can crack plastic threads or flatten the washer.
Check the hose near the fitting for pinholes, splits and hardened material. Replace a damaged hose instead of relying on tape. After reconnecting, dry the area and watch the joint while the unit runs.
Recommended Products

𝐎𝐧𝐞 𝐇𝐨𝐬𝐞 𝐟𝐨𝐫 𝐌𝐮𝐥𝐭𝐢𝐩𝐥𝐞 𝐔𝐬𝐞𝐬 : The 5.25 ft dehumidifier hose is versatile with a soft rubber adapter and connecting clamp, strong elasticity, tight seal, and not easy to leak. It is arbitrary extension docking and compatible with most dehumidifiers, semi-automatic washing machines, dishwashers, and portable air conditioners. It also can be used as a faucet extended hose for watering plants or washing cars

Multi Purpose Versatile Drain Hose: 5.25 ft flexible drain hose comes with soft rubber adapter and securing clamp for tight sealing. Works with most dehumidifiers, semi automatic washing machines, dishwashers and portable AC units. Also serves as a faucet extension hose for plant watering or car washing

Multi-Purpose Hose, 6ft Cut-to-Fit:This 6-foot hose is designed for various applications, including dehumidifier drainage and gardening tasks. It can be easily cut to the desired length for flexible use. Please confirm the required length before purchase.
Clear Sludge, Algae and Debris
Dust carried in condensate can form sludge and algae that block the hose. Frigidaire recommends flushing the hose periodically with clean water, and GE suggests a baby bottle brush or pipe cleaner on the drain and hose after unplugging the unit and emptying the bucket.
Do not pour bleach, peroxide, drain opener or vinegar into the appliance unless the owner’s manual approves that product and dilution.
Recommended Products

You will get 1 pcs 66" dual-ended drain brush with 0.6" and 1.2" diameter bristle heads, 1 pcs 58" pipe brush with 0.5" diameter bristle head, 2 pcs 8" straw cleaner brush with 0.4" diameter bristle head.
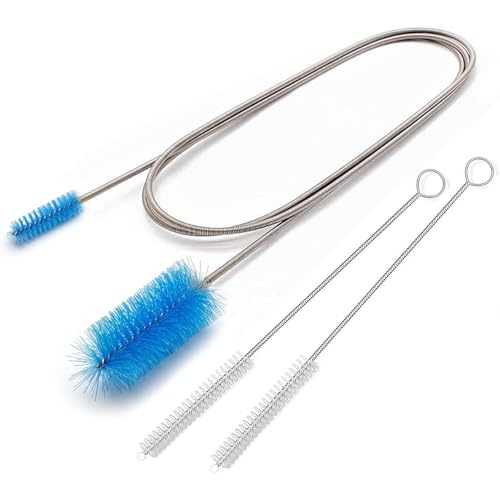
🚫UNCLOG NARROW TUBES INSTANTLY: Tired of water pooling in your fridge or grime clogging your aquarium filters? This 67-inch (170cm) extra-long flexible drain brush is the ultimate problem-solver. It easily snakes through deep, narrow, and curved tubing to effortlessly remove gunky buildup, dirt, and residue.

Diversified Sizes for Comprehensive Cleaning Experience: Our stainless steel hose brush 3-piece set offers five different sizes of brush heads (0.39 inches, 1.9 inches, 2.26 inches, 0.78 inches, 1.18 inches), covering cleaning needs from small to standard pipes. Whether it's for home kitchens, fish tanks, water pump accessories, or car sunroofs and refrigerator pipes, our brushes can easily handle it, providing a cleaning experience with no dead corners.
Spot Hose Blockages
Look for dark residue, cloudy slime, slow dripping or water backing into the bucket. Check bends, adapters and the drain nozzle, where debris collects.
- Disconnect the hose and look through it toward a light.
- Check each end for a narrowed opening or damaged washer.
- Flush the hose with clean water.
- Confirm water exits as fast as it enters.
- Reinstall the hose on a continuous downhill route.
Flush Out Sludge
Flush a removable hose in a sink or bucket until the runoff is clear. Avoid stiff wire, drill bits and compressed air, which can puncture tubing or damage a small fitting.
If you use any disinfectant the manufacturer has approved, follow the manual and label exactly. The CDC says never to mix household bleach with other cleaners or disinfectants, and to ensure good ventilation when using bleach indoors.
Remove Algae Buildup
Recurring algae usually means water is sitting in a low spot or the hose is not cleaned often enough. After flushing, correct sags and let a removable hose drain and dry before storage. If buildup returns within days, look for a hidden low spot or a submerged outlet. Repeated chemical treatment will not fix a routing problem.
Look for Internal Drain Blockages
If the hose flows freely, inspect only the areas the manufacturer says are user-accessible. Unplug the unit, remove the bucket if required, and look for lint, scale, sludge, mold or ice around the drain port, adapter, bucket channel and visible drain pan outlet.
Check the Drain Port, Adapter and Bucket
Confirm the continuous-drain cap or plug has been removed or repositioned as the manual directs. Seat the adapter fully and reinstall the bucket correctly, even when using a hose. Some units will not run or pump unless the bucket and float are in position.
Clean the accessible opening with a soft bottle brush or pipe cleaner. Do not force a tool deep into the cabinet. If the opening is cracked or misaligned, stop using continuous drain until it is repaired.
Clean the Internal Drain Path
Rinse an accessible drain channel with clean water only if the manual permits it, and keep water away from controls, wiring and the fan motor. Do not tip the unit while it holds water unless the manual explains how.
If you can see mold or sludge beyond the reachable opening, arrange service instead of taking the cabinet apart.
Flush Sludge Buildup and Retest
- Place the dehumidifier upright on a level surface.
- Secure the bucket, drain adapter and hose.
- Route a gravity hose continuously downhill.
- Keep the hose outlet open and above standing water.
- Run the unit in a humid room and watch for water movement.
- Once it makes condensate, check the bucket and connection for leaks or backup.
A unit may make little water when the room is dry or cool. ENERGY STAR says frost can form when air temperature drops below 65°F, and that a frosted unit should be switched off and allowed to defrost before restarting. If drainage works but output seems low, see how much water a dehumidifier should collect per day and why a dehumidifier is not collecting water.
What If the Dehumidifier Pump Still Will Not Drain?
Only some dehumidifiers have a built-in pump. Confirm that yours does and that you are using the pump outlet and hose named in the manual, not the gravity connection. Pump behavior varies, so do not assume it runs continuously.
| Check | What it may mean | What to do |
|---|---|---|
| Pump mode is off | The unit collects water but is not told to pump | Enable pump mode as the manual describes |
| Bucket not seated | A safety switch or pickup may not engage | Reinstall the bucket and check the float |
| Pump hose kinked or frozen | The pump cannot move water | Straighten, thaw or replace the hose |
| Pump runs but no water exits | Pickup, hose or pump may be blocked or worn | Clean accessible parts, then arrange service |
| No pump sound when conditions are met | A control, switch, wiring connection or pump may have failed | Stop and seek service |
| Clean gravity setup still fills the bucket | Adapter, diverter or bucket channel may be faulty | Check the manual and contact the manufacturer |
Follow your model’s pump hose routing, length and lift limits. They vary by manufacturer, so do not apply one brand’s numbers to another unit.
Recommended Products

AUTOMATIC CONDENSATE PUMP: features a vertical-type switch to reduce footprint and is designed to automatically remove condensate produced by boilers, furnaces, air conditioners and de-humidifiers

Powerful Drainage: Delivers up to 90 GPH max flow and a 20 ft lift, our condensate removal pump handles long-distance and uphill drainage. The upgraded check valve with a non-return ball avoids backflow for steady operation when drains are far away

【The Undisputed Champion — Industry‑Leading Dehumidifier Brand】When you choose AEOCKY, you get double market validation. In 2025, AEOCKY was an industry‑leading dehumidifier brand on Amazon US. This means you’re not just choosing a flagship from a market leader, but the top choice proven by millions of real users—representing the ultimate combination of performance, quality, and trust.
Common Mistakes
- Pushing the hose too far into a drain so the end touches water.
- Leaving the continuous-drain cap in place when attaching a hose.
- Using a thin hose that clogs with sludge.
- Letting the hose sag into a low spot.
- Skipping the washer at the hose connector.
- Mixing cleaning chemicals in the drain path.
When to Call a Professional
Contact the manufacturer or a qualified technician if a clean, correctly routed setup still fills the bucket, the pump never runs, or you see leaks near electrical parts, damaged wiring, burning smells or repeated freezing. Do not keep running a unit that shows those signs.
Related guides
- Why is my dehumidifier not collecting water?
- Why is my dehumidifier not lowering humidity?
- How to drain a dehumidifier using a hose or gravity
- Why is my dehumidifier freezing up?
Frequently Asked Questions
Why does my dehumidifier not drain out the hose?
The usual causes are a kinked or clogged hose, an uphill section, a loose adapter or missing washer, a hose end touching water, or a drain cap that was never removed. On pump models, also check that pump mode is on and the bucket is seated.
How do I make a dehumidifier drain through a hose?
Use the hose and adapter your manual specifies, secure the connection and washer, and run the hose continuously downhill to an open drain. Flush it with clean water if flow is weak. Do not add a P-trap unless the manufacturer or a qualified installer calls for one.
Why does the bucket fill when the hose is attached?
The hose may be blocked, raised, sagging or submerged, so water backs up. The drain cap or adapter may also be fitted wrong, letting water follow the bucket path. Check the float and bucket position, then retest with the hose running straight downhill.
Can a dehumidifier hose drain uphill?
A gravity hose cannot reliably move water uphill. Use a lower drain, a model with a built-in pump, or an approved external condensate pump, and stay within the pump’s maximum lift and hose length.
Does my dehumidifier need a pump to drain?
Not always. A gravity hose works when the drain sits lower than the unit’s drain port. If the drain is higher than the port, you need a model with a built-in pump or an approved external condensate pump.
Sources
- Frigidaire: Dehumidifier Not Draining
- GE Appliances: Dehumidifier drain hose issues
- ENERGY STAR: Dehumidifiers
- CDC: Cleaning and Disinfecting With Bleach

[…] hygrometer, moisture meter, wet/dry vac, fans, gloves, goggles, N95 respirator, towels, drain hose if […]
[…] Dehumidifier, built-in humidistat or separate hygrometer, exhaust fan if available, and optional drain hose. […]
[…] can also move the water instead of moving the electricity. Use a gravity drain hose to a floor drain, utility sink, or sump area if the manual allows it. If the drain is uphill or […]
[…] thermometer, flashlight, moisture meter if available, drain hose or condensate pump, safe outlet, filter access, and manufacturer […]
[…] grounded outlet, optional drain hose, clean filter, and manufacturer […]
[…] dirty tank, clogged filter, or wet drain hose can make the unit smell musty and may contribute to poor indoor air […]
[…] the sump pump and pit are working normally but the bucket still fills, use the dedicated guide to fix a dehumidifier that is not draining through the hose. Use the table below when the symptom involves the sump pit, rising water, or the sump […]
[…] If the unit collects water in the bucket but will not send it through a hose, use the separate dehumidifier hose-drain troubleshooting guide rather than treating that symptom as a sealed-system […]
[…] the drain hose safe. Route it to a floor drain or sump area without crossing cords or […]
[…] is that the bucket fills while little or no water reaches the hose, see the dedicated guide to why your dehumidifier is not draining through the hose. The checks below focus specifically on hose problems that can cause a floor […]
[…] Empty or drain the water safely. Seat the bucket correctly and keep the hose free of kinks. If continuous drainage fails, see why a dehumidifier may not drain through the hose. […]
[…] but the dehumidifier still sends water to its bucket or will not move water through the hose, see why your dehumidifier is not draining through the hose for model-side hose, washer, blockage, and drain-port […]
[…] For a hose-specific diagnosis, see why a dehumidifier may not drain through the hose. […]
[…] the bucket keeps filling after a hose is connected, use the dedicated guide to why your dehumidifier is not draining through the hose for the full troubleshooting […]
[…] is that the bucket fills while little or no water reaches the hose, see the dedicated guide to why your dehumidifier is not draining through the hose. The checks below focus specifically on hose problems that can cause a floor […]
[…] Pro Tip: If you attach a continuous gravity drain hose, make sure the hose slopes steadily downward with zero loops or upward bends. A hose that rises or kinks will back water up into the bucket and overflow onto the floor. If water still backs up with a downward slope, see our drain hose troubleshooting guide. […]
[…] If you use continuous gravity drainage, attach a 1/2-inch or larger diameter drain hose and route it continuously downhill with no upward loops or kinks. Narrow tubing clogs rapidly with dust and algae sludge, diverting condensate back into the bucket until the float switch shuts the machine off. For deeper hose diagnostics, see our guide on why a dehumidifier is not draining through the hose. […]